
The quadcopter is an interesting thing about technology. Most people use it for hobbies, surveillance, photography, etc. The quadcopters are available in various sizes and are mostly used for outdoor applications. The brushed quadcopter is a rare one that is used as an indoor quadcopter.
If you’re a drone hobbyist and love to make creative drones, then this Robu is for you!
In this blog, we are going to learn how to build a brushed quadcopter. Let's start with the parts of this drone.
Introduction to Basic Parts
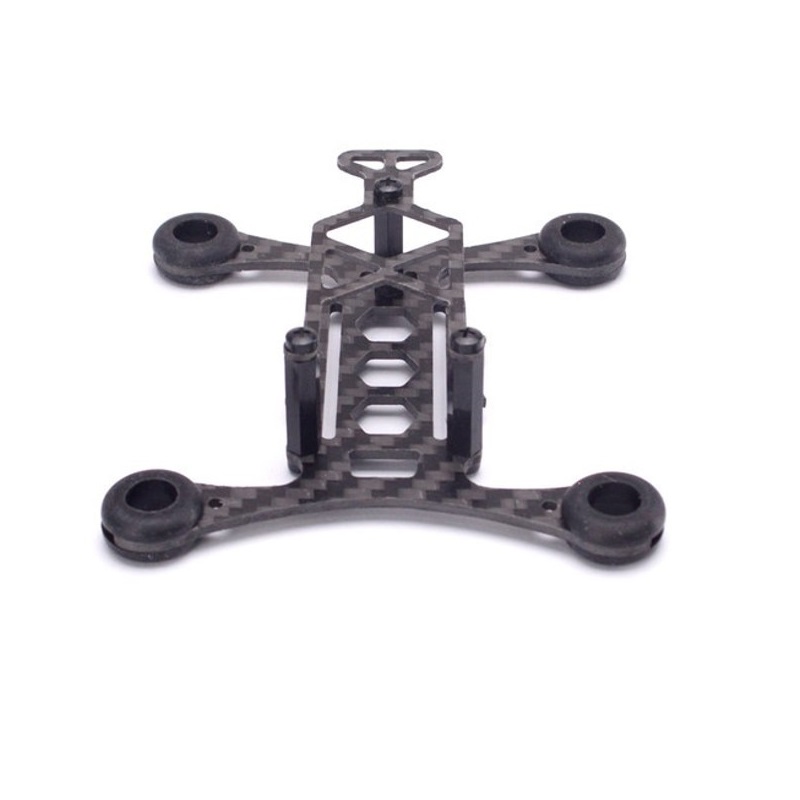
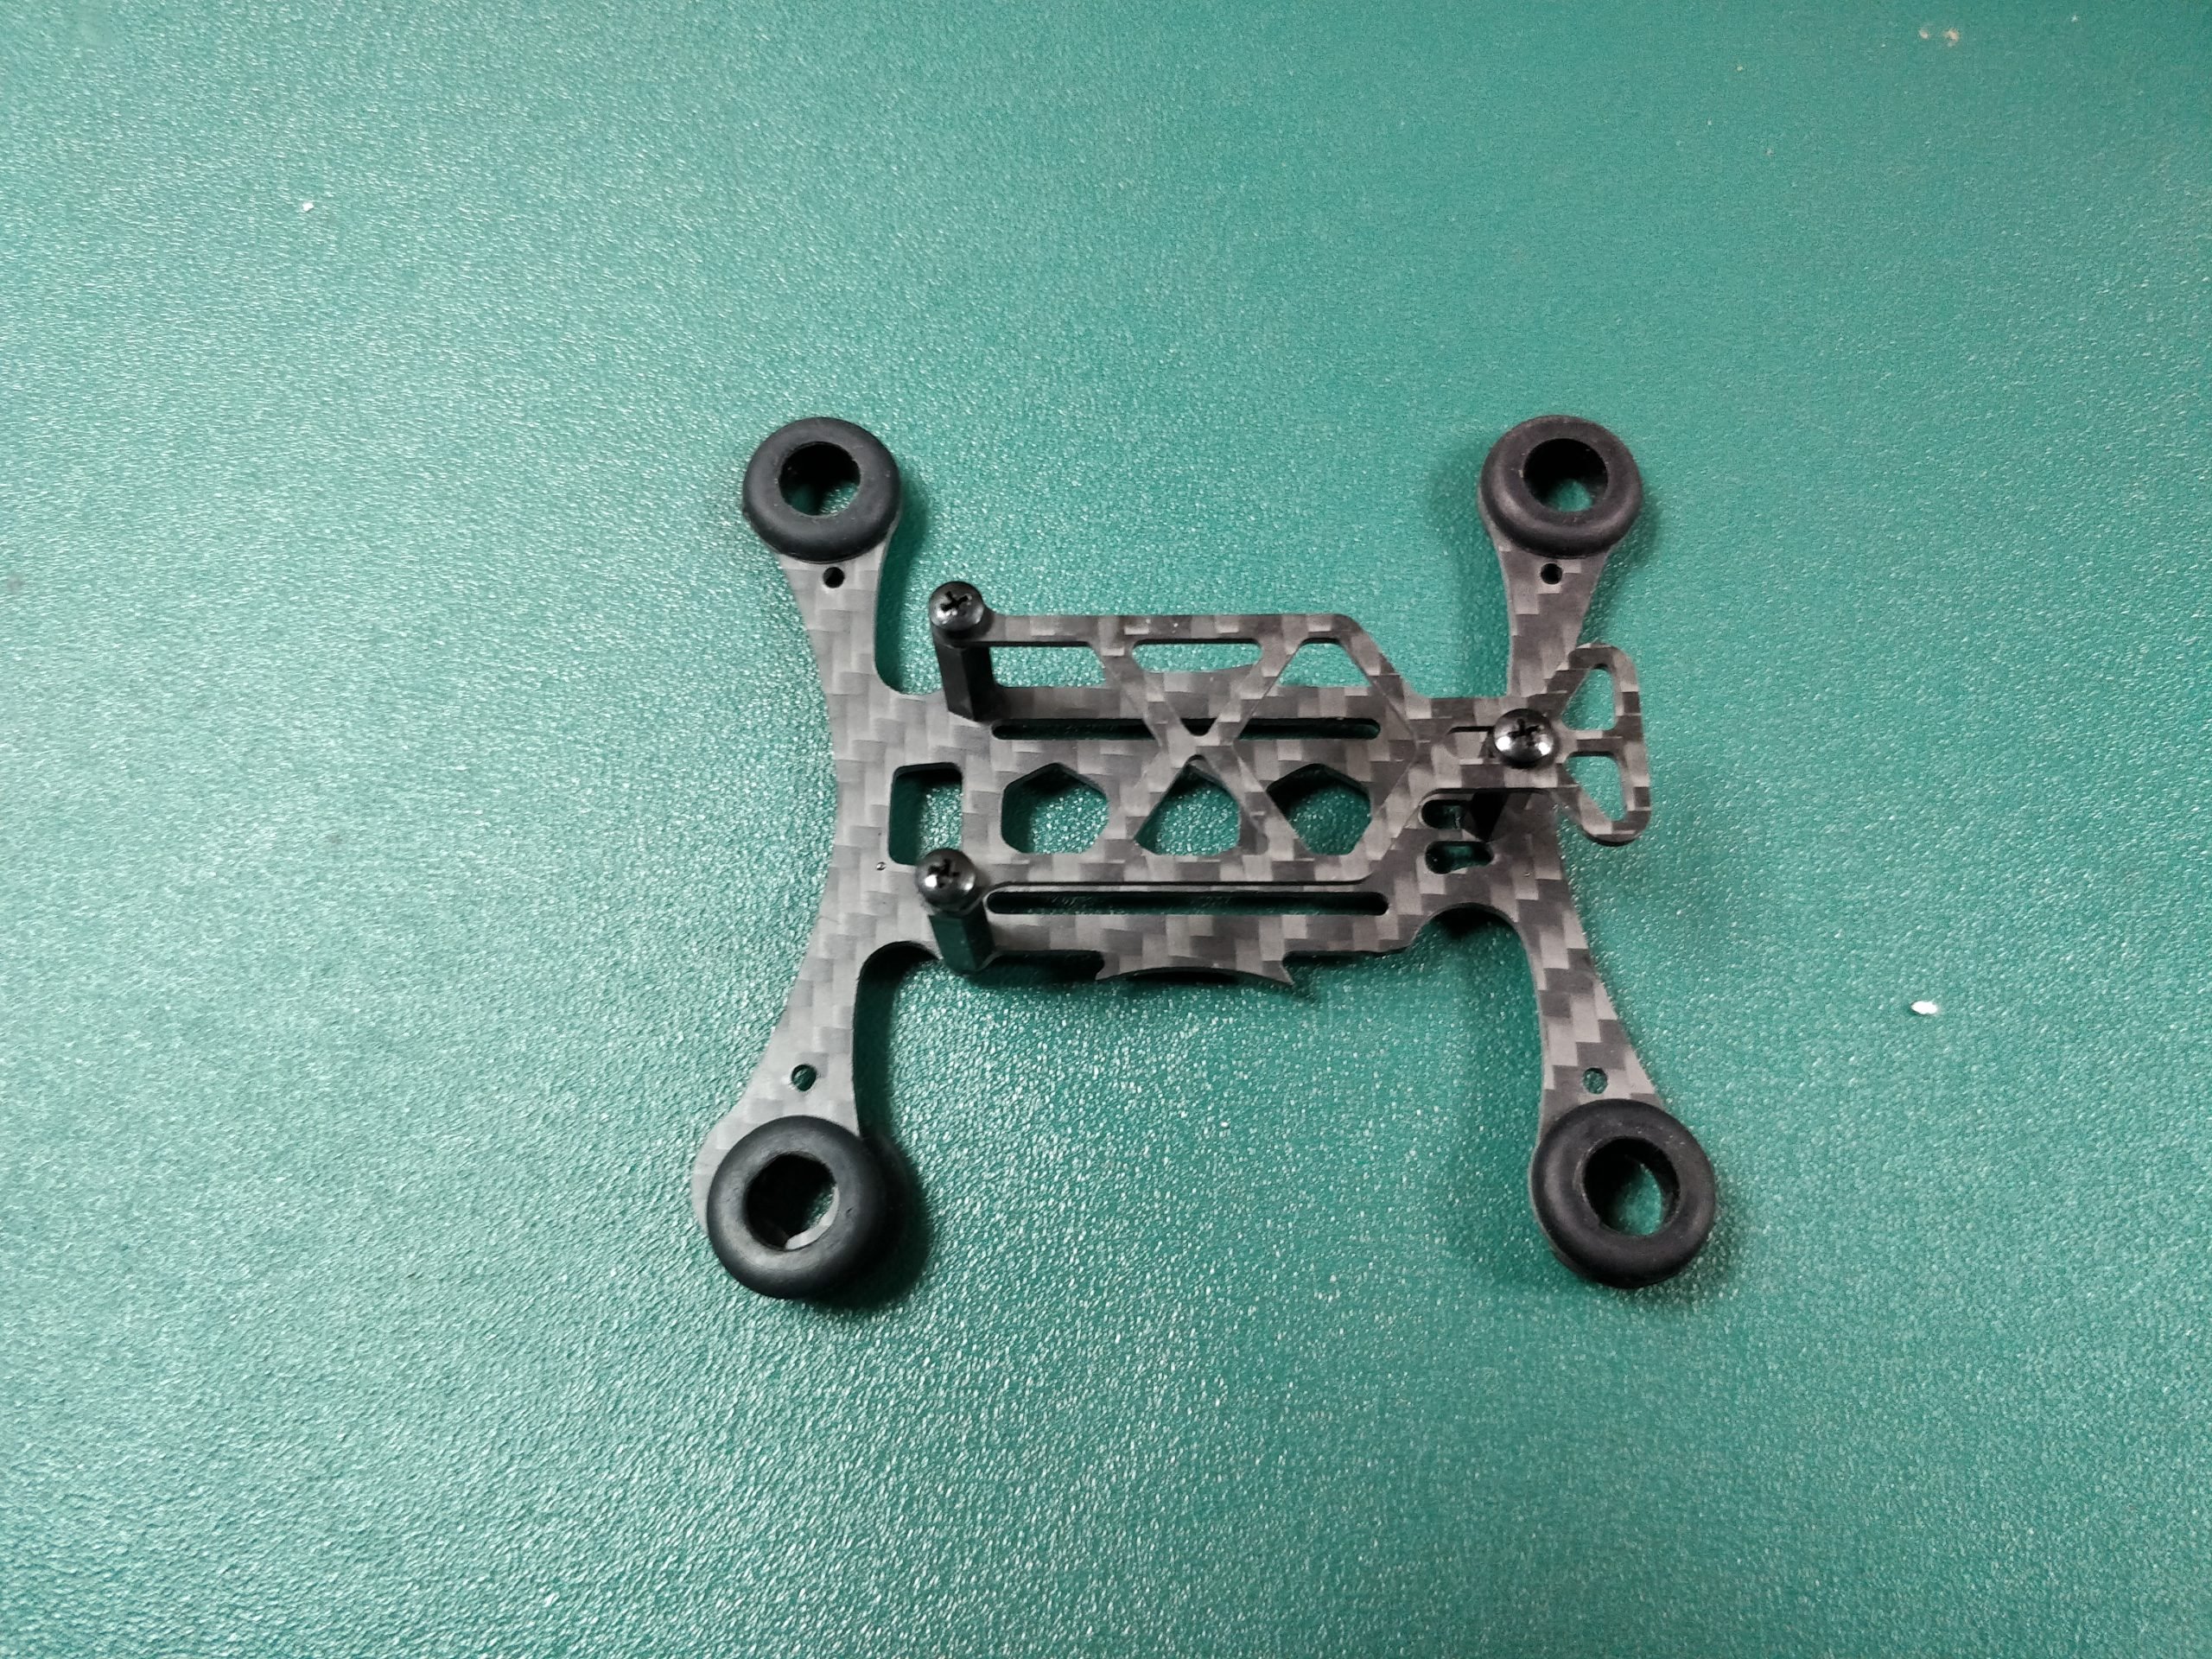
- Mini Drone frame- Here we use a lightweight 95 mm brushed drone frame. It has four arms to hold the brushed motor and a chassis to fix the flight controller. It uses the material carbon fiber.
- Brushed motors & Propellers- Here, we use a 55mm Blade Propeller+615 CW & CCW Coreless Brushed motor for the mini drone. The rated RPM for the brushed DC motor is 60000.

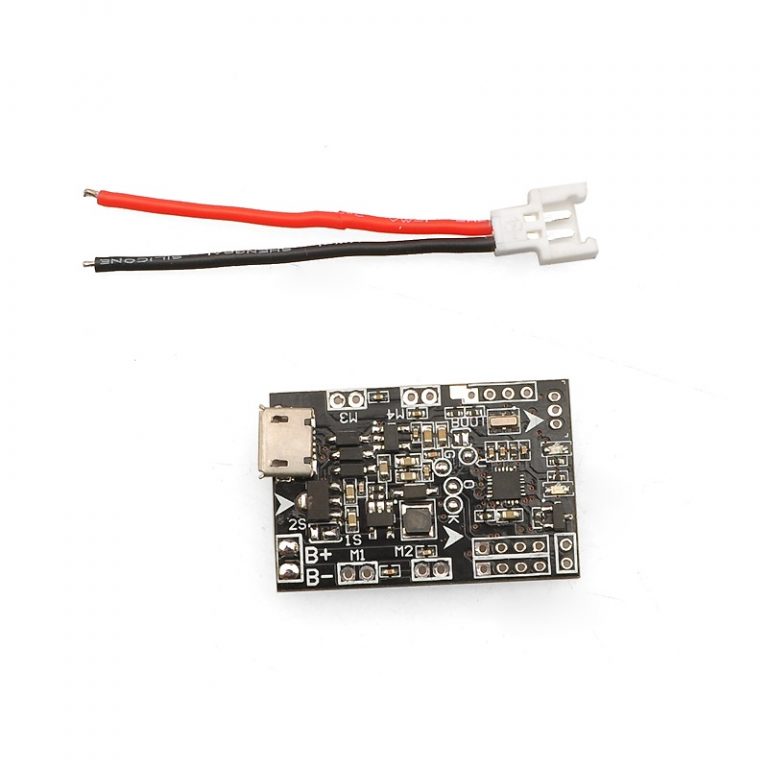
- Brushed flight controller- Here we are using the latest version of F3 EVO Flight Control Support for 6-axis aircraft. It is a 32-bit brushed flight controller based on SP Racing F3 Evo firmware. It supports 1S (4.2V) and 2S (8.4V) power supplies, and 2S can bring you more breathtaking flight.
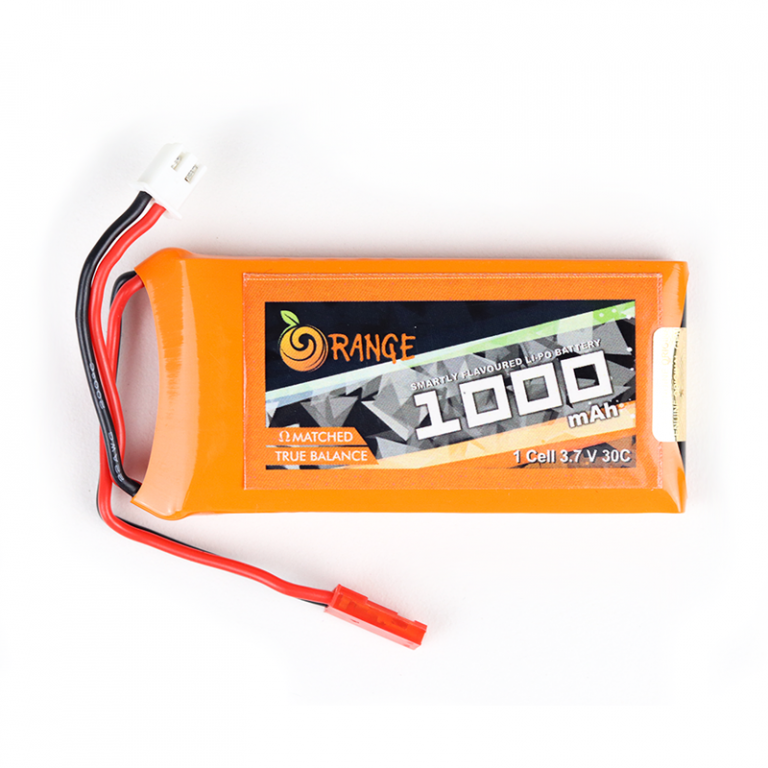
- LIPO battery: A mini drone can operate with one cell battery. Here, we have used the 1000 mah 3.7v LIPO battery to get a flight time of up to 10 minutes.
- RC Transmitter and Receiver- To operate this drone, we are using the FS-i6S Flysky RC transmitter and receiver. With this flight controller, we can use a DSM, PPM, or SBUS receiver.
Now, let’s start the procedure of making mini Quadcopter.
Step 1: Assembly of brushed quadcopter frame.
This frame comes with separate parts. Kindly fix it properly with the given nuts and standoffs.
Step 2: Fixing of Brushed Motors
Install the brushed motors in the holders provided on the arm. In a quadcopter, we need 2 counter-clockwise (CCW) and 2 clockwise motors (CW).
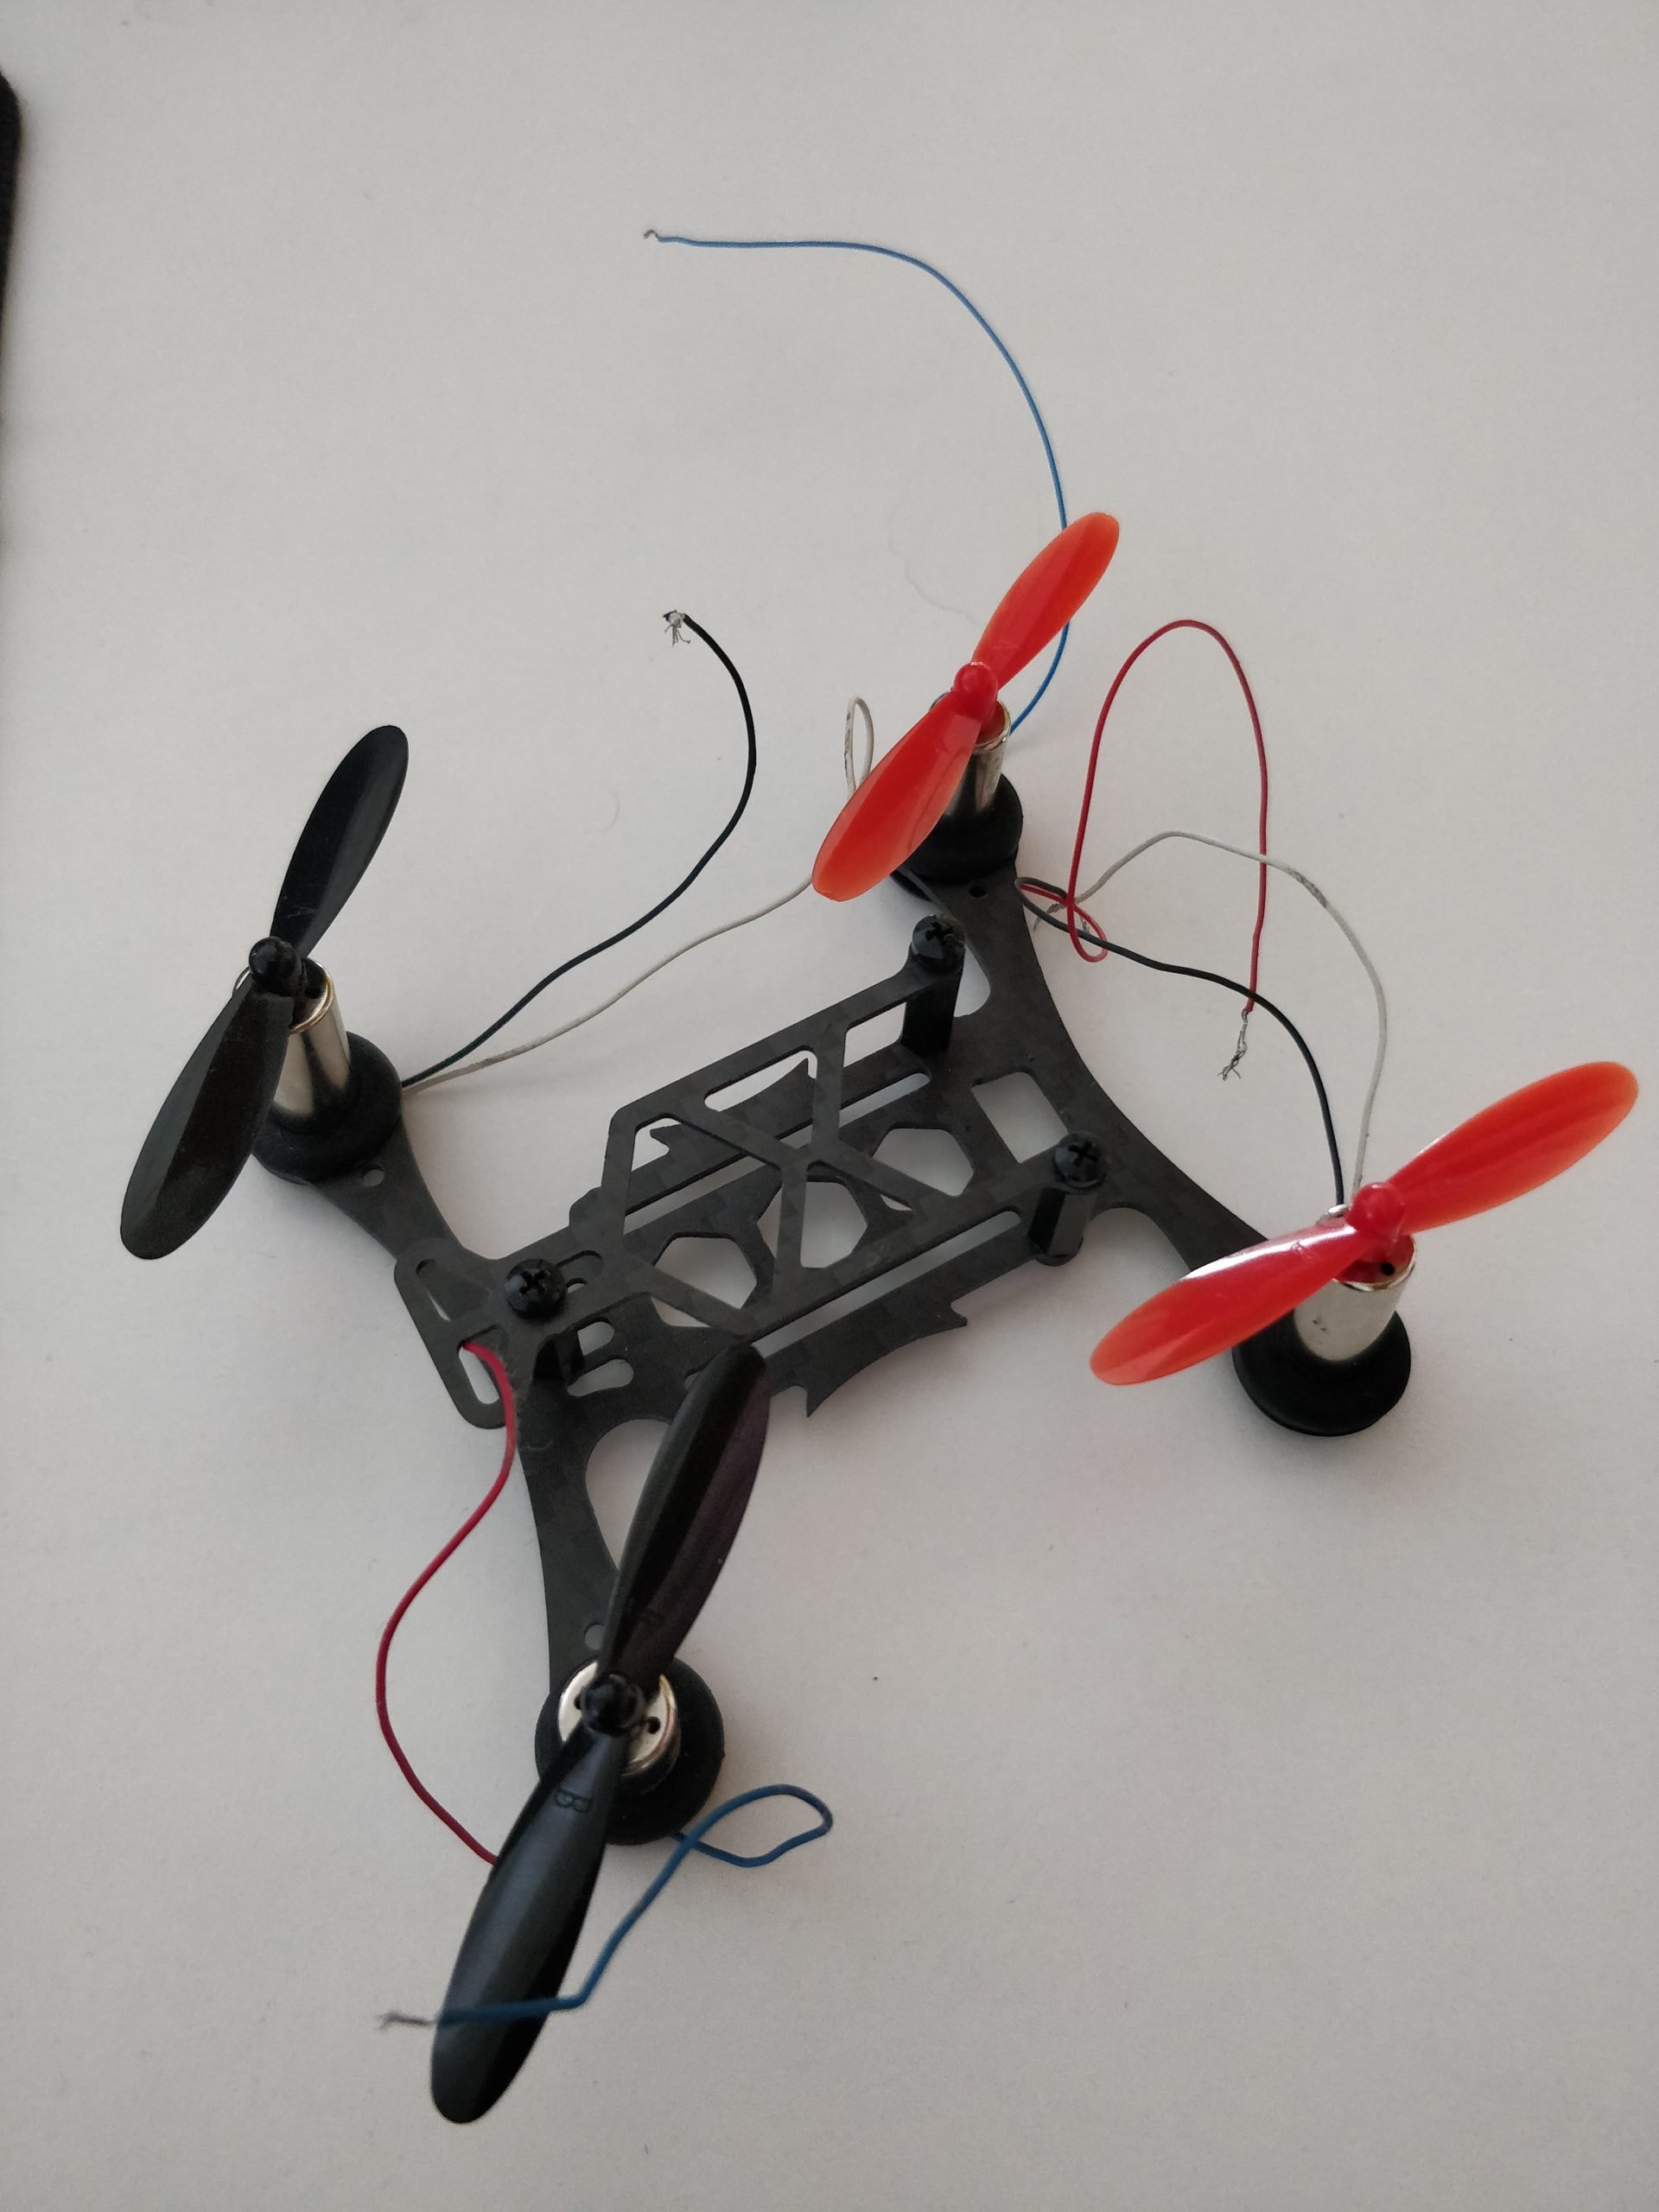
Here, Red and the Blue wire is the CW rotation motor & Black and the White wire is the CCW rotation motor. The polarity of the wires is as follows:-
- RED + (positive) | WHITE + (positive)
- BLUE - (negative) | BLACK - (negative)
Make sure that all the motors are at the same level. Then, we attach the CW Propeller to the CW motor and the CCW propeller to the CCW motor.
Step 3 -fixing of Flight Controller
To fix the flight controller, remove the film from the DST tape provided with the flight controller.
Then place the DST tape onto the back of the flight controller board and press it. Then remove the film from the other side and fix the flight controller board on the chassis properly.
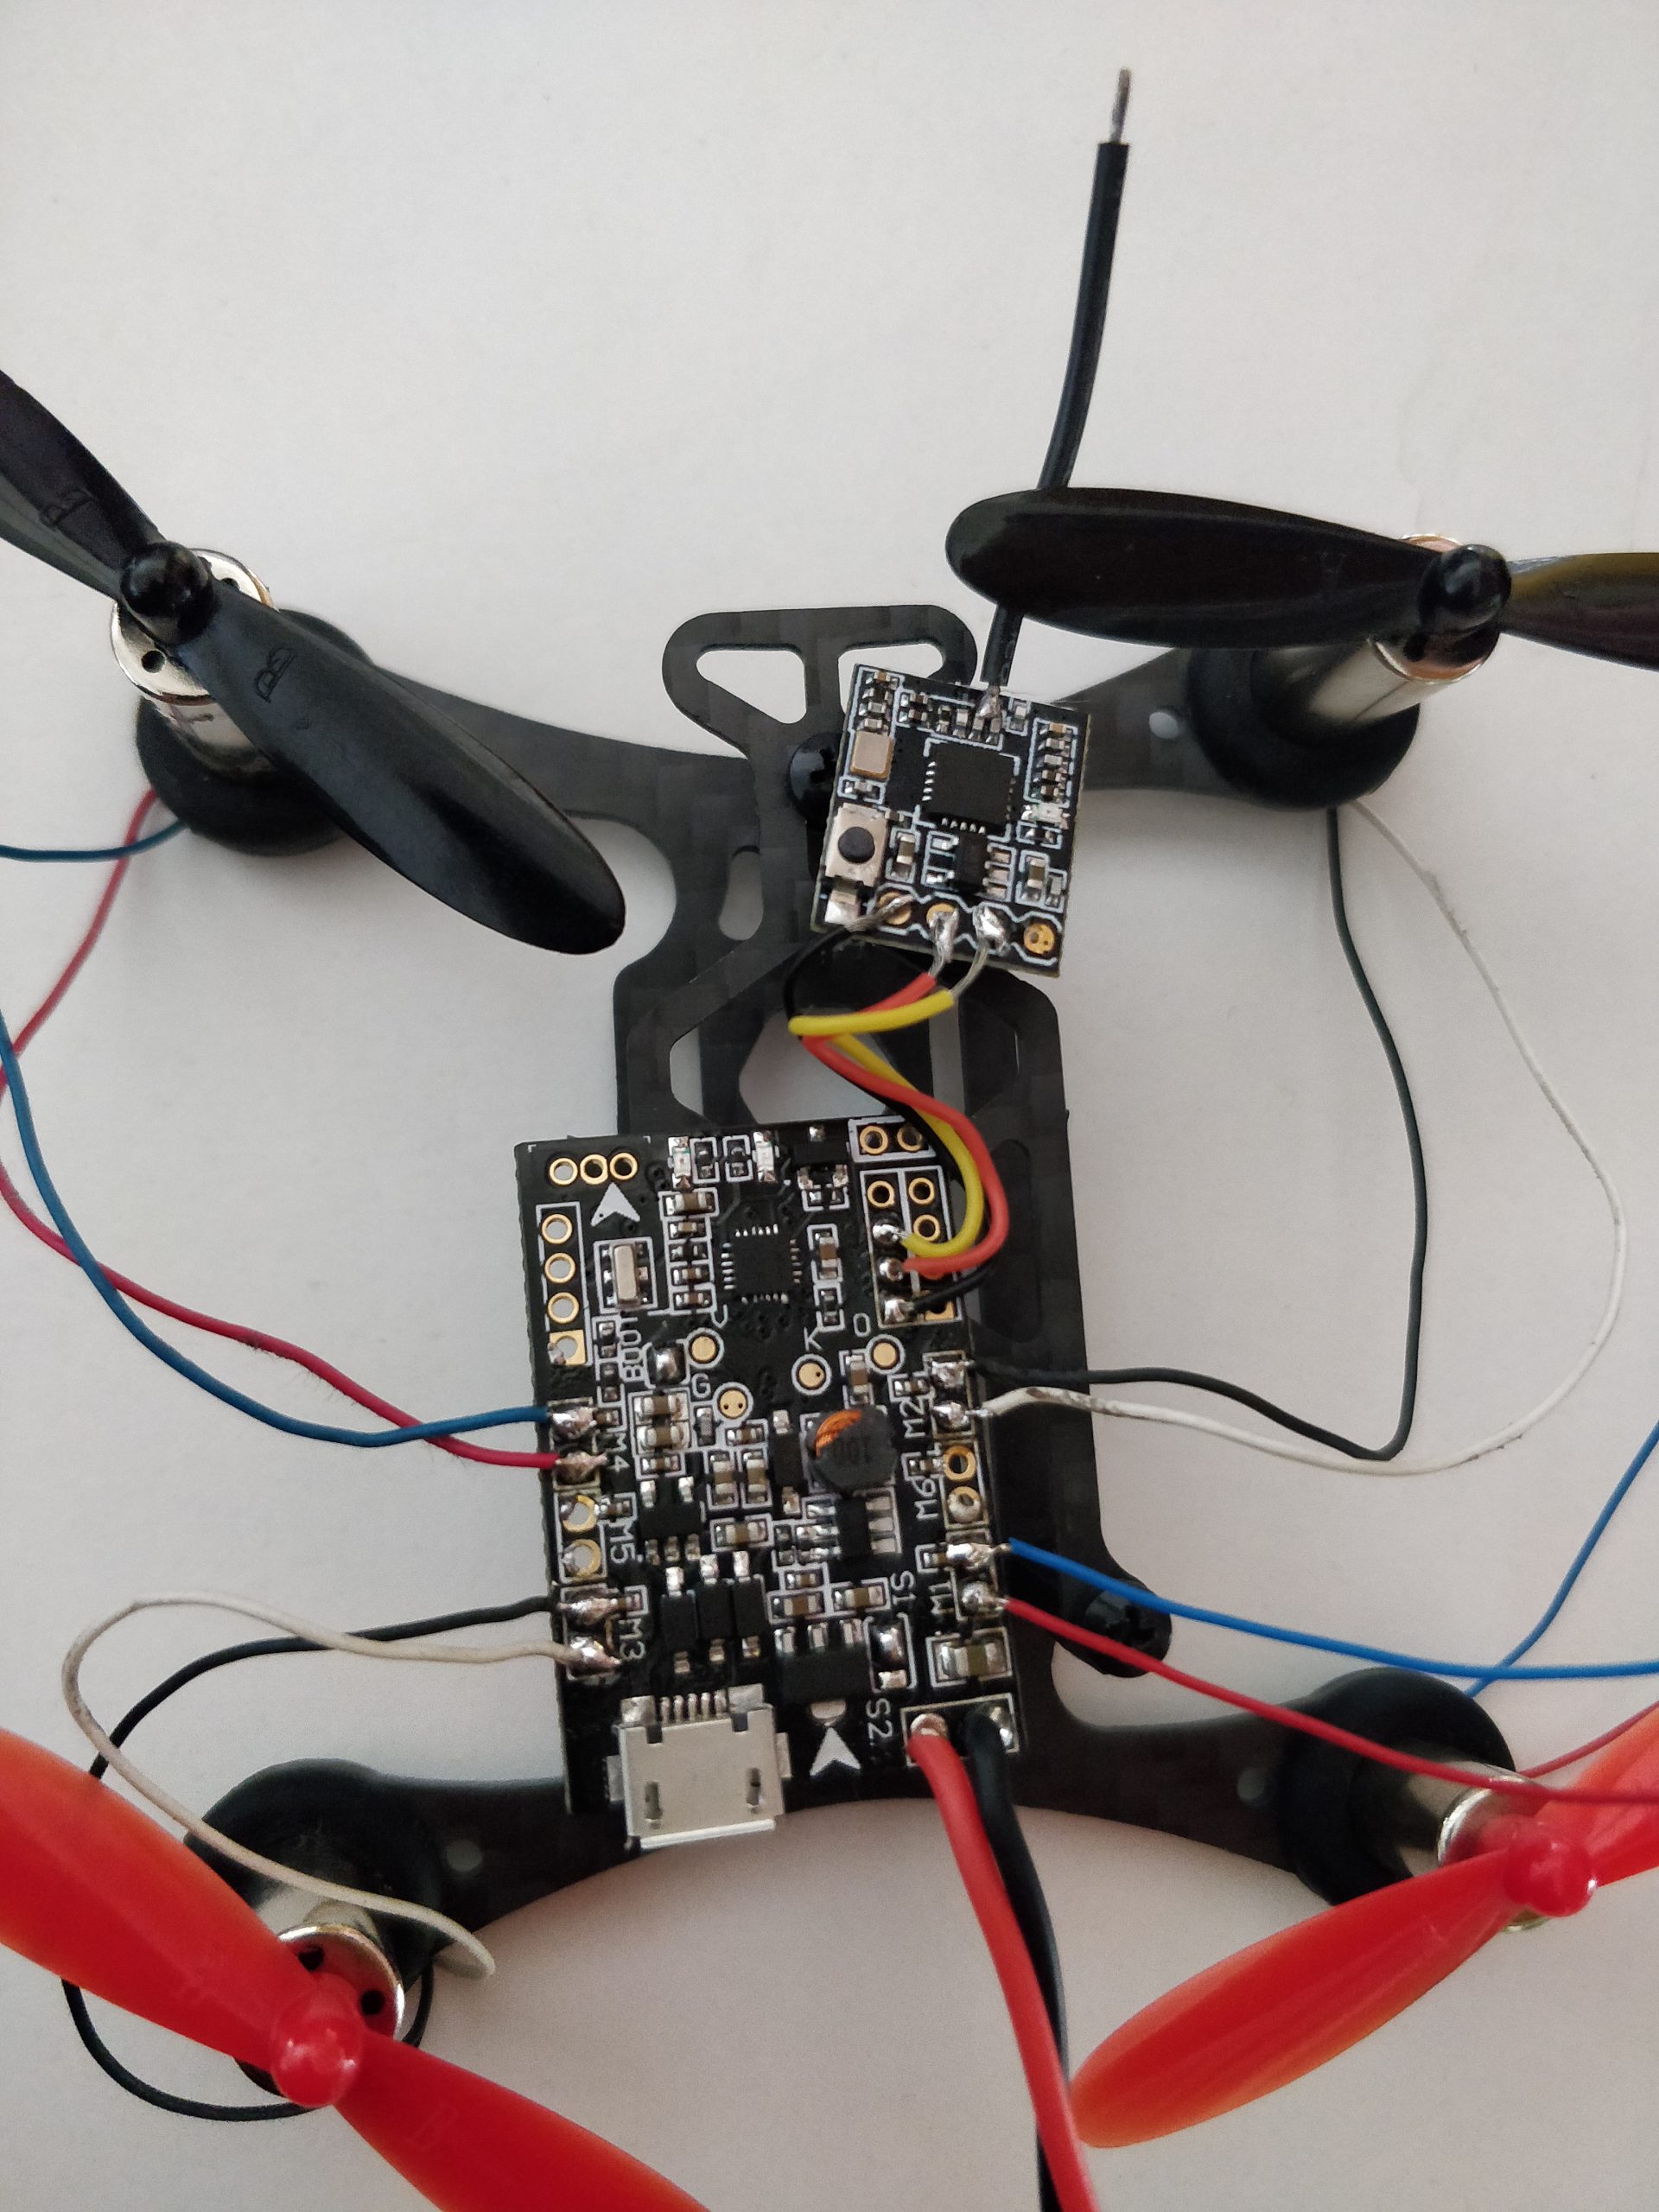
Step 4- Connection of Motors with Flight Controller
Here, we use the 1234 quadcopter X configuration of cleanflight and made the connection of motors with the flight controller. Also, soldered the battery connector to the pad. Here, we connected the motor as,
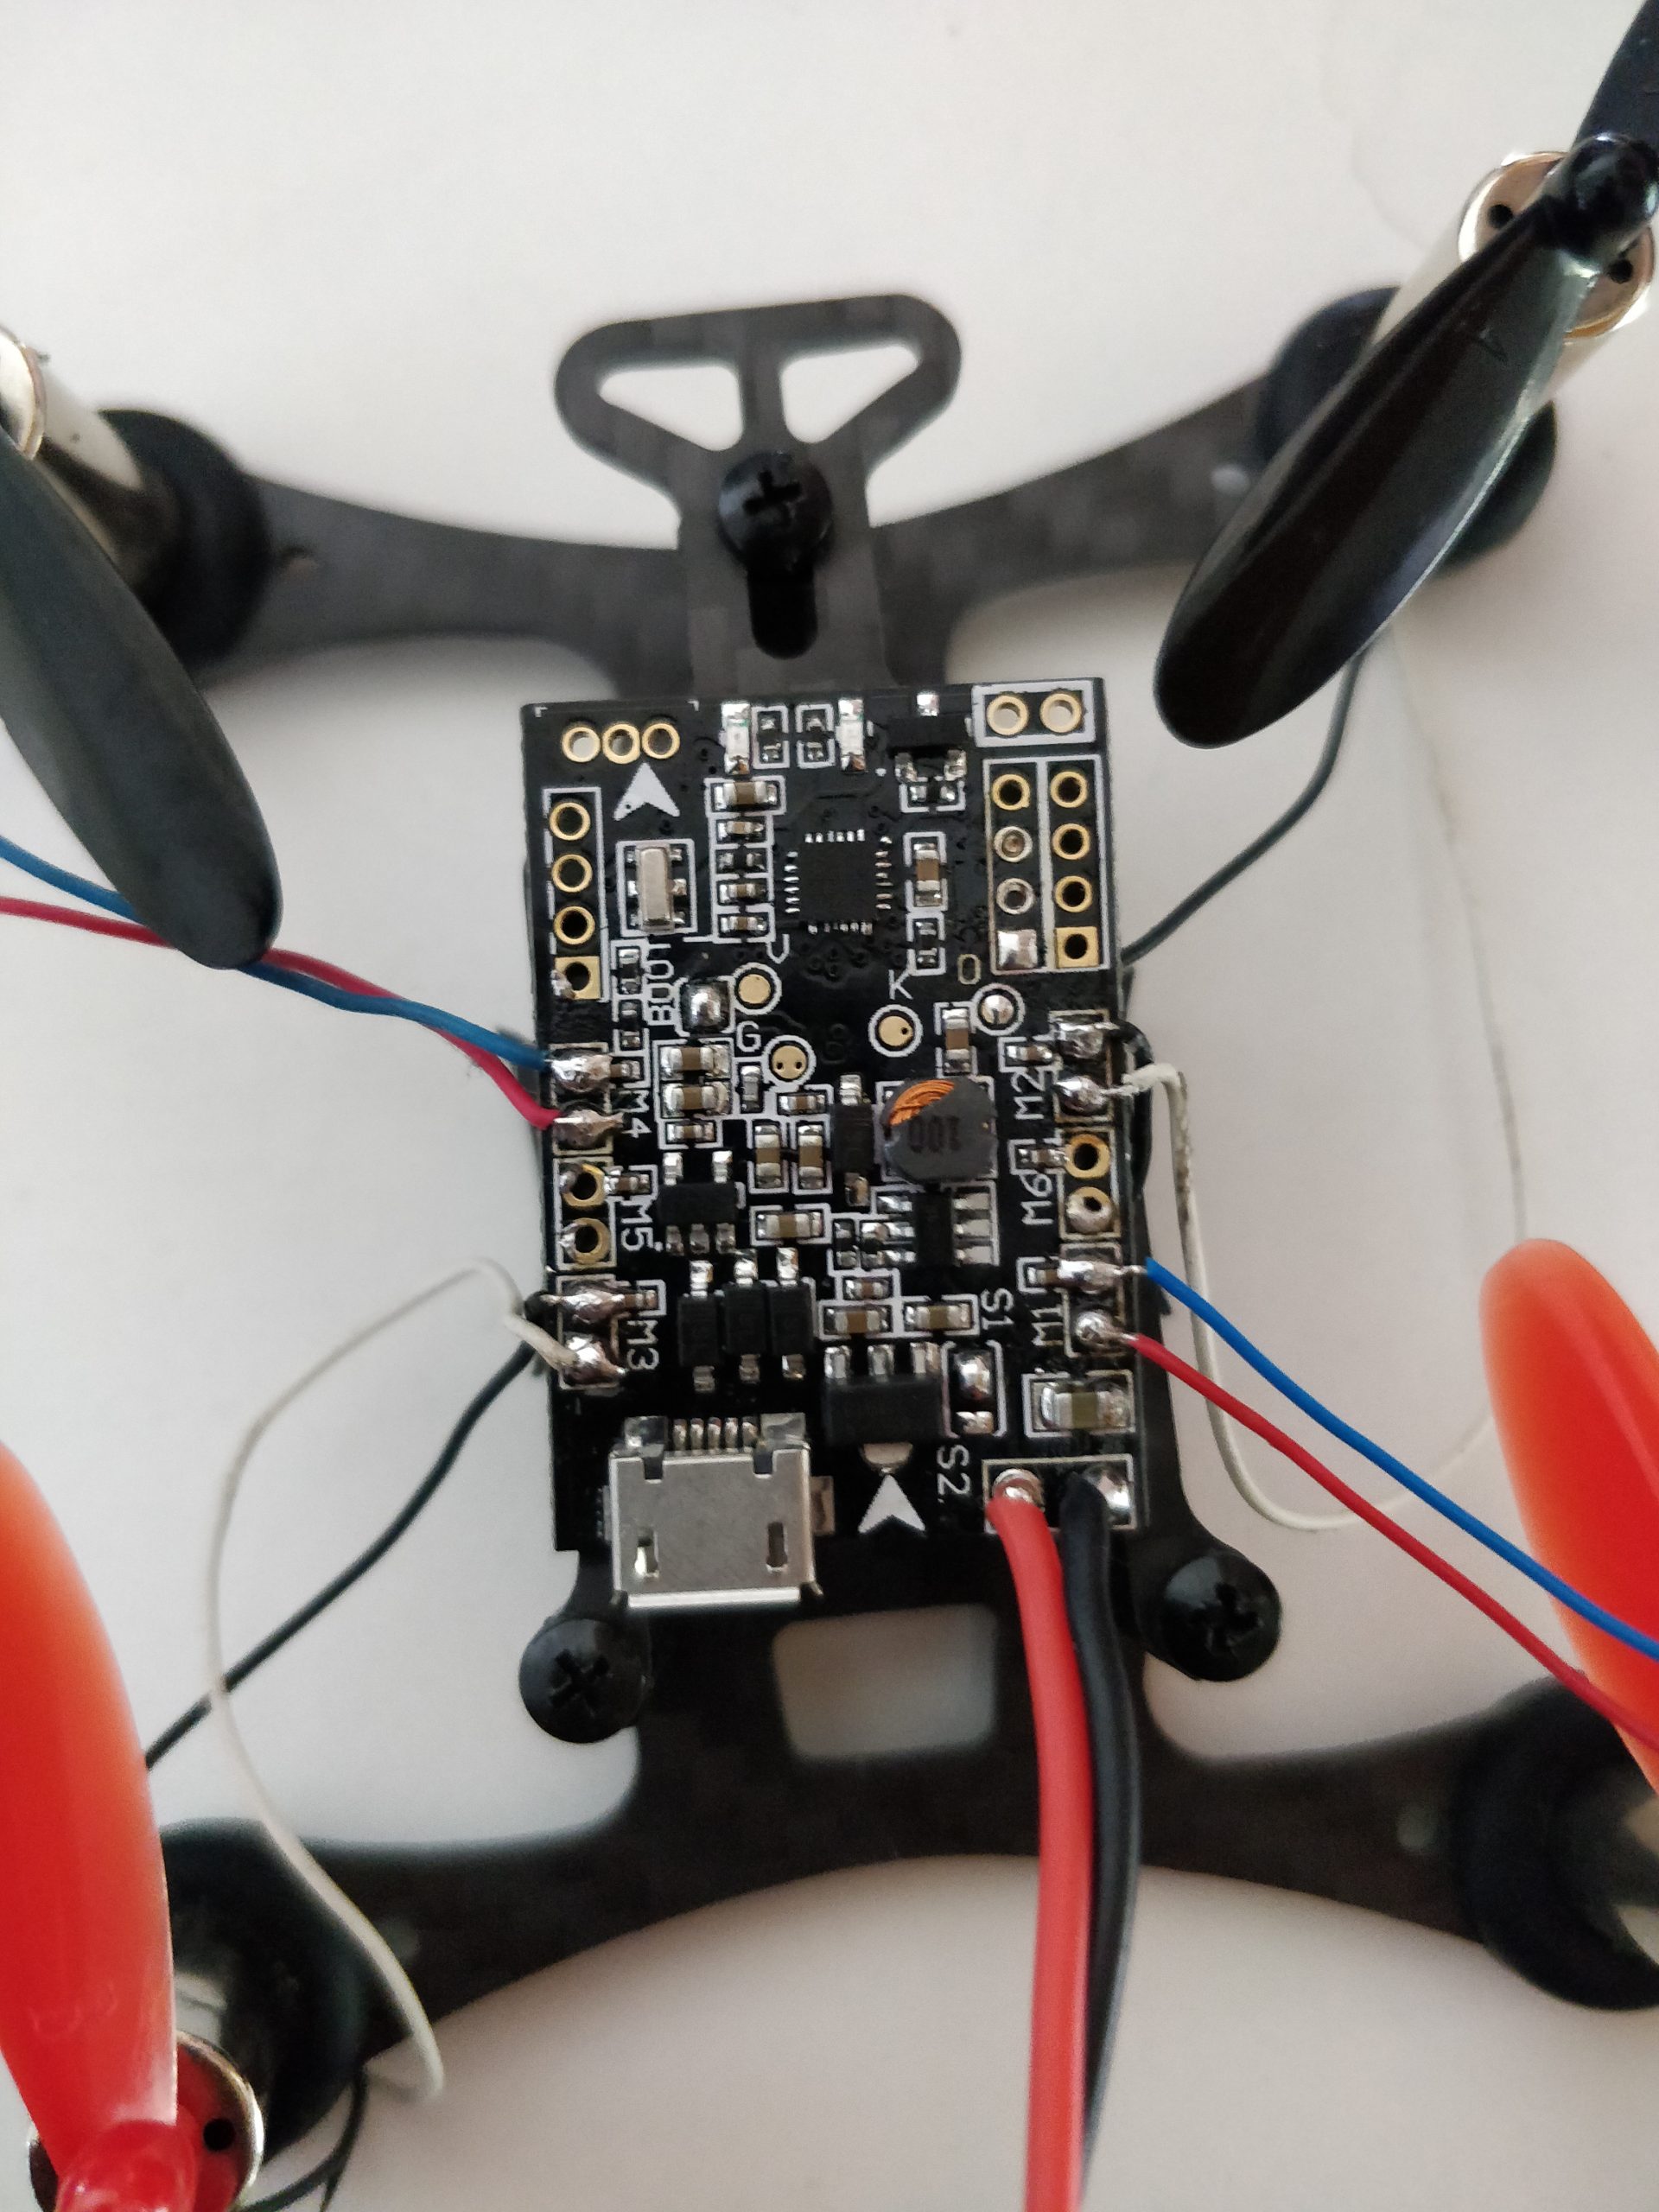
- M1: clockwise brushed motor : red (+), Black(-)
- M2: counterclockwise brushed motor : white (+), Black(-)
- M3: counterclockwise brushed motor : white (+), Black(-)
- M4: clockwise brushed motor : red (+), Blue(-)
Step 5- Connect the Receiver
With this flight controller, you can use SBUS, PPM, or DSM receiver. Here, I am using a PPM receiver. As per the below image, the PPM receiver is connected to the UART 2 pins. In Cleanflight you need to enable UART2 as Serial RX.
The connections for PPM and SBUS are,
- Gnd to Gnd
- 5V to 5V
- PPM signal to Rx2 and keep the TX2 pin unconnected.
If you are using DSM Receiver:
- Solder the DSM plus lead to 3.3V, the minus lead to GND, and the signal lead to RX3,
- In Cleanflight you need to enable UART3 as Serial RX.
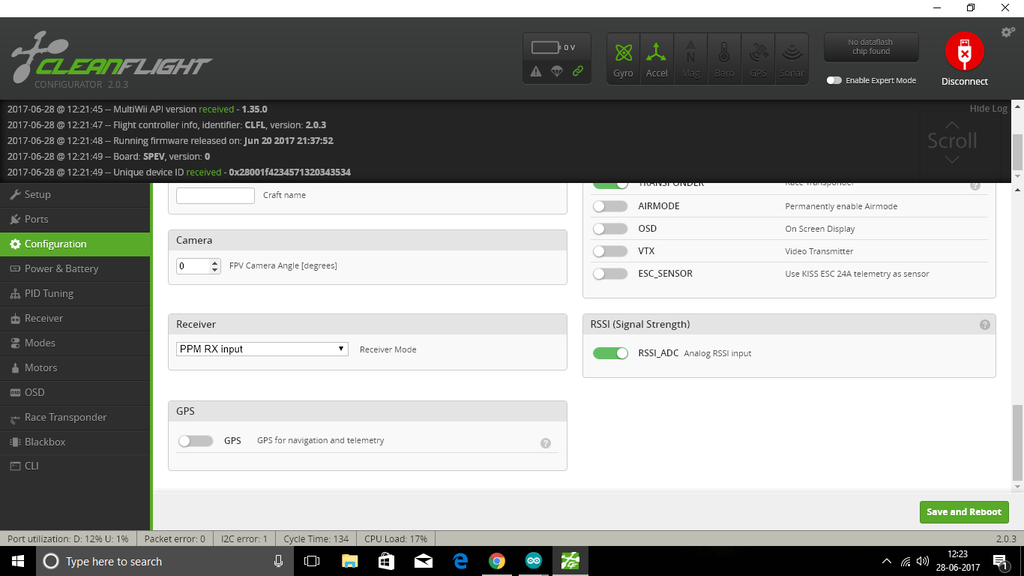
Step 6- Configuration of the Flight Controller
Here, we are using Cleanflight and Zadig software to configure our FC. You can download the software from the below link,
Kindly install both the software properly and open the cleanflight configurator now,
1. Plug your F3 EVO_Brush board onto your computer. Click on the firmware flasher, select the flight controller and its latest firmware version, and load firmware [online].

2. open the Zadig software, select the option, and tick list all devices.
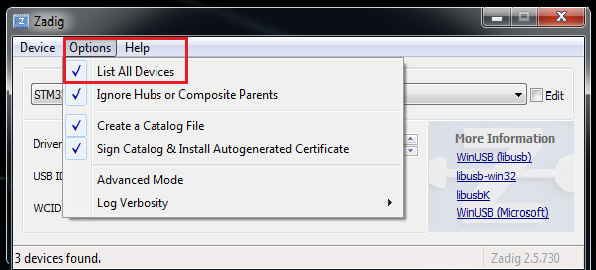
3. Select STM32 Bootloader from the drop-down, choose WinUSB as
the replacement, and click Replace Driver.
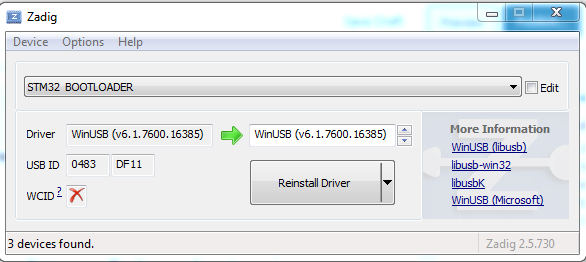
4. Now, go back to Cleanflight click on firmware flasher, and wait the ST DFU DRIVER Automatic installation. It’s successfully flashed when you see the DFU port on the Upright corner.

After flashing the firmware, remove the soldered jumper and reboot the flight controller board. Then go to the mode tab and set up the arm switch and the flight modes. After this disconnect the USB cable and connect the battery and now your drone is ready to fly!
Hope you have enjoyed learning this tutorial for your indoor brushed quadcopter. We hope this tutorial is the perfect option for starting your own mini quadcopter.


prashant naidu
Tuesday, March 16, 2021