


 Sell on Robu


In 2020, I assume many of the people in electronics and computer science know about Raspberry Pi and even have it, did you ever wonder if you could use your phone/laptop display as a raspberry pi display. Main Pro you will get is that it will become portable, you won't have to plug into your displays every now and then because it's wireless. It becomes a bit difficult to set up Raspberry pi without an HDMI display.
I personally have a Raspberry Pi 3B+ and I don't have a monitor to set up the raspberry pi. I will show you in this Blog how you can flash and set up your Raspberry Pi headless. You will just need a Laptop/Android Phone & Raspberry pi.
- You will need the raspbian OS Image. You can download the raspbian latest image from here. I prefer the raspbian buster with desktop and recommended software so that I don't have to download things later. you can choose according to your requirements. The Buster Image with software is around 2541 MB.
Step 1: [Installation Setup]
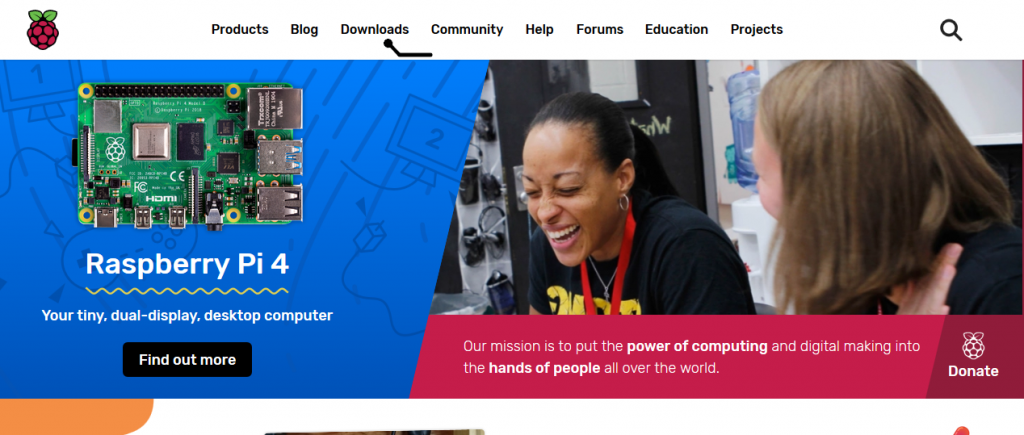
Go to the Raspberry PI website click on the Downloads Section.
Click on Raspbian
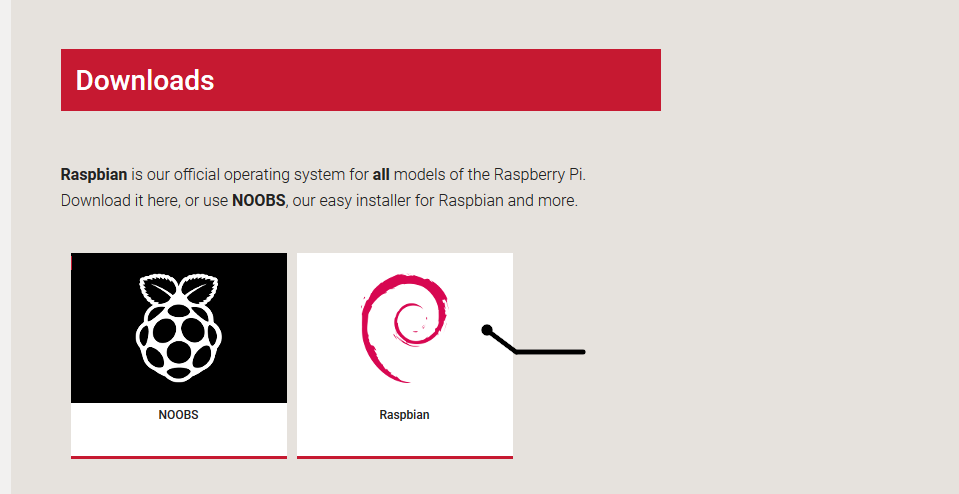
Click on any of these. But I suggest you download one with the desktop and recommended software

- Raspbian is the best-optimized system for Raspberry Pi. If you use any other OS, you might face stutters and lags here and there sometimes.
- Once the download is done you will need an SD card formatter tool. you use any tool that can format the SD in FAT32 Format. In case you are using a 64GB SD card, it comes in SDXC so you will need to format it in exFAT.
Flashing OS into the SD Card
- Etch droid can be used to flash raspbian into your SD connecting it via OTG or you can use a PC to do the same. Etchdroid is a great utility, you will find many software's out there but Its open source and doesn't have any ads in it.
- I have personally tried it. All you need is the downloaded raspbian file. Once you have that just click on the image and it will start extracting it into your Sdcard. After extraction just pulls out the sd card, now you'll need a PC.
- Extract the iso file via 7 zip or any other tool hand now you will get a .img file.
- You can download any image extractor program like Win32DiskImager, Balena Etcher, etc... I prefer the Win32DiskImager. You need to connect your SD card to your Laptop via SDadapter or simply you can plug it with any MicroSD Card Reader. and start extracting the ISO file you got from the download page of the Raspberry pi.
Win32 Disk Imager
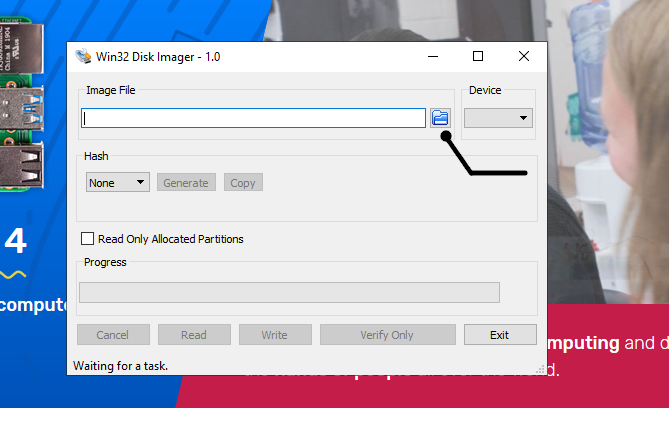

- Open Win32 Disk Imager and select the .img file and press the write button.
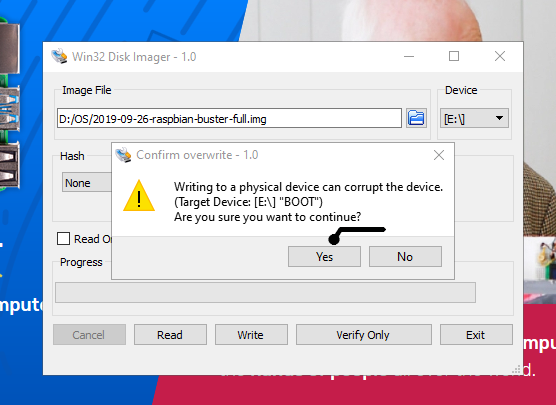
- After selecting the file Click yes as in the popup shown above. Once it's completed you can now plug the SD Card out
Step 2: Creating an SSH file
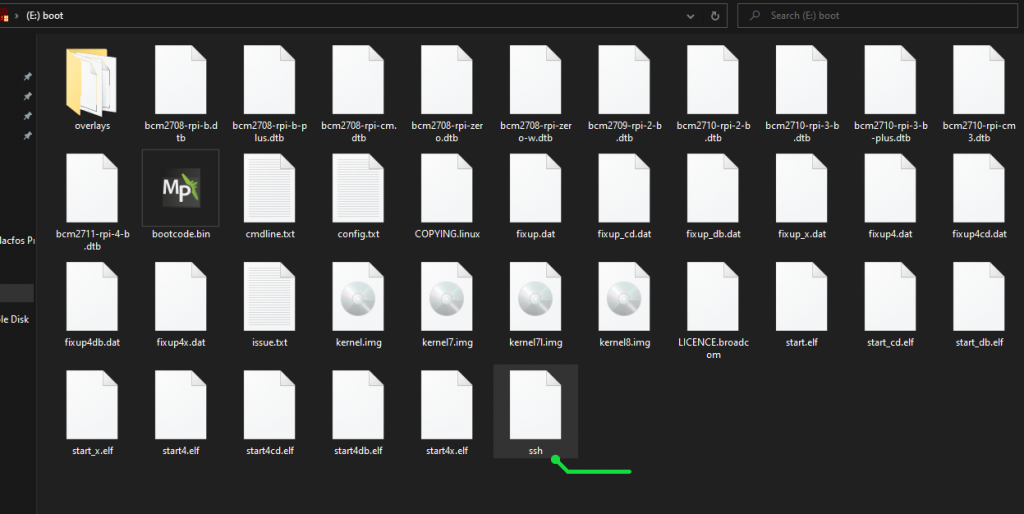
- Once the extraction completes you will need to make an SSH file in order for your raspberry pi to connect via ssh to android. For SSH you need to make a blank file and name it ssh without any extensions and save it in the main directory(BOOT)(its the main directory in SDcard
Step 3: Editing and putting the WPA_supplicant.conf file
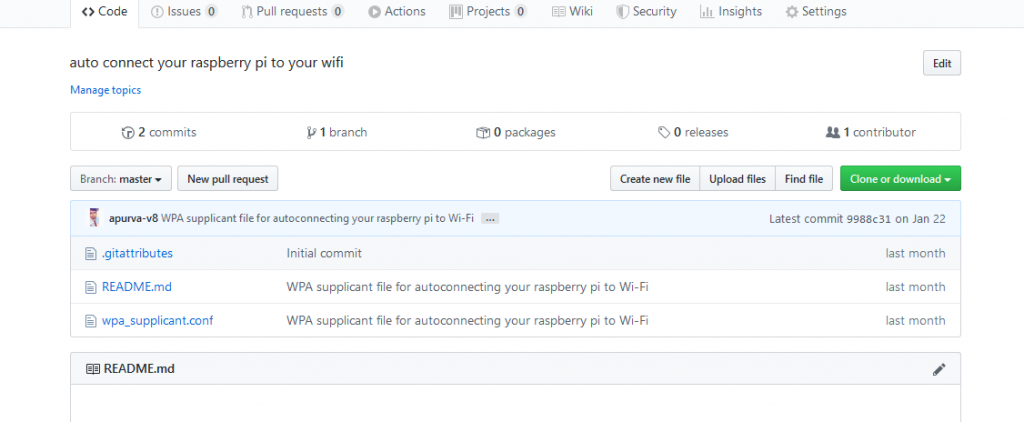
- Now, After creating the SSH file, You will need to download the wpa_supplicant.conf file which you can download from here. This file is actually for auto-connecting to your android phone's hotspot or Wi-Fi. You can even use the LAN skipping this whole step.

- Once you download the wpa_supplicant file. Open it in notepad++ (if you don't have it download it. Don't use basic notepad it won't serve the purpose, it will but I don't suggest you) Once that is done Open the file and change SSID to your wifi name (its case sensitive so please type clearly) after that enter your password in front of psk. Now go in Edit> EOL conversion> UNIX so that raspbian can understand the file and now save it. I use visual studio, you can too :).

- After this, you just need to plug your sd card into your Raspberry Pi and you are good to go.
- Now you need configuration to do. For it just put the IP of your raspberry pi from your phone( you can check IP of connected devices on your phone). It will auto-connect to your hotspot or wifi once you boot it or you can check in your modem for new connected devices and put the IP from there.
- Now download putty into your laptop, you can do this by laptop by ssh and tightvncserver but TightVNC is not realvnc it has some restrictions I don't like. So just go to putty in your laptop and select SSH and put the IP and press connect.
Step 4: Putty Configuration
- If you don't have putty, you can download it here.
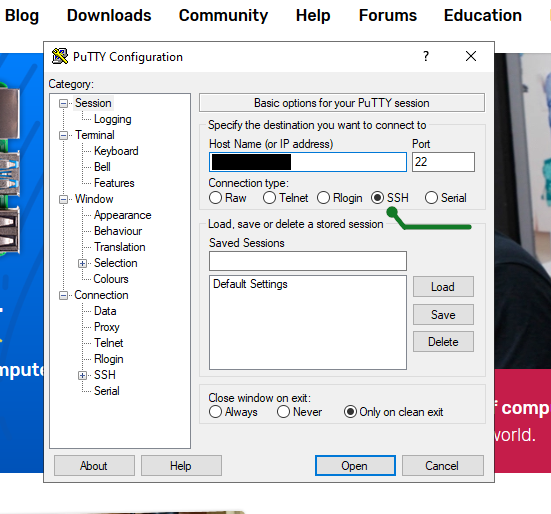
- Put your IP and you don't need to change the port, just click on SSH as shown in the above Image.
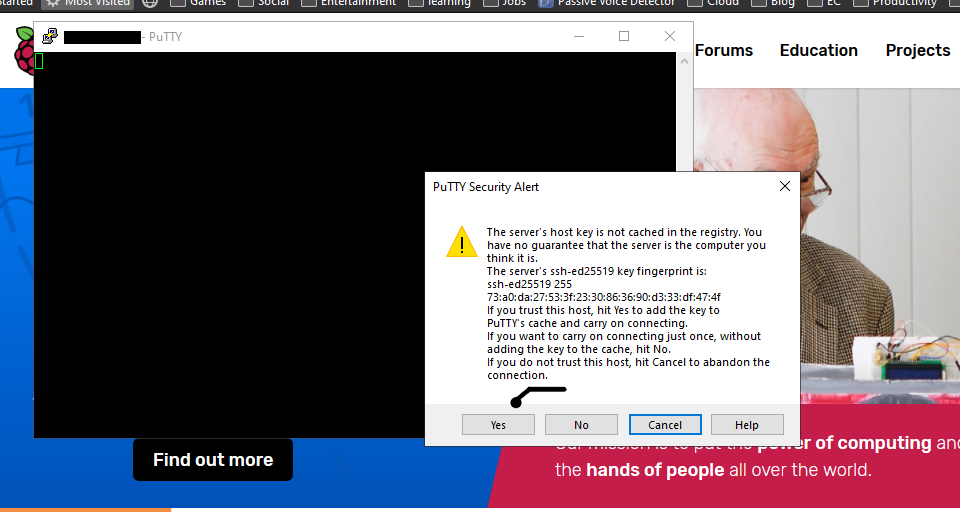
- Click yes as shown in the above image.
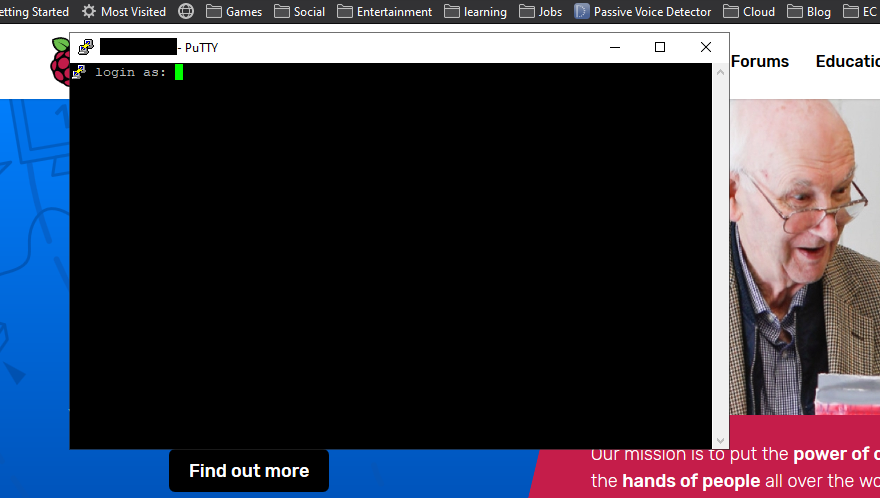
- Once it gets connected. Type username- "pi" and pswd- "raspberry" its default(don't panic if you don't see the password while typing
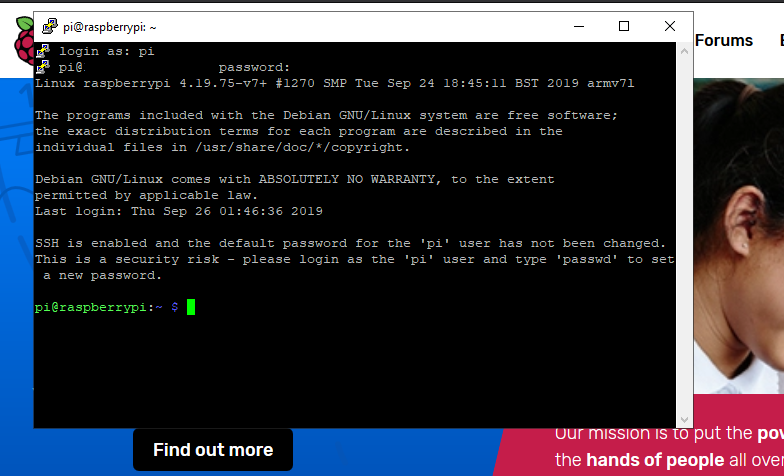
- You will see something like this after the connection.
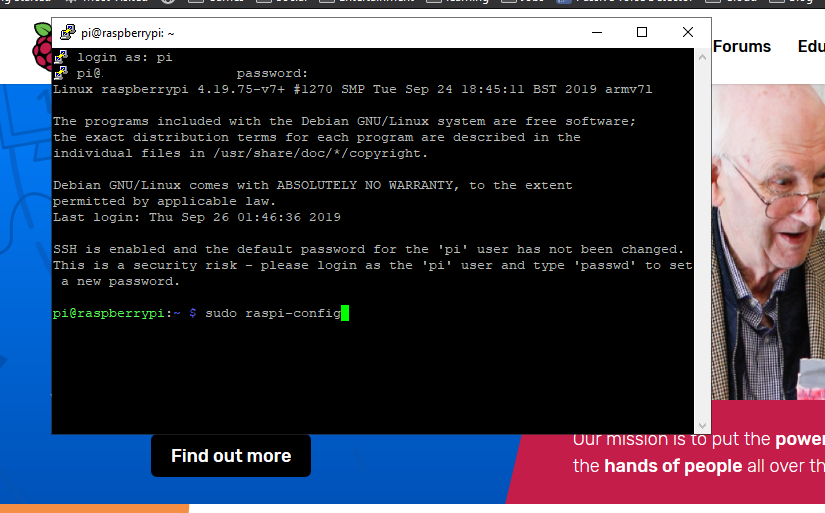
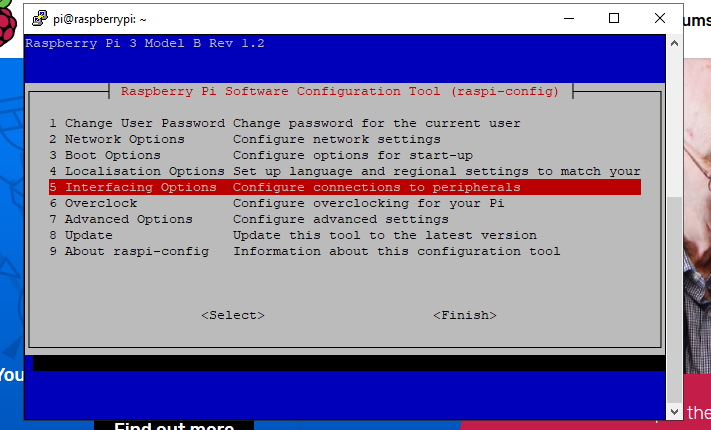
sudo raspi-config- After that in the terminal type above command.
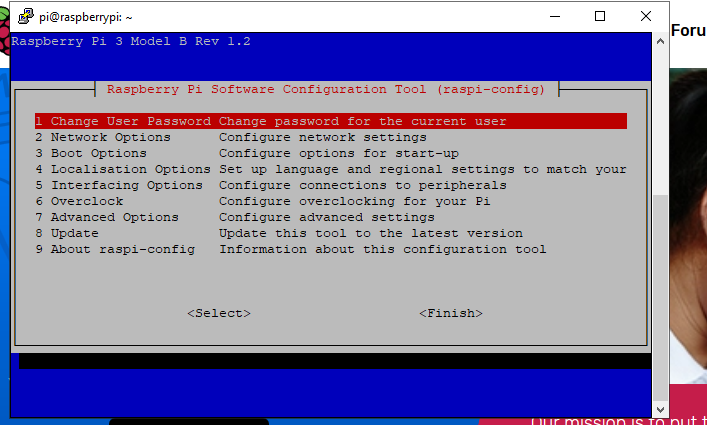
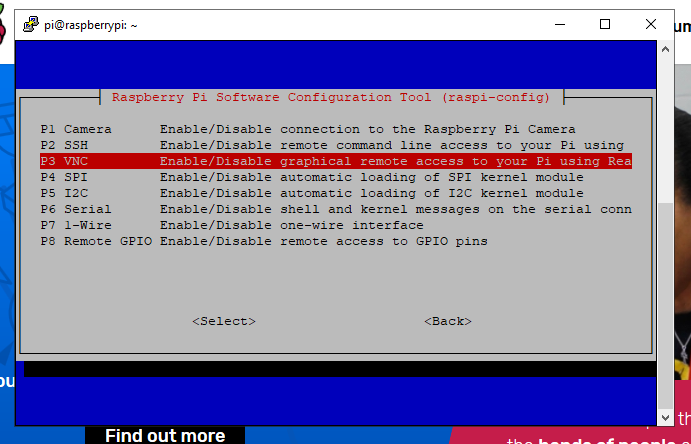
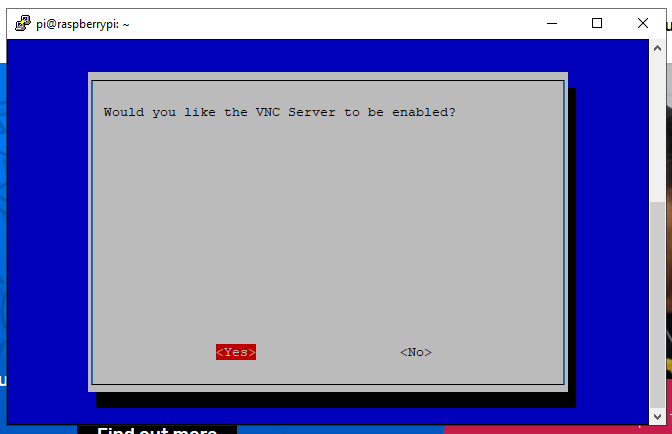
- The config menu of raspberry pi will pop up just go to Interfacing options> VNC > Enable it. After that just restart your Pi.
Step 5: VNC Viewer
- You don't need a display just download VNC viewer from google play store /for PC from here.
- If you are an IOS user you can download VNC Viewer here.

- Put your IP as shown in the above image

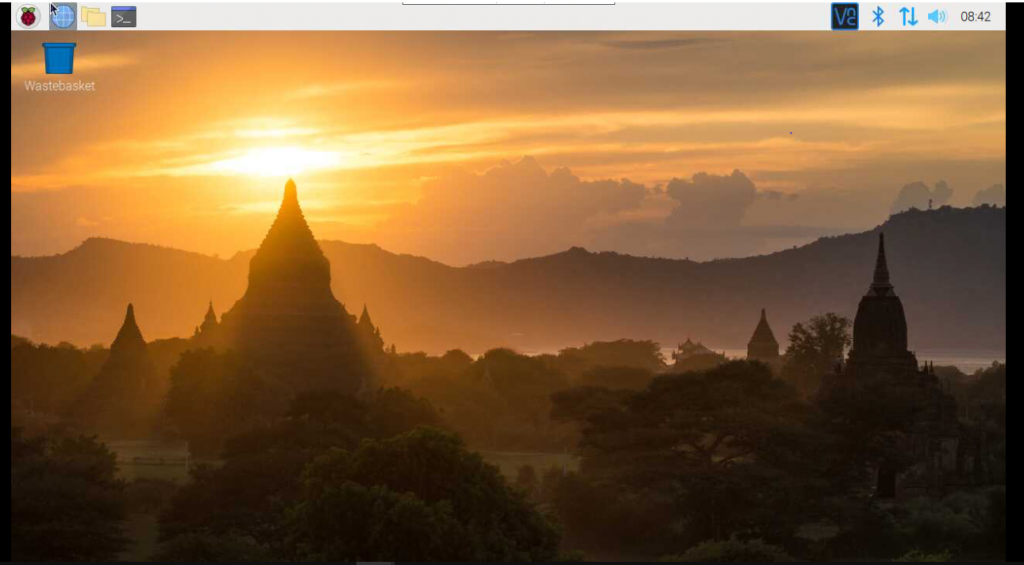
- Put your username and password once it asks and if any popup comes just press Yes and now you're good to go.
- One more thing that you don't need to do this every time, its a one-time setup and now you can just plug and put the IP and access your raspberry pi easily.
You can also watch this video for greater ease.
What do you think about it? Let me know if you tried it in the comments section. If you think I should add more content or improvise something on this. Please let me know.




atmanand gore
Tuesday, March 12, 2019