


 Sell on Robu


Introduction to ZigBee/XBee Pro S2C 802.15.4 Module
The XBee/XBee-PRO S2C 802.15.4 RF Module supports the needs of low-cost, low-power wireless sensor networks. The devices require minimal power and provide reliable delivery of data between devices. The devices operate within the ISM 2.4 GHz frequency band. The XBee/XBee-PRO S2C 802.15.4 RF Module uses S2C hardware and the Silicon Labs EM357 chipset. As the name suggests, the 802.15.4 module is over-the-air compatible with our Legacy 802.15.4. Module (S1 hardware), and the TH versions of the new product are also form factor compatible with designs that use the Legacy module.
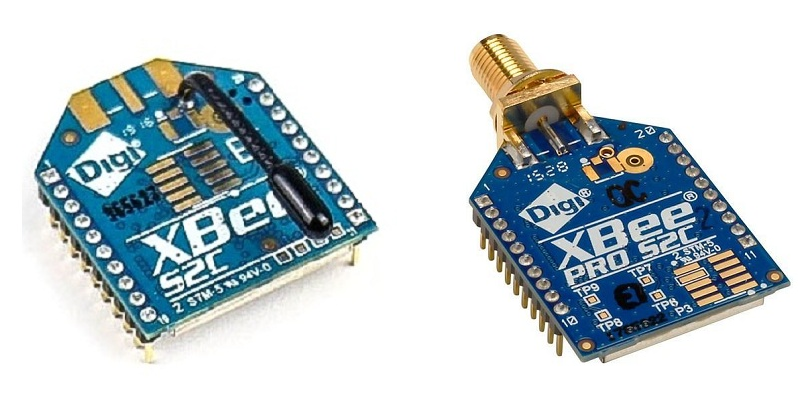
XBee and XBee-PRO ZigBee modules are ideal for hobbyists and educational research as well as applications in the energy and control markets where manufacturing efficiencies are critical. The Serial Peripheral Interface (SPI) provides a high-speed interface and optimizes the integration with embedded microcontrollers, lowering development costs and reducing time to market. Digi’s ZigBee compatible module is based on the Ember EM35x (EM357 and EM3587) system on chip (SoC) radio ICs from Silicon Labs, utilizing 32-bit ARM Cortex M3 processor.
That was a brief introduction to the ZigBee module.Hardware required:
- 2 x ZigBee XBee Pro
- 2 x XBee USB adapter
- 2 x USB cable
Software required:
- XCTU software (6.1.1 version) (click to download)
How to configure ZigBee/Xbee Pro
1. XBee connection with USB adapter.
Place the XBee module on XBee USB adapter: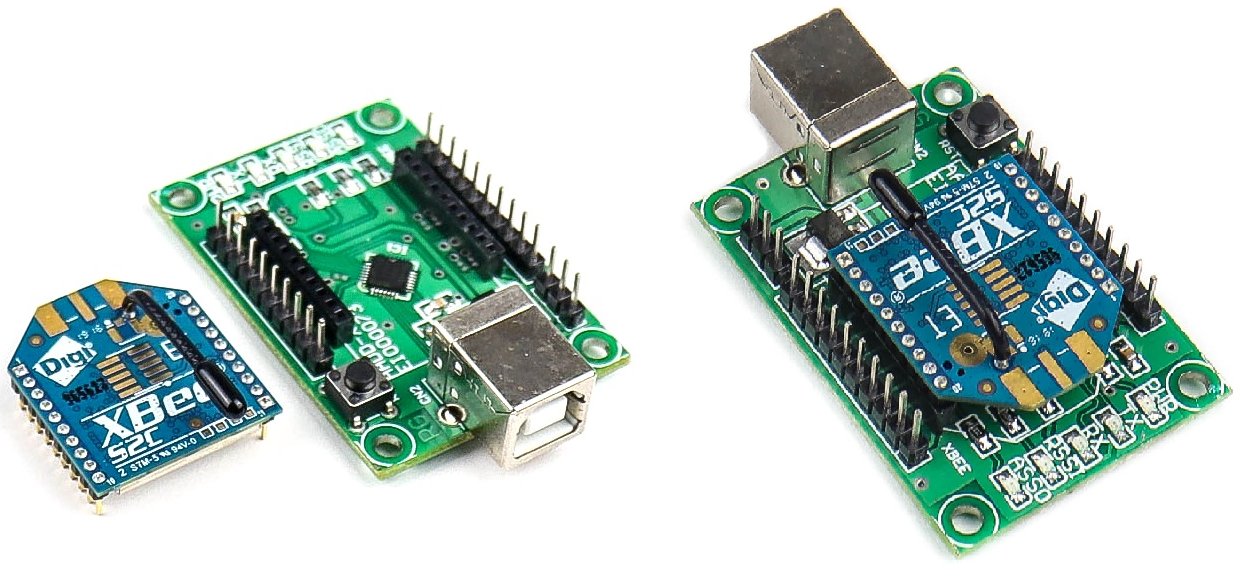
2. Download and Install XCTU software 6.1.1 software
- Open XCTU software 6.1.1 software. Click on the search button of XCTU. It directs the XBee connected to the USB adapter. Let us start the configuration of the XBee module.
- Open the XCTU software& then click on the search on the top.
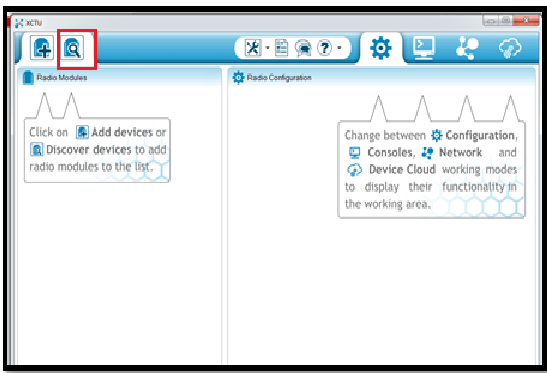
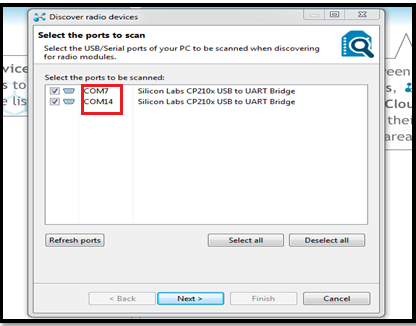
- To know the com port where radios are connected open the device manager and note down the com port. Select the ports and click on next.
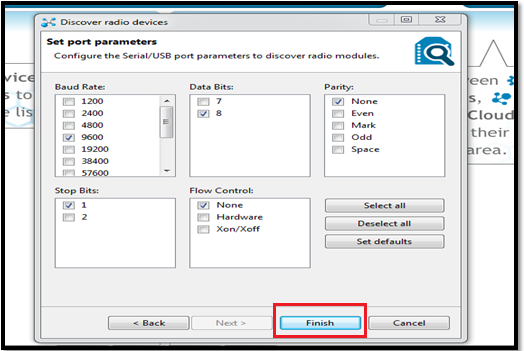
- Leave the port parameters to default. (i.e. 9600-8-N-1)
- 9600- Baud rate
- 8- Data bit
- Parity- None and 1- stop bit
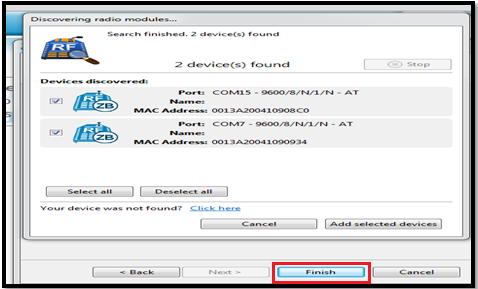
- The radios (XBees) are discovered by XCTU& click on Add selected device to see the XBee listed on the left side of the XCTU.
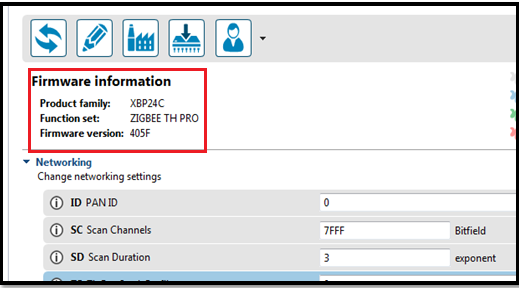
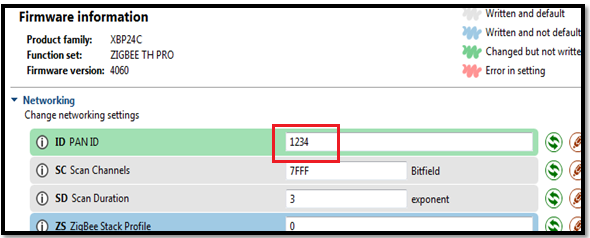
- Click on the First radio to load the setting. You can see the product family as XBP24C and Function set as ZIGBEE TH PRO.
- To upgrade the latest firmware, click on the Upgrade Firmware and leave the function set to default and select the Newest version. Click on the finish to upgrade.

3. Now configure the first radio as COORDINATOR.
- First set Pan ID for your network. This can be any Hex value from 0 to FFFF. (Set it as 1234)
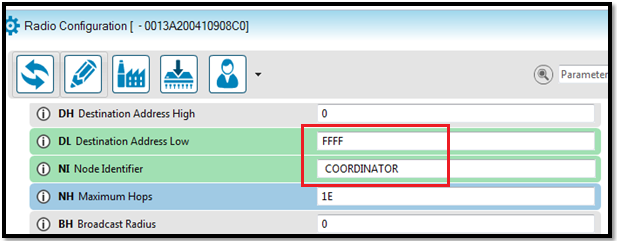
- To operate the Radio in the broadcast mode set the DL (Destination address) as FFFF. Type the name of the first radio in NI (Node Identifier). You can provide any name. Here the NI set as COORDINATOR.
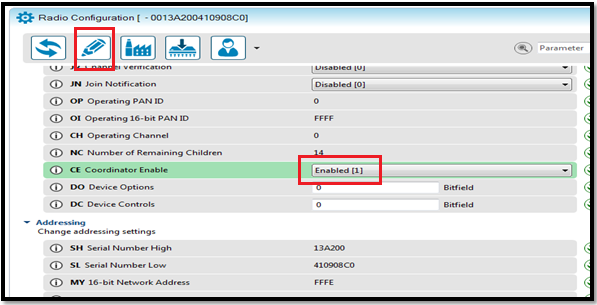
- To make the Radio as COORDINATOR, Set the CE parameter to Enable and click on the Write button (Pencil Icon) to save the information.
4. Now click on the second radio and configure this as ROUTER.
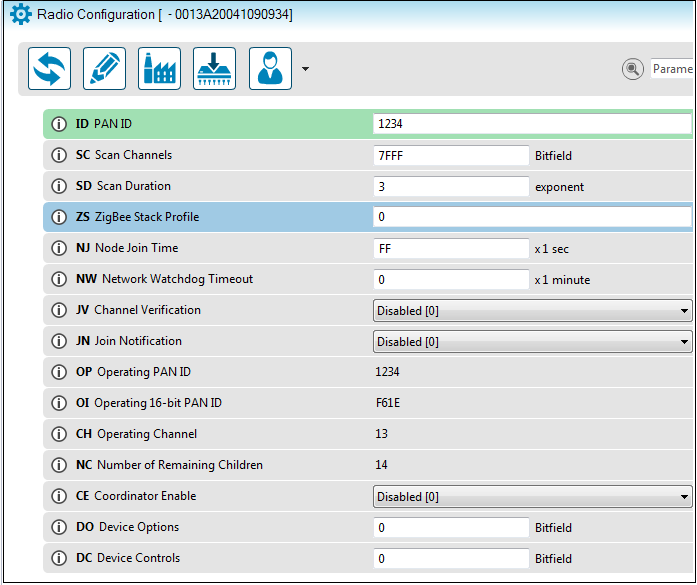
- Enter the Pan Id as 1234 which is the same as COORDINATOR. Set the JV channel Verification to enable so that it joins the COORDINATOR. Leave the CE to Disable and click on the Write to save the changes.
5. Communication between Coordinator and Router
The Radios are configured, now you can do the communication between the COORDINATOR and Router:- Delete the second radio and click on the first one. This is the COORDINATOR and leave this XCTU window open and start another window of XCTU.
- Click on the search button of the second window of XCTU. Select the com port of the second radio. That is the ROUTER radio. Click on the router radio to load the settings.
6. Check the Output
Now the new window has a ROUTER and the old window has a COORDINATOR.- Left side- ROUTER
- Right side- COORDINATOR
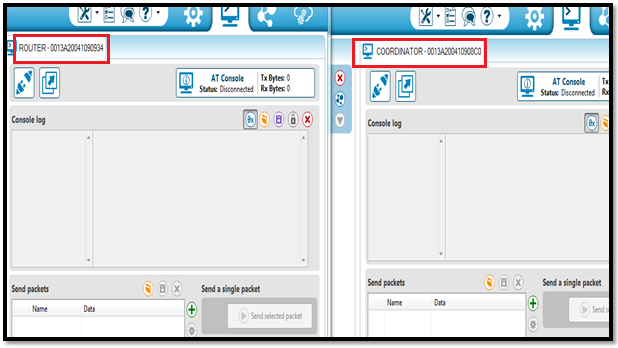
- Click on the Console terminal window of both radio and Serial close button.
- Now you can type the message in the Console log window to see received by other radio. The transmitter message in BLUE and Received message in RED.
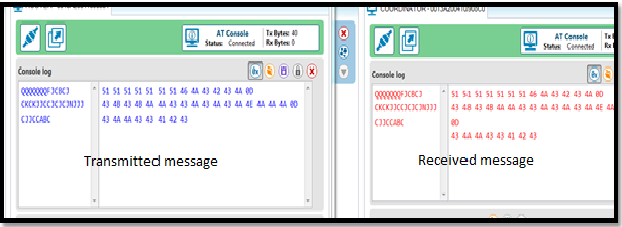
- This is Bidirectional communication.

Hope this tutorial helps you to understand the deailed of How to configure ZigBee/Xbee Pro. In this tutorial, we have used XCYU software for configuration. We at Robu.in hope that you found it interesting and that you will come back for more of our educational blogs.




Shreyash Jagtap
Saturday, February 27, 2021