


 Sell on Robu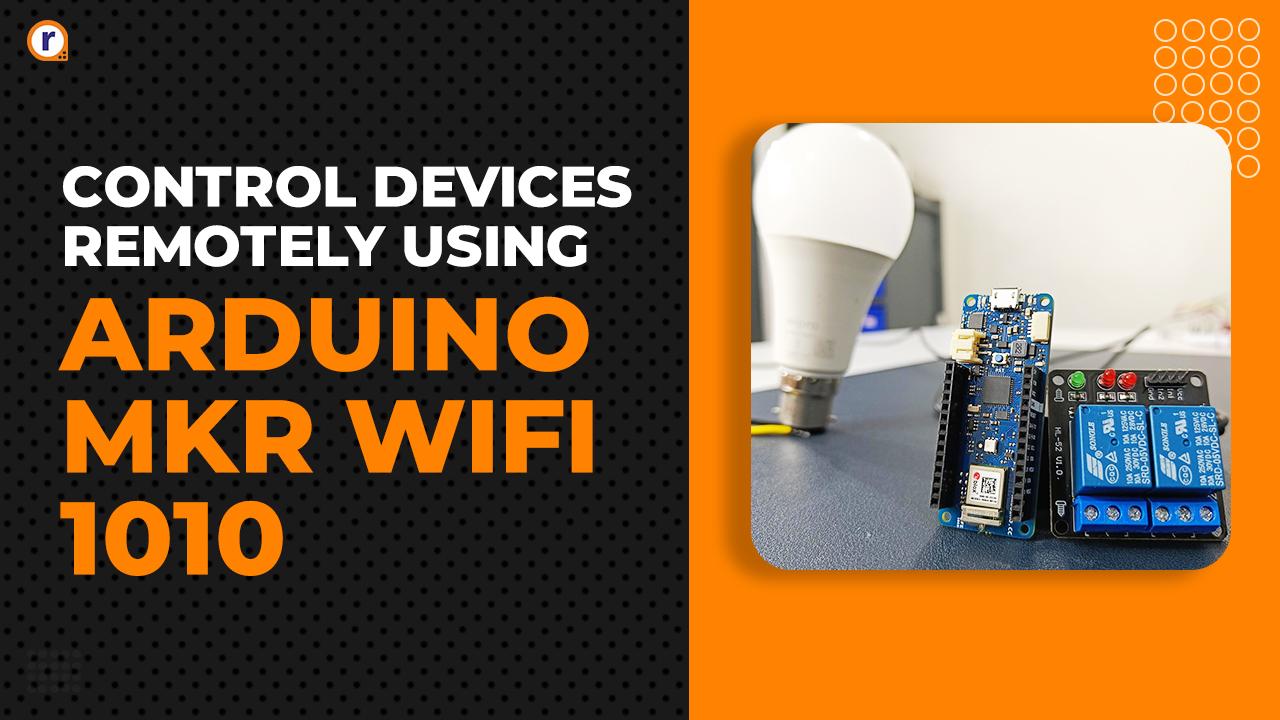


In home, industry or office wherever there are many electrical devices there is need for central control system from where the devices can be turned on or off. A central server from where every single device can be controlled is the best option. In this project we are going make a simple web server using Arduino MKR wifi 1010. The server will be used to provide web page, where we will create 4 buttons to turn on and off two relays connected to the Arduino MKR board. The relays will indirectly turn on the electrical devices. So lets start with the project.
Components required
- Arduino MKR WiFi 1010
- USB micro cable
- 2 relay module
- 5V 2A adapter
- Jumper wires
- MOSFET IRF540
- Resistors – 1K
- Resistor – 10K
- Breadboard
Circuit diagram
Hardware explanation
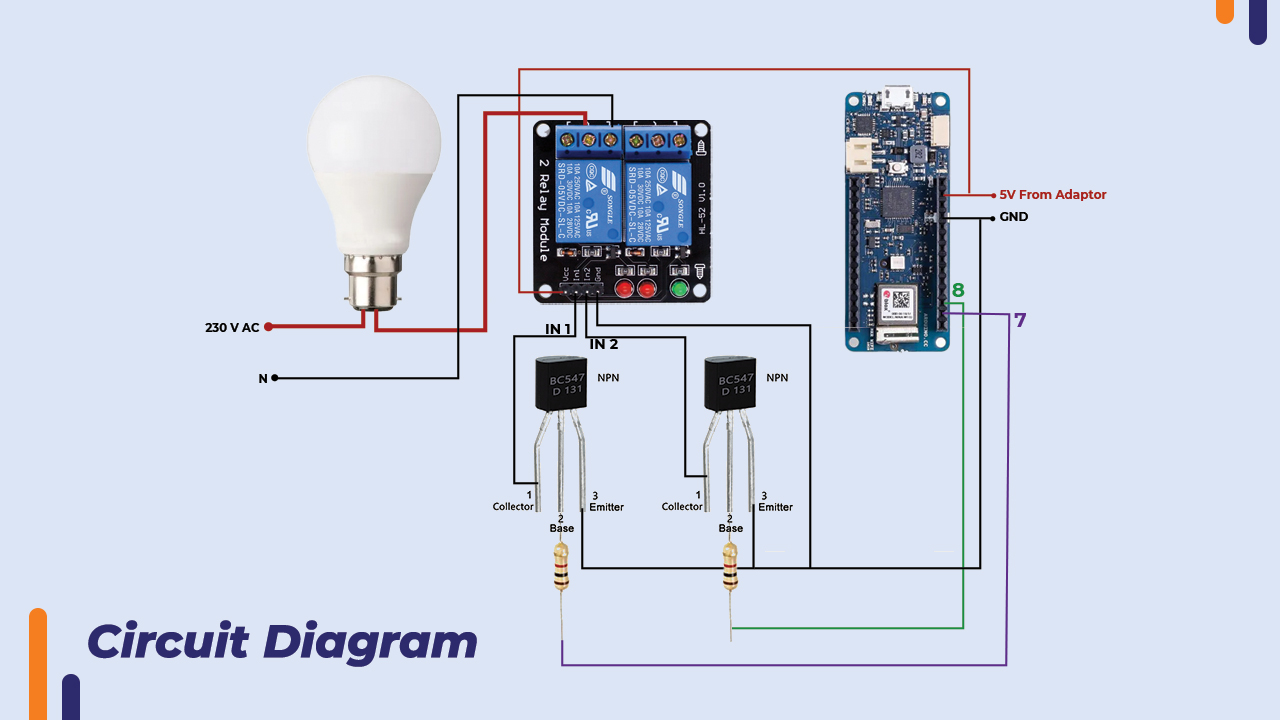
The relay module is interfaced with Arduino MKR with the help of transistor BC547. The reason why we are using transistor is because the Arduino MKR outputs 3.3V on digital output pin. 3.3 Volts is not sufficient to turn off the relay. The relay turns on at 0V but cannot turn off at 3.3V. So we switch ground (0V) to the relay input with the help of transistor. We are using transistor as a switch. When the base of transistor is fed 3.3V from Arduino. The transistor will switch ground to the relay input pin and the relay will turn on.
The electrical device is connected in series with the relay’s NO (normally open) switch. So when the relay is activated, 230V is switched to the electrical device.
Making Arduino MKR WiFi 1010 compatible with Arduino IDE
Open the Arduino IDE and then open board manager. Type “Arduino MKR“ keyword. Install the boards package.

Now the MKR board is added in Arduino IDE. We can upload basic code of led blinking to test the board. The on board led is connected on pin 6.
To make web server we will be using the “WiFiNINA library”. To install the library, open library manager and search for keyword “WiFiNINA” and install the library.

Upload the below given code. Before uploading make sure that you have entered your WiFi ssid and password.
Code
#include <WiFiNINA.h>
char ssid[] = " "; // your network SSID (name) between the " "
char pass[] = " "; // your network password between the " "
int keyIndex = 0; // your network key Index number (needed only for WEP)
int status = WL_IDLE_STATUS; //connection status
WiFiServer server(80); //server socket
WiFiClient client = server.available();
int bulp_pin = 7;
int fan_pin = 8;
void setup() {
Serial.begin(9600);
pinMode(bulp_pin,OUTPUT);
pinMode(fan_pin,OUTPUT);
while (!Serial);
enable_WiFi();
connect_WiFi();
server.begin();
printWifiStatus();
}
void loop() {
client = server.available();
if (client) {
printWEB();
}
}
void printWifiStatus() {
// print the SSID of the network you're attached to:
Serial.print("SSID: ");
Serial.println(WiFi.SSID());
// print your board's IP address:
IPAddress ip = WiFi.localIP();
Serial.print("IP Address: ");
Serial.println(ip);
// print the received signal strength:
long rssi = WiFi.RSSI();
Serial.print("signal strength (RSSI):");
Serial.print(rssi);
Serial.println(" dBm");
Serial.print("To see this page in action, open a browser to http://");
Serial.println(ip);
}
void enable_WiFi() {
// check for the WiFi module:
if (WiFi.status() == WL_NO_MODULE) {
Serial.println("Communication with WiFi module failed!");
// don't continue
while (true);
}
String fv = WiFi.firmwareVersion();
if (fv < "1.0.0") {
Serial.println("Please upgrade the firmware");
}
}
void connect_WiFi() {
// attempt to connect to Wifi network:
while (status != WL_CONNECTED) {
Serial.print("Attempting to connect to SSID: ");
Serial.println(ssid);
// Connect to WPA/WPA2 network. Change this line if using open or WEP network:
status = WiFi.begin(ssid, pass);
// wait 10 seconds for connection:
delay(10000);
}
}
void printWEB() {
if (client) { // if you get a client,
Serial.println("new client"); // print a message out the serial port
String currentLine = ""; // make a String to hold incoming data from the client
while (client.connected()) { // loop while the client's connected
if (client.available()) { // if there's bytes to read from the client,
char c = client.read(); // read a byte, then
Serial.write(c); // print it out the serial monitor
if (c == '\n') { // if the byte is a newline character
// if the current line is blank, you got two newline characters in a row.
// that's the end of the client HTTP request, so send a response:
if (currentLine.length() == 0) {
// HTTP headers always start with a response code (e.g. HTTP/1.1 200 OK)
// and a content-type so the client knows what's coming, then a blank line:
client.println("HTTP/1.1 200 OK");
client.println("Content-type:text/html");
client.println();
//create the links
client.print("<h1>ROBU studio web dashboard</h1>");
client.print("<button style=\"height:100px;width:100px\" onclick=\"window.location.href = 'http://192.168.179.234/H';\">Turn on bulp</button>");
client.print("<button style=\"height:100px;width:100px\" onclick=\"window.location.href = 'http://192.168.179.234/L';\">Turn off bulp</button></br></br>");
client.print("<button style=\"height:100px;width:100px\" onclick=\"window.location.href = 'http://192.168.179.234/Y';\">Turn on fan</button>");
client.print("<button style=\"height:100px;width:100px\" onclick=\"window.location.href = 'http://192.168.179.234/N';\">Turn off fan</button>");
//int randomReading = analogRead(A1);
//client.print("Random reading from analog pin: ");
//client.print(randomReading);
// The HTTP response ends with another blank line:
client.println();
// break out of the while loop:
break;
}
else { // if you got a newline, then clear currentLine:
currentLine = "";
}
}
else if (c != '\r') { // if you got anything else but a carriage return character,
currentLine += c; // add it to the end of the currentLine
}
if (currentLine.endsWith("GET /H")) {
digitalWrite(bulp_pin,HIGH);
}
if (currentLine.endsWith("GET /L")) {
digitalWrite(bulp_pin,LOW);
}
if (currentLine.endsWith("GET /Y")) {
digitalWrite(fan_pin,HIGH);
}
if (currentLine.endsWith("GET /N")) {
digitalWrite(fan_pin,LOW);
}
}
}
// close the connection:
client.stop();
Serial.println("client disconnected");
}
}
After the code is uploaded, open the serial monitor it will print “Attempting to connect to ssid :“ . Turn on the WiFi. The board will connect to the WiFi network. As soon as the board connects. On the serial monitor you will see the message “To see the page in action open a brower to http://” followed by the IP address. Connect your laptop to same WiFi network and open the web browser, then paste the IP address in the address bar and hit enter. Our webpage will appear.

Power the board and relay module with external 5V adapter and click on the button on the HTML web page. You will see that the relay activates when the button is clicked. Now you can connect a AC load in series with the relay switch and turn it on and off.
Conclusion
In this way we created a webserver using Arduino MKR WiFi 1010 and controlled electrical devices from that webserver using simple HTML widgets. If you have any doubt regarding any part of this blog, feel free to comment it. Our team will be there to assist you.
For more interesting electronics projects check out our YouTube channel.





Divyani Tiwari
Thursday, June 1, 2023