


 Sell on Robu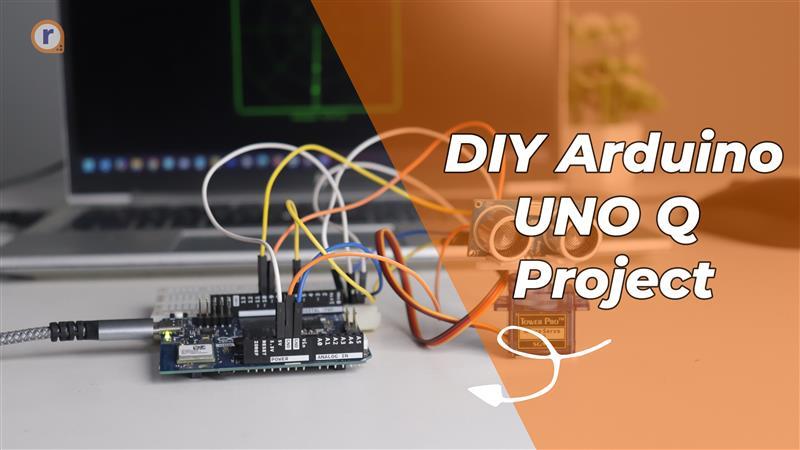


Introduction
Easy DIY Project with Arduino UNO Q If you’re starting with the new Arduino UNO Q and wondering what your first real project should be — this one is perfect. In this tutorial, we’ll build a real-time ultrasonic radar (technically SONAR) using: Arduino UNO Q HC-SR04 Ultrasonic Sensor SG90 Servo Motor Python + Web UI (HTML, CSS, JavaScript) Within minutes, your Arduino will:
- Rotate a servo
- Scan distances
- Send data to Linux
- Host a local webpage
- Draw a live radar animation in your browser
No blinking LEDs. This is a proper embedded visualization project.
Why Start With This Arduino UNO Q Project?
Arduino UNO Q is Arduino’s first SBC (Single Board Computer). It’s a dual-brain board: STM32 MCU → real-time hardware control Qualcomm MPU → Linux, Python, Web UI So instead of simple code sketches and contorl, you can build full systems. This radar project shows exactly how both processors work together.
What Are We Building?
A rotating ultrasonic radar: Servo sweeps from 30° to 150° Ultrasonic sensor measures distance Arduino sends angle + distance Python receives data Browser draws radar graphics Result: A live sonar screen in your web browser.
Chapter 1 – Hardware Requirements
Main Components


Supporting Parts


Optional (for standalone mode):
HDMI display
Keyboard
Mouse
USB hub
Power supply
Chapter 2 – Wiring Connections
Ultrasonic Sensor Pins
VCC
GND
TRIG
ECHO
Servo Motor Wires
Red → VCC
Brown → GND
Orange → Signal
Arduino UNO Q Connections Servo
Orange → D6
Red → 5V
Brown → GND
Ultrasonic Sensor
TRIG → D9
ECHO → D10
VCC → 5V
GND → GND
Make sure all grounds are common.
Double-check wiring before powering up.
Chapter 3 – Programming Logic
UNO Q allows something powerful:
You run C++ on STM32 and Python + Web on Linux
Data Flow STM32 → Route Bridge → Qualcomm Processor → Python → Web UI
Arduino Side (C++)
The microcontroller:
Moves servo from 30° to 150°
Sends ultrasonic pulse
Measures echo time
Calculates distance
Returns:
angle,distance
Only two values.
Simple.
These values are exposed through Arduino’s Router Bridge.
Python Side
Python continuously calls:
Bridge.call("get_radar")
Then:
Splits angle and distance
Sends data to browser using WebUI
Runs in background thread for smooth UI
Web Side (HTML + CSS + JavaScript)
HTML
Creates:
Canvas for radar
Distance text
Loads Socket.IO
Loads JavaScript
Minimal structure.
CSS
Your radar look:
body{ background:black; color:#00ff00; text-align:center; font-family:Consolas; }
canvas{ border:2px solid #00ff00; box-shadow:0 0 25px #00ff00; margin-top:10px; }
#dist{ margin-top:10px; font-size:20px; }
Classic green-on-black radar theme.
JavaScript
JavaScript:
Listens for radar_update
Updates angle and distance
Clears canvas
Draws grid
Draws sweep line
Plots detected objects
Runs ~60 FPS for real-time motion.
Summary of Software Flow
Arduino measures Python forwards Browser draws
Hardware → Browser → Live radar.
CODE


Chapter 4 – Final Assembly
Mount ultrasonic sensor on servo
Fix components on breadboard/base
Secure wires
Place Arduino UNO Q
Connect display (if standalone)
Power ON
Your radar hardware is ready.

Chapter 5 – Testing & Working
Upload the code.
Open local webpage.
And boom.
Servo sweeps
Sensor scans
Radar beam rotates
Dots appear
Distance updates live
Move your hand.
Dots move instantly.
You just built a real-time SONAR visualization system.


Technologies Used
Arduino UNO Q
HC-SR04 Ultrasonic Sensor
SG90 Servo Motor
STM32 (C++)
Qualcomm Linux Processor
Python
HTML
CSS
JavaScript
Socket.IO
What Did You Really Build?
Not just a project.
You built:
- Embedded system
- Sensor processing
- Inter-processor communication
- Python backend
- Web frontend
- Real-time visualization
That’s serious engineering.
Final Thoughts
This project doesn’t use the full power of UNO Q.
But it’s the perfect starting point.
If you think Arduino is only for LEDs…
UNO Q will change your mind.
Watch Detail video on - https://www.youtube.com/@RobuInlabs







Leave a Comment Your email address will not be published. Required fields are marked*