


 Sell on Robu


In this blog we will cover how to interface Arduino with HC -05 and control the motor using it. and make a Bluetooth control car.
What is HC-05 Bluetooth module ?
The HC-05 Bluetooth module is a simple and cost-effective way to add wireless communication to a project. It supports master and slave modes, making it useful for various applications. It can communicate with the Arduino via serial communication (UART).
How to interface HC-05 with Arduino
Interfacing the HC-05 Bluetooth module can be connected to Arduino by connecting RX and Tx pins to Arduino’s TX and RX pins, respectively and can be power it with 3.3v or 5v depending on module
Hardware requirement
- Arduino UNO Board
- HC-05 Bluetooth Module
- Motor Driver
- DC Motors
- Car chassis
- Wheels
- Battery for supply
- Jumper wires
Software requirement
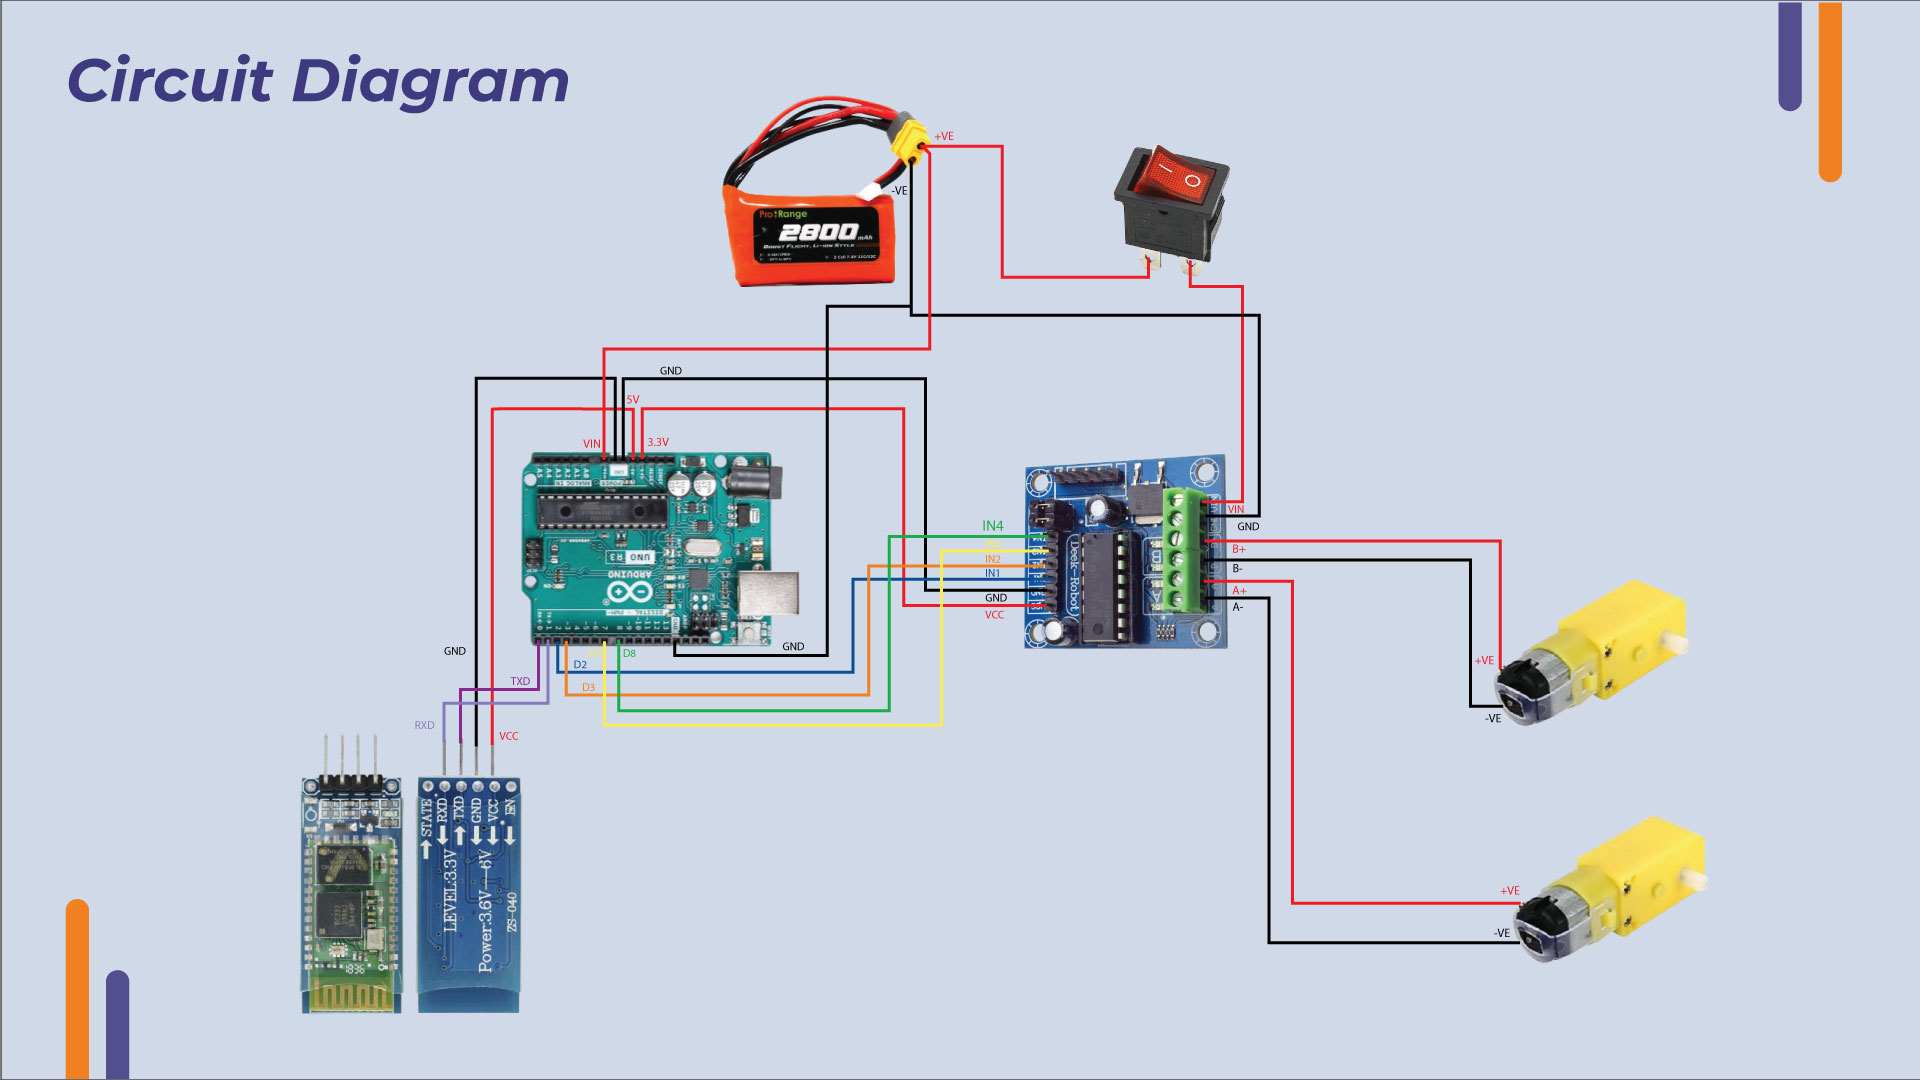
Circuit diagram
Connections
HC-05 to Arduino:
- HC-05 VCC to Arduino 5V
- HC-05 GND to Arduino GND
- HC-05 TX to Arduino RX (pin 0)
- HC-05 RX to Arduino TX (pin 1)
Motor Driver to Arduino:
- Motor driver IN1, IN2, IN3, IN4 to Arduino digital pins (2,3,7,8)
- Motor driver VCC to battery positive terminal
- Motor driver GND to battery negative terminal and Arduino GND
- Motors connected to motor driver outputs
Bluetooth Pairing and Terminal App Setup
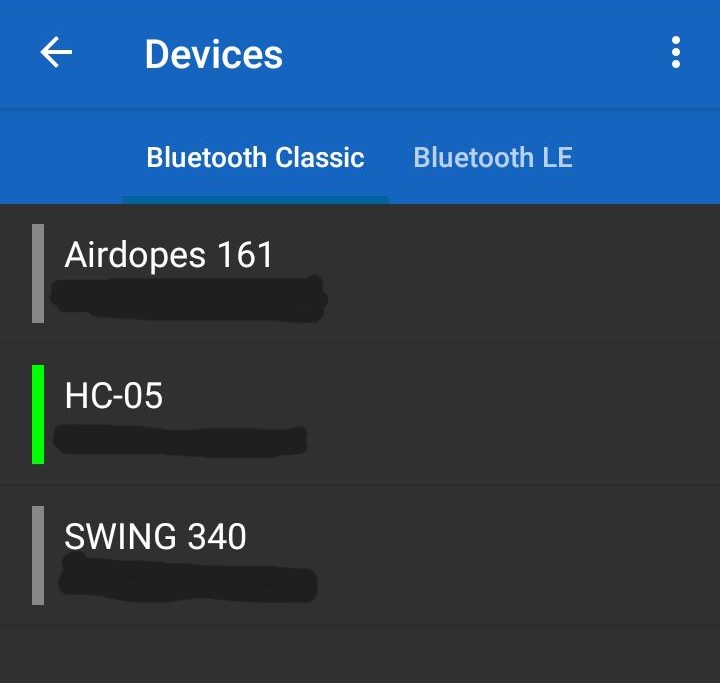
Pair Mobile Bluetooth with HC-05 Bluetooth module.(Default password 0000 or 1234)
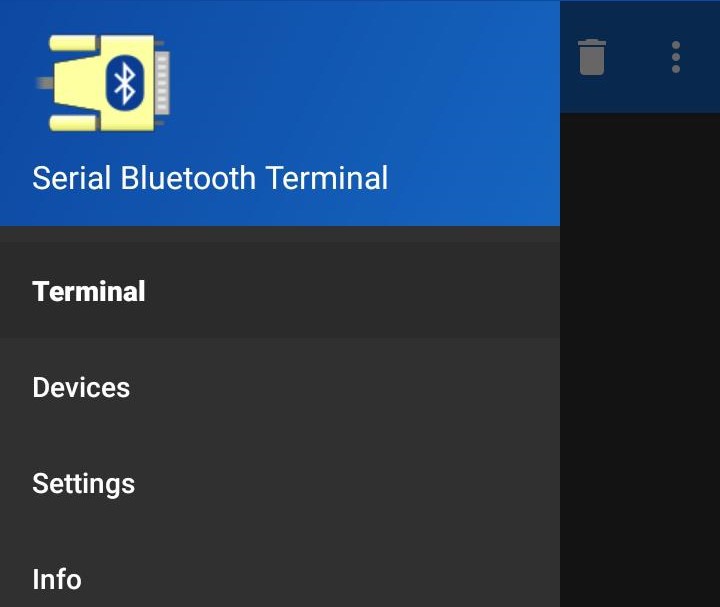
Open the terminal app and connect HC-05
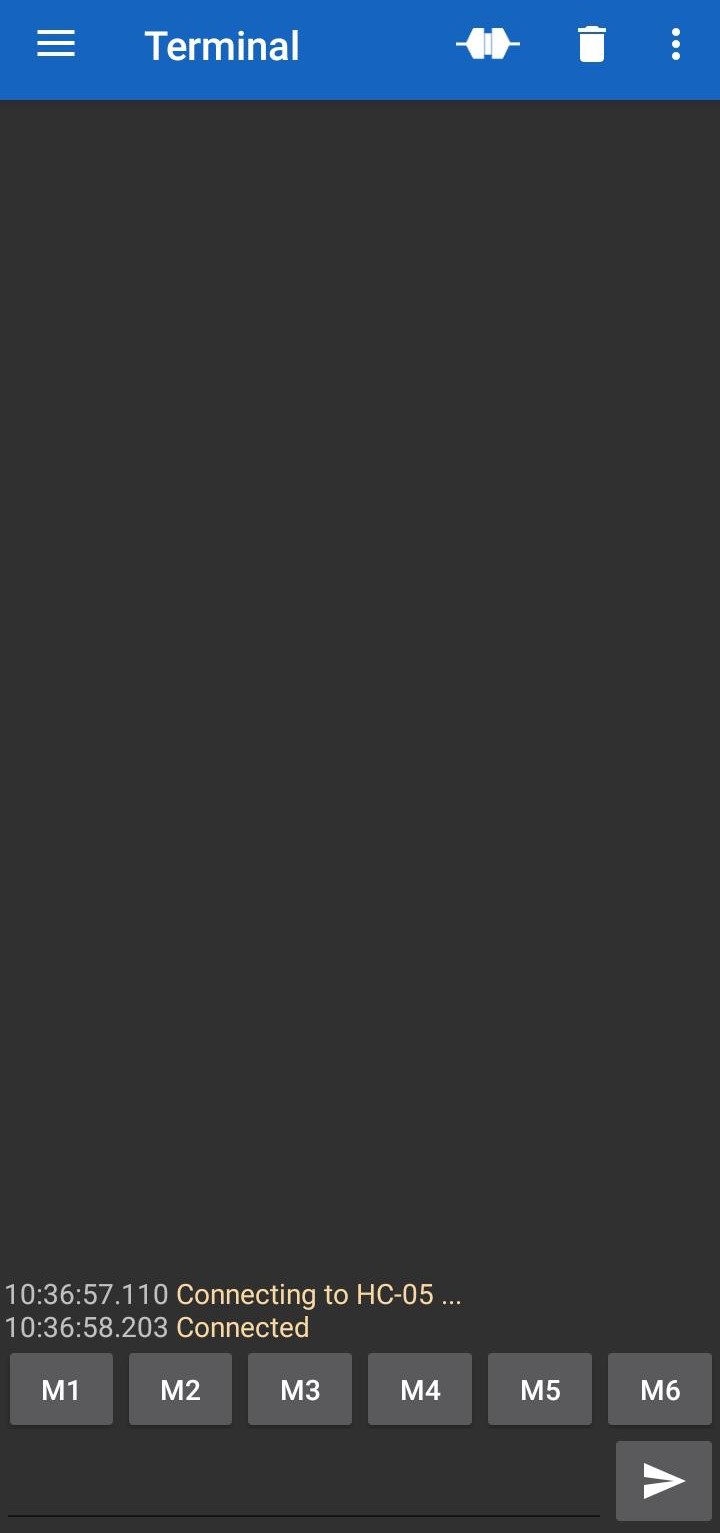
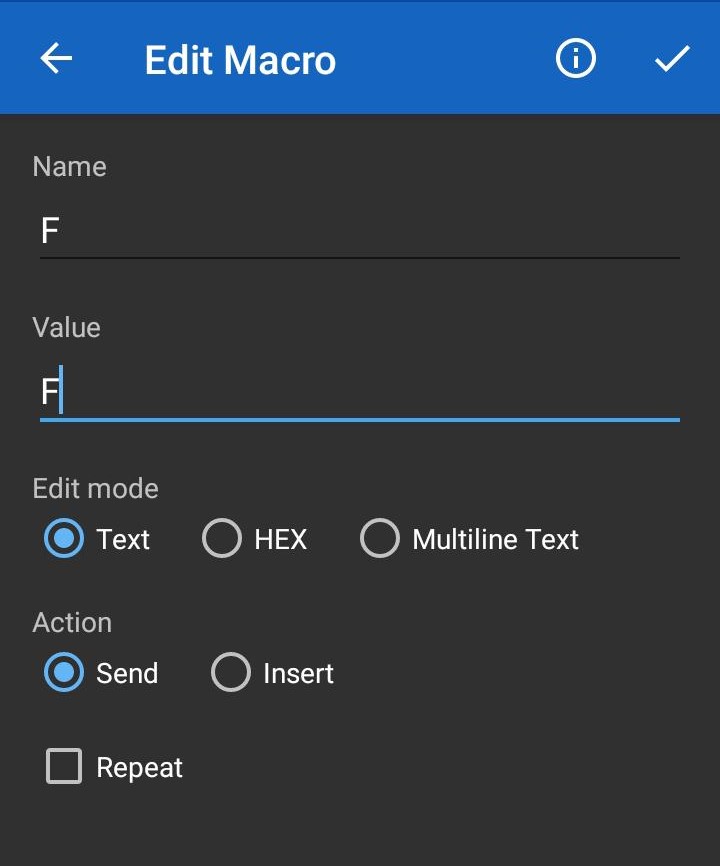
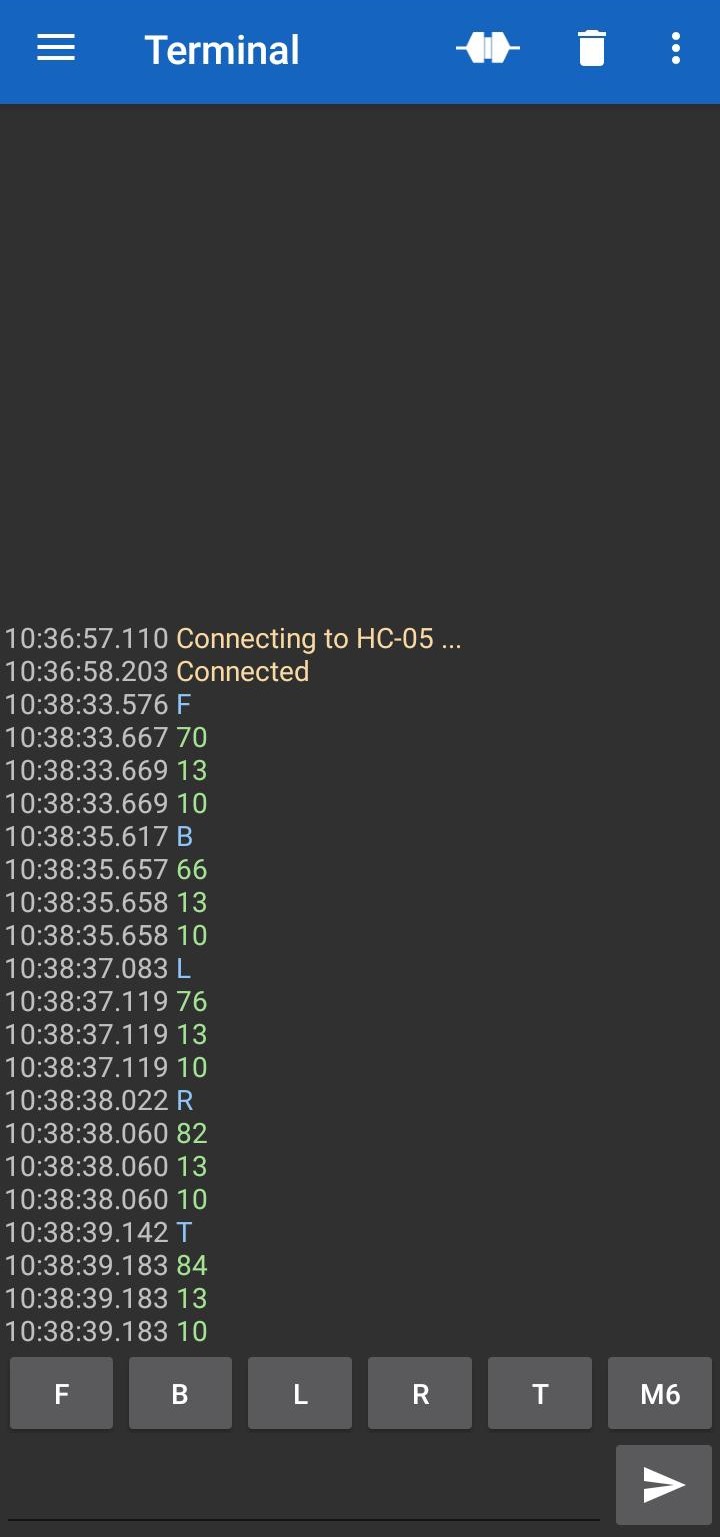
Assign the name and value to the button on terminal app.
Assembly
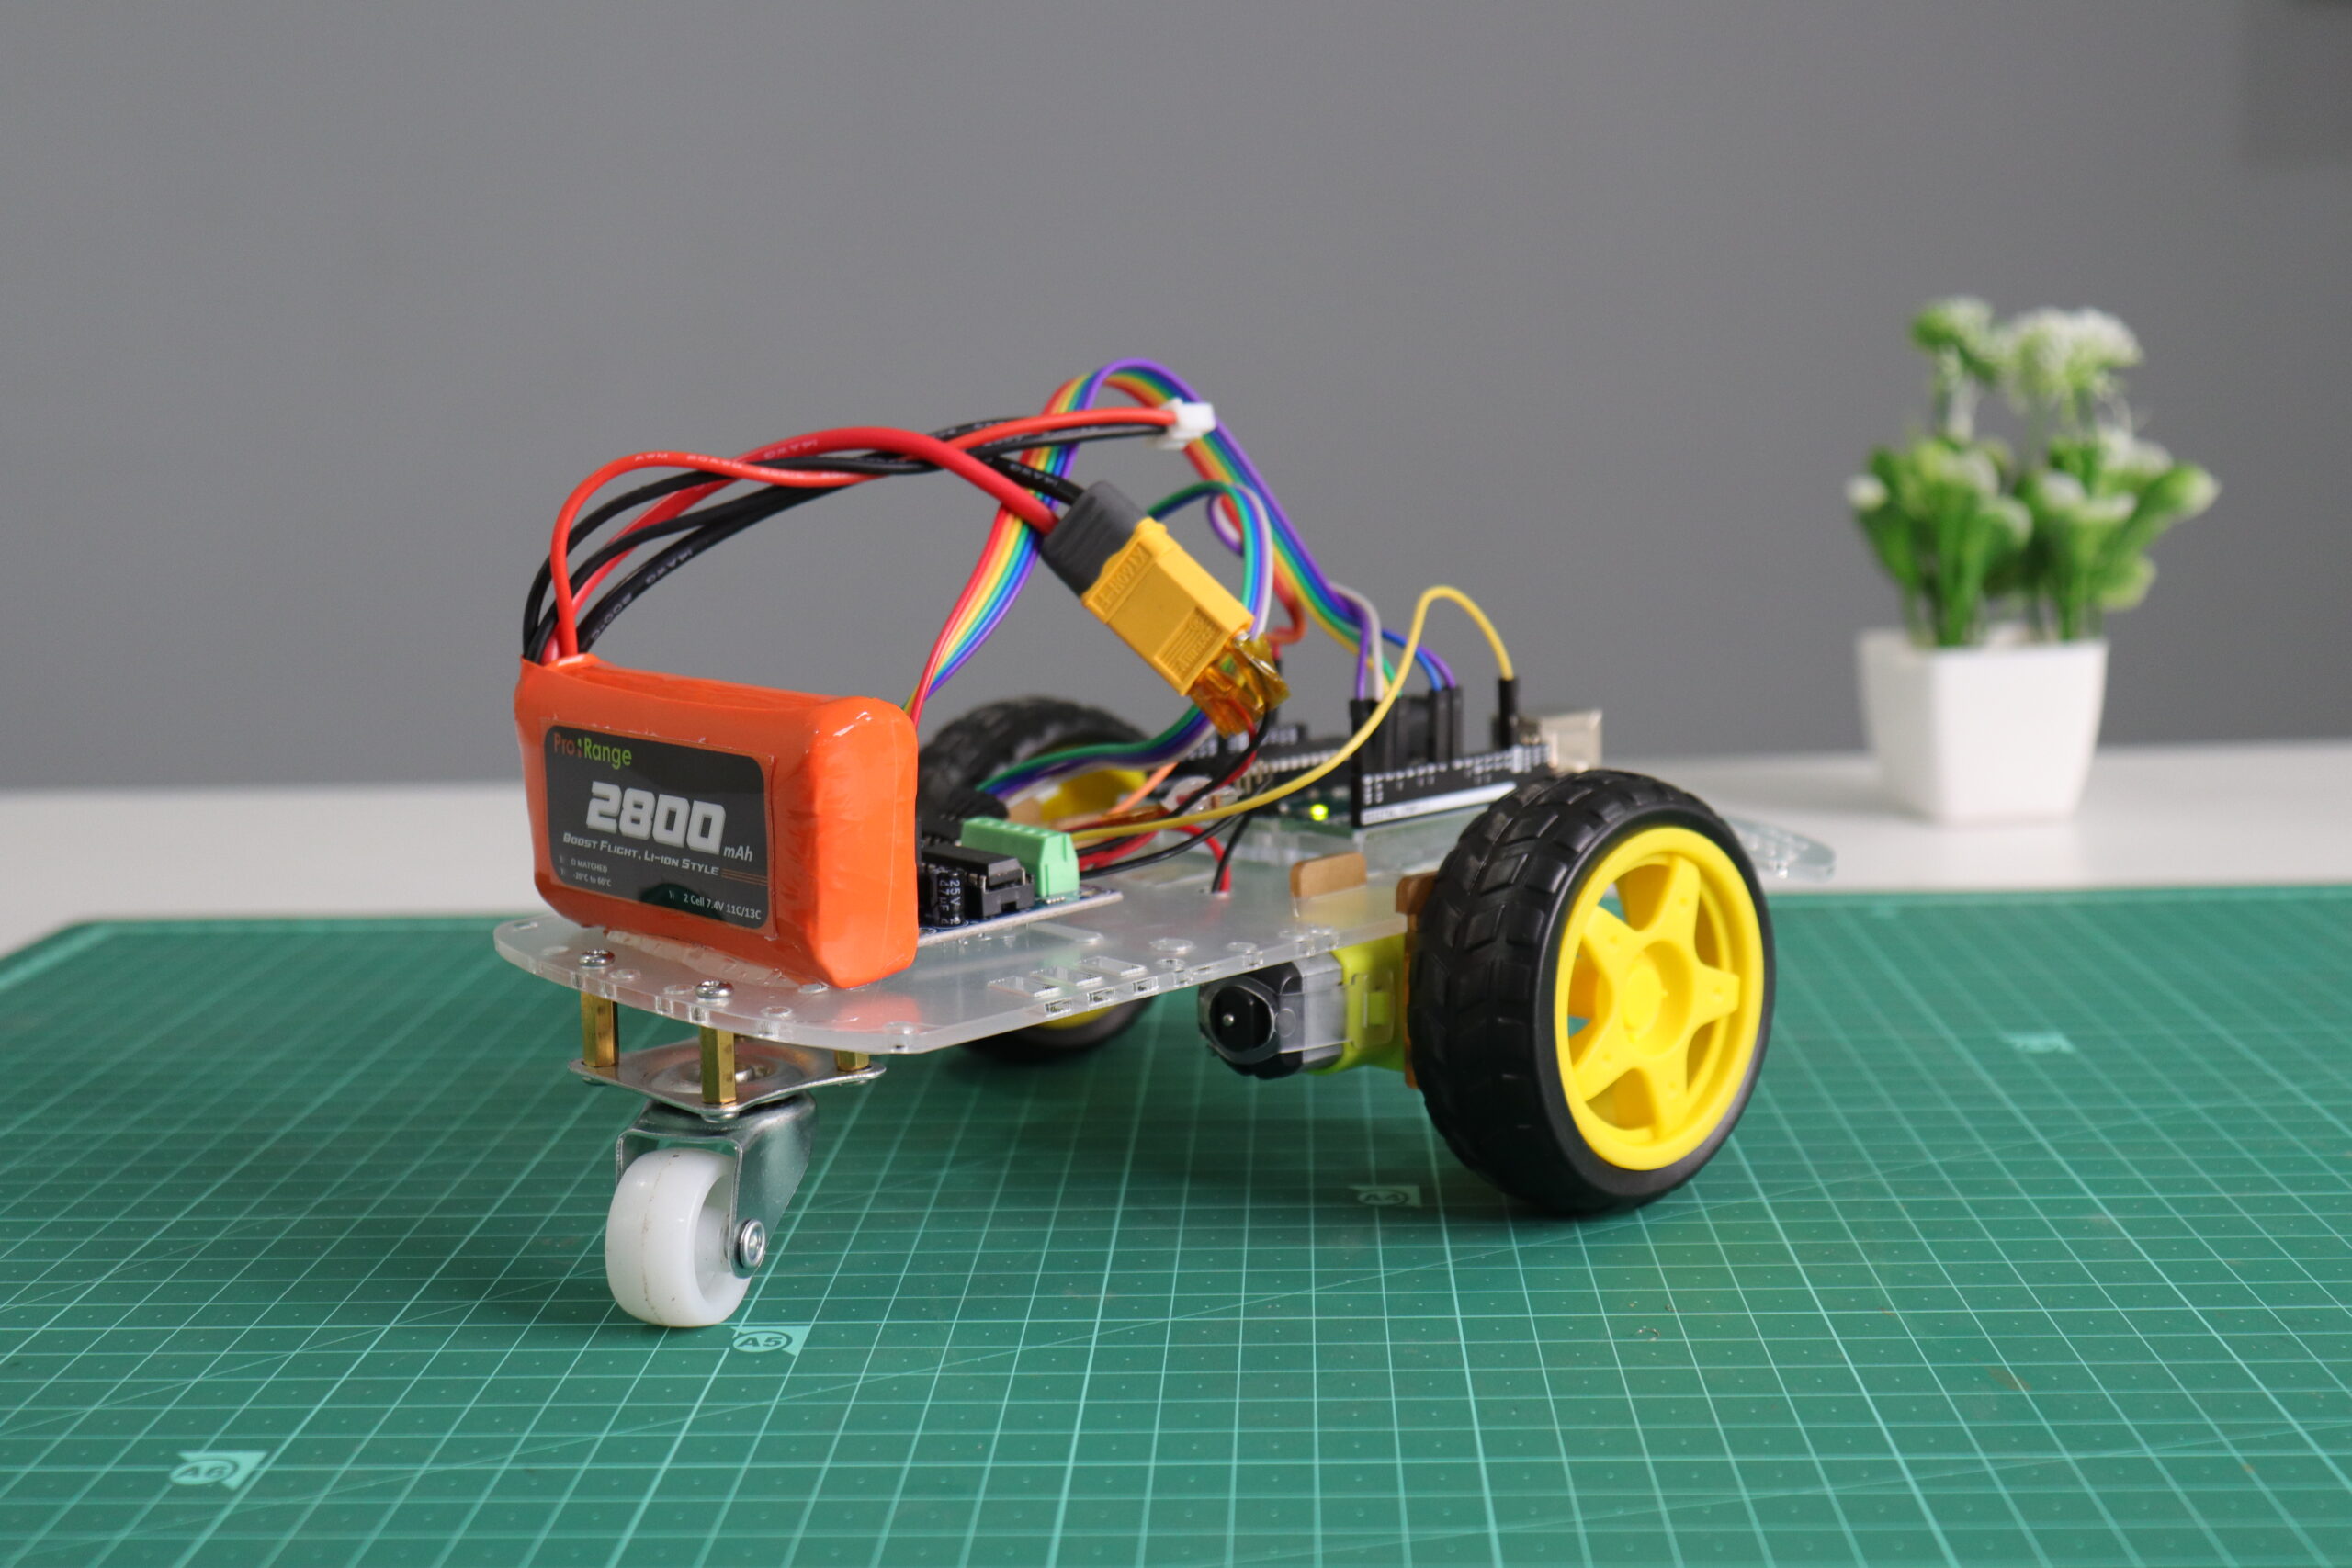
- Attach the motors to the car chassis and connect them to the motor driver.
- Mount the Arduino and HC-05 module on the chassis.
- Connect the motors driver to the Arduino according to the circuit diagram.
- Ensure the power supply is properly connected to the motor driver and Arduino.
Code
Code link: https://github.com/Robu-In/Bluetooth-car
// Define motor pins
const int motor1Pin1 = 2; // IN1 for Motor 1
const int motor1Pin2 = 3; // IN2 for Motor 1
const int motor1En = 5;   // ENA for Motor 1 (PWM)

const int motor2Pin1 = 7; // IN3 for Motor 2
const int motor2Pin2 = 8; // IN4 for Motor 2
const int motor2En = 6;   // ENB for Motor 2 (PWM)

// Define LED pin
const int ledPin = 13;

int data;
int Speeed = 255; // Change this value between 0 to 255 for speed

void setup() {
  // Set up motor pins as outputs
  pinMode(motor1Pin1, OUTPUT);
  pinMode(motor1Pin2, OUTPUT);
  pinMode(motor1En, OUTPUT);

  pinMode(motor2Pin1, OUTPUT);
  pinMode(motor2Pin2, OUTPUT);
  pinMode(motor2En, OUTPUT);

  // Set up LED pin as output
  pinMode(ledPin, OUTPUT);

  // Initialize serial communication
  Serial.begin(9600);

  // Initialize motors and LED to off
  Stop();
  digitalWrite(ledPin, LOW);
}

void loop() {
  while (Serial.available() > 0) {
    data = Serial.read();
    Serial.println(data);

    // Motor control commands
    if (data == 'F') {
      forward();
    } else if (data == 'B') {
      back();
    } else if (data == 'L') {
      left();
    } else if (data == 'R') {
      right();
    } else if (data == 'T') {
      Stop();
    }

    // LED control commands
    if (data == 'A') {
      digitalWrite(ledPin, HIGH);
    } else if (data == 'B') {
      digitalWrite(ledPin, LOW);
    }
  }
}

// Motor control functions
void forward() {
  digitalWrite(motor1Pin1, HIGH);
  digitalWrite(motor1Pin2, LOW);
  analogWrite(motor1En, Speeed);

  digitalWrite(motor2Pin1, HIGH);
  digitalWrite(motor2Pin2, LOW);
  analogWrite(motor2En, Speeed);
}

void back() {
  digitalWrite(motor1Pin1, LOW);
  digitalWrite(motor1Pin2, HIGH);
  analogWrite(motor1En, Speeed);

  digitalWrite(motor2Pin1, LOW);
  digitalWrite(motor2Pin2, HIGH);
  analogWrite(motor2En, Speeed);
}

void left() {
  digitalWrite(motor1Pin1, LOW);
  digitalWrite(motor1Pin2, HIGH);
  analogWrite(motor1En, Speeed);

  digitalWrite(motor2Pin1, HIGH);
  digitalWrite(motor2Pin2, LOW);
  analogWrite(motor2En, Speeed);
}

void right() {
  digitalWrite(motor1Pin1, HIGH);
  digitalWrite(motor1Pin2, LOW);
  analogWrite(motor1En, Speeed);

  digitalWrite(motor2Pin1, LOW);
  digitalWrite(motor2Pin2, HIGH);
  analogWrite(motor2En, Speeed);
}

void Stop() {
  digitalWrite(motor1Pin1, LOW);
  digitalWrite(motor1Pin2, LOW);
  analogWrite(motor1En, 0);

  digitalWrite(motor2Pin1, LOW);
  digitalWrite(motor2Pin2, LOW);
  analogWrite(motor2En, 0);
}
Working
- Turn on the power supply to the Arduino and motor driver.
- Pair the smartphone with the HC-05 Bluetooth module.
- Control opens the Bluetooth terminal app on the smartphone and connects to the HC-05 module.
- Send command to control the car:
- F to move forward
- B to move backward
- L to turn left
- R to turn right
- T to stop
Conclusion
This project is an excellent way to learn about wireless communication and motor control with microcontrollers.by following this blog anyone can create a Bluetooth controlled car using Arduino and HC-05 Bluetooth module.
Watch related videos here- https://www.youtube.com/@RobuInlabs
Related blog blogs - https://robu.in/category/blogs/





satish
Monday, March 3, 2025