Hope that you should have gone through the initial raspberry pi setup as given in our previous tutorials : - )
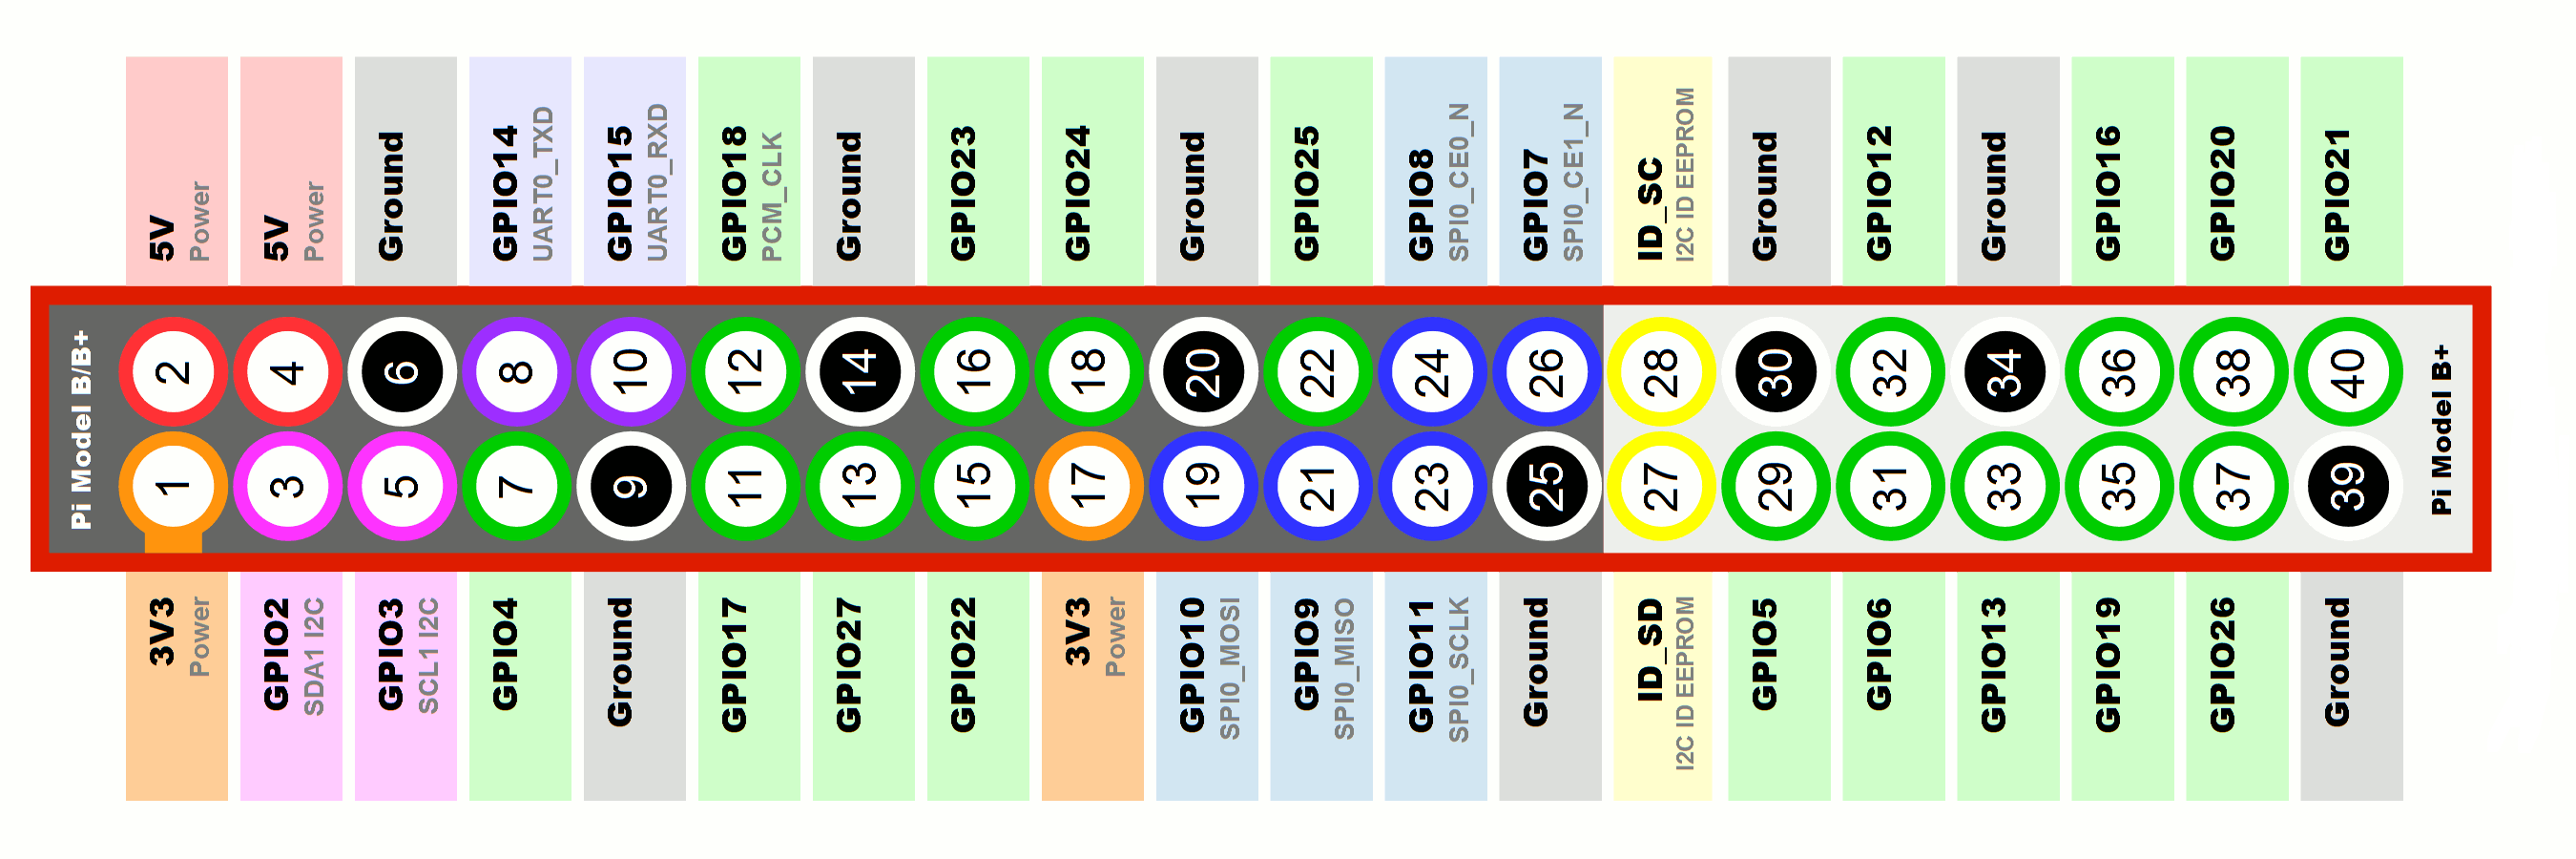
Raspberry Pi 3 B+ have a total of 40 GPIO pins
 Above image properly mentions pin configuration of the Raspberry Pi 3 B+, now explaining it briefly -
- Voltage Pins - Two 5V ( pin 2 and 4 ) pins and two 3V3 ( pin 1 and 17 ) pins are present on the board, as well as a number of ground pins i.e 0V ( pin 6,9,14,20,25,30,34 and 39 ) which are unconfigurable. The remaining pins are all general purpose 3V3 pins, meaning outputs are set to 3V3 and inputs are 3V3-tolerant.
- Outputs - A GPIO pin designated as an output pin can be set to high (3V3) or low (0V).
- Inputs - A GPIO pin designated as an input pin can be read as high (3V3) or low (0V). This is made easier with the use of internal pull-up or pull-down resistors. Pins GPIO2 and GPIO3 have fixed pull-up resistors, but for other pins this can be configured in software.
- More - As well as simple input and output devices, the GPIO pins can be used with a variety of alternative functions, some are available on all pins, others on specific pins.
- PWM (pulse-width modulation)
- Software PWM available on all pins
- Hardware PWM available on GPIO12, GPIO13, GPIO18, GPIO19
- SPI
- SPI0: MOSI (GPIO10); MISO (GPIO9); SCLK (GPIO11); CE0 (GPIO8), CE1 (GPIO7)
- SPI1: MOSI (GPIO20); MISO (GPIO19); SCLK (GPIO21); CE0 (GPIO18); CE1 (GPIO17); CE2 (GPIO16)
- I2C
- Data: (GPIO2); Clock (GPIO3)
- EEPROM Data: (GPIO0); EEPROM Clock (GPIO1)
- Serial (UART)
You can also visit :
https://pinout.xyz/ for more detailed Information
Blinking LED using GPIO pin -
Step 1 - Connections
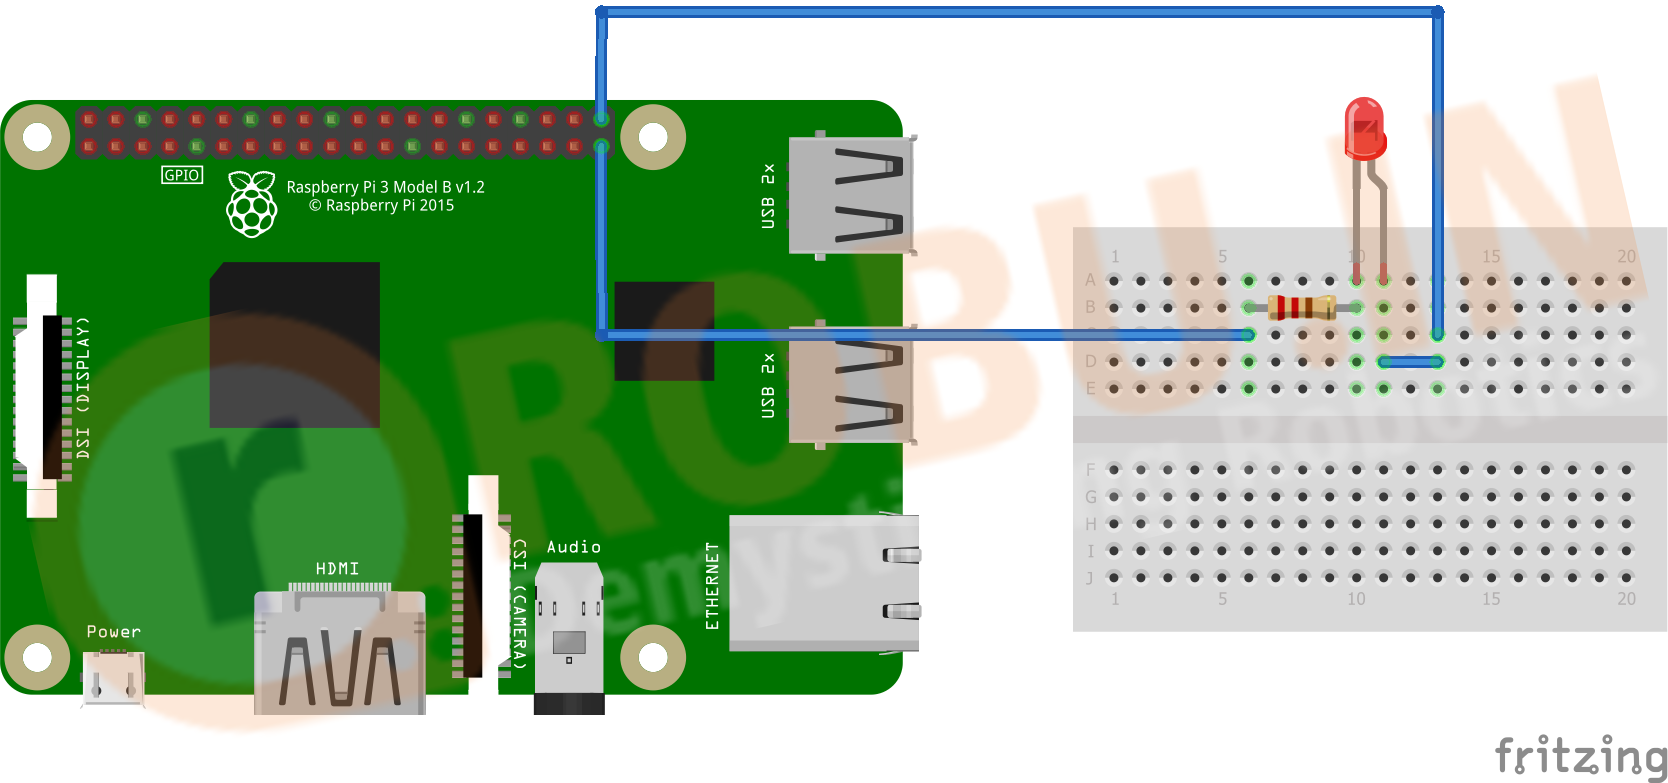
Here we will be using GPIO 21 or pin no. 40 to make the LED blink. Ground ( 0V) at pin 39 will be used to provide ground with a resistance ( 270,330,1k ohm ) in series to LED. Make connection by referring the Diagram below -
Step 2 - Writing Python code on Python 3(IDLE)
- Open Python 3 (IDLE) in your Raspberry Pi

- Now Create a new file. And add the code import RPi.GPIO as GPIO # Importing GPIO library
import time
LedPin = 40 # Defining pin40 as LedPin
def setup():
GPIO.setmode(GPIO.BOARD) # Numbers GPIOs by physical location
GPIO.setup(LedPin, GPIO.OUT) # Set LedPin's mode is output
GPIO.output(LedPin, GPIO.HIGH) # Set LedPin high(+3.3V) to turn on led
def blink():
while True:
GPIO.output(LedPin, GPIO.HIGH) # led on
time.sleep(1) # keeping it in previous state for 1 sec
GPIO.output(LedPin, GPIO.LOW) # led off
time.sleep(1) # keeping it in previous state for 1 sec
def destroy():
GPIO.output(LedPin, GPIO.LOW) # led off
GPIO.cleanup() # Release resource
if __name__ == '__main__': # Program start from here
setup()
try:
blink()
except KeyboardInterrupt: # When 'Ctrl+C' is pressed, the child program destroy() will be executed.
destroy()<code></code>
Save the code as blink.py
- Now open the terminal and type sudo python blink.py , such command is used to run any python file via terminal
- You can press "Ctrl+C" to stop the program.



 Sell on Robu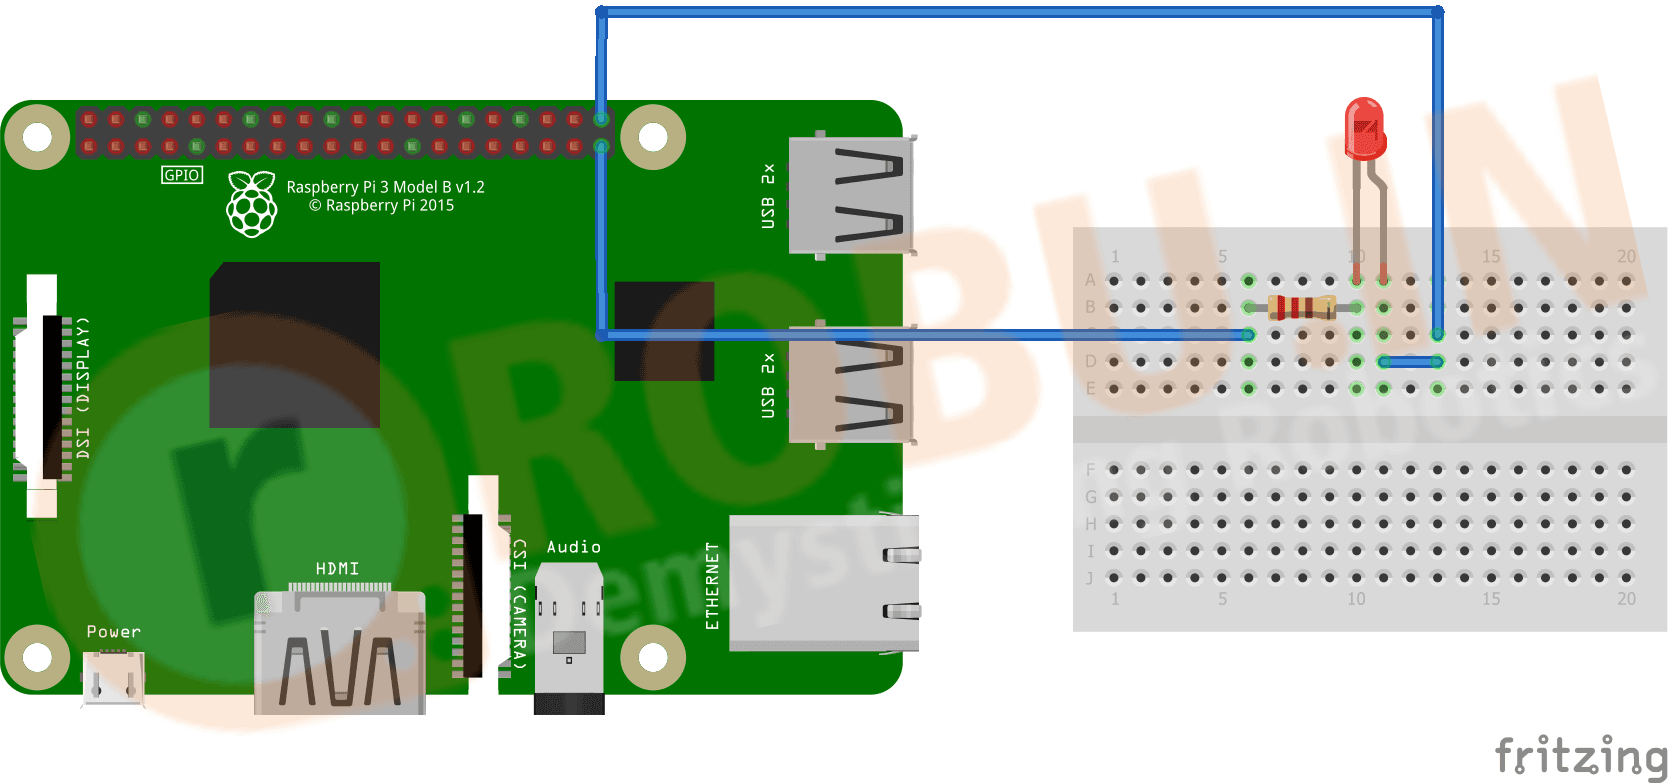


 Above image properly mentions pin configuration of the Raspberry Pi 3 B+, now explaining it briefly -





Leave a Comment Your email address will not be published. Required fields are marked*