
Hello everyone welcome to the blog in this blog you will get all the information about SmartElex sensors . That are capacitive sensor, an imaging sensor, an IR sensor, a distance

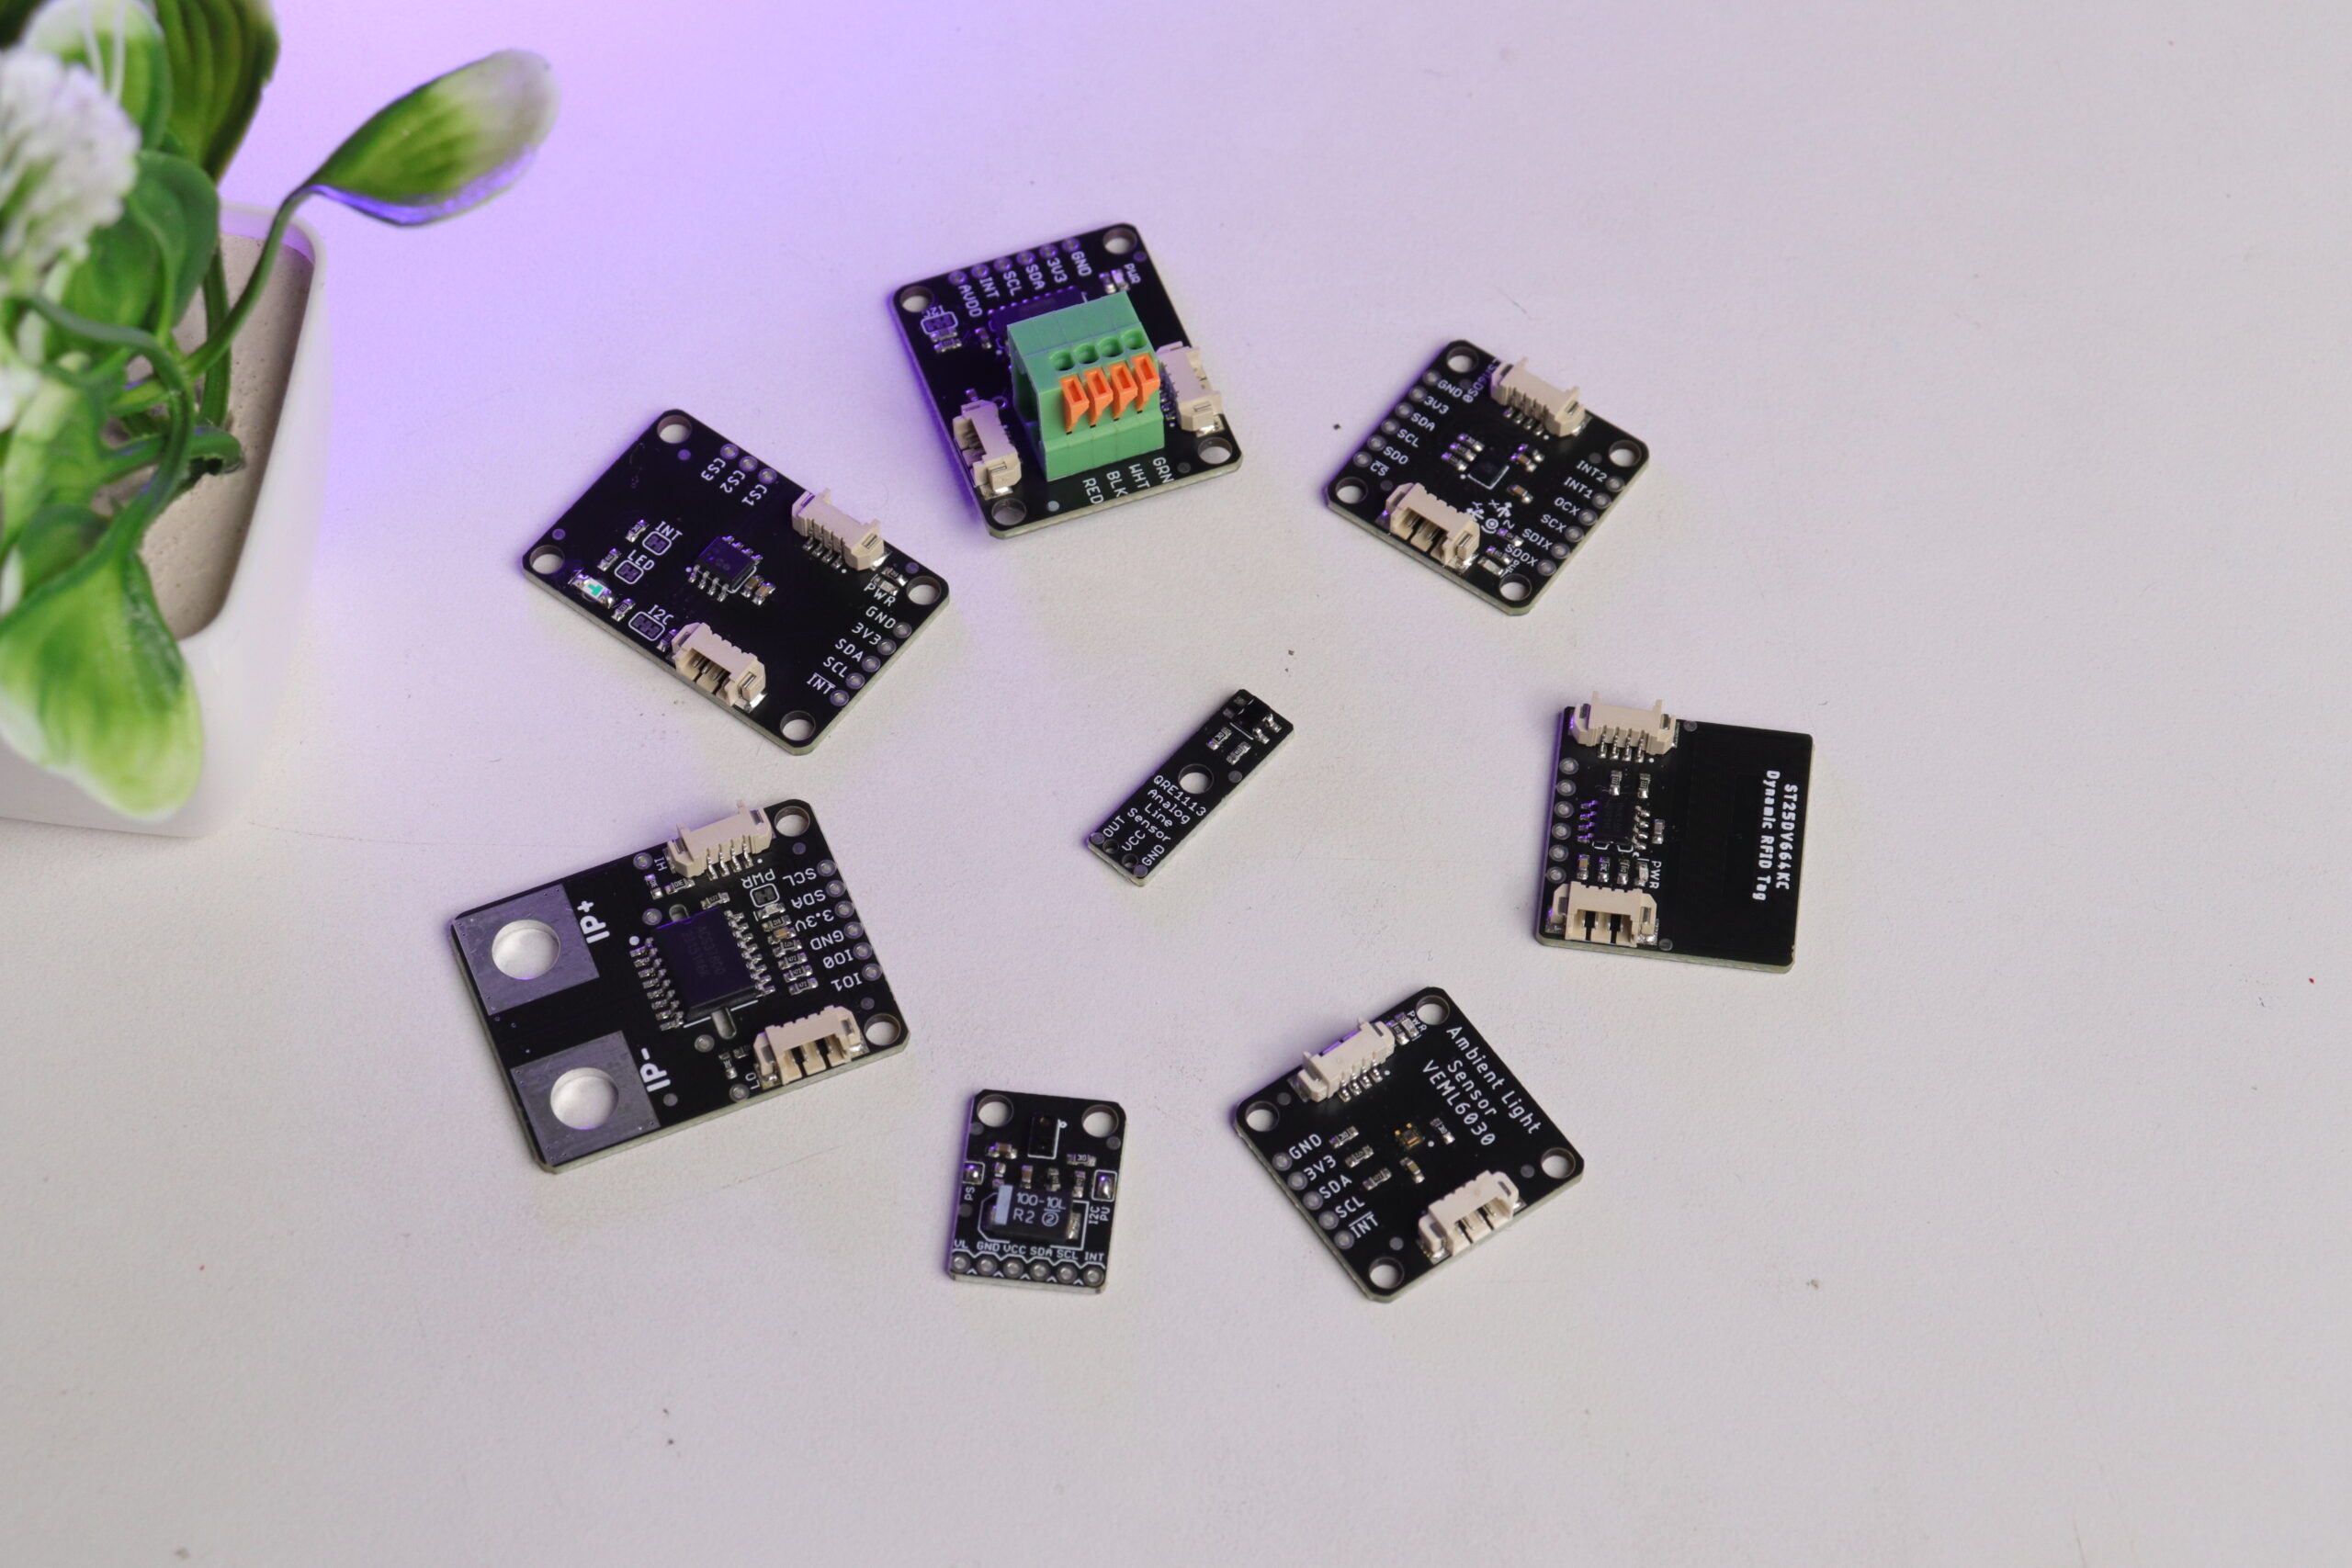
Hello everyone welcome to the blog in this blog you will get all the information about SmartElex sensors .
That are capacitive sensor, an imaging sensor, an IR sensor, a distance sensor, an RFID sensor, a movement sensor, a force sensor, and a current sensor.
Which are new Sensors
- SmartElex Imaging sensor (VEML6030)
- SmartElex Capacitive sensor (CAP1203)
- SmartElex Movement Sensor (LSM 6DSO)
- SmartElex IR/Line Sensor (QRE1113)
- SmartElex Distance sensor (APDS 9960)
- SmartElex Flex/ Force sensor (NAU7802)
- SmartElex Current Sensor (ACS37800)
- SmartElex RFID Tag (ST25DV64KC)
Software requirement
Hardware requirement
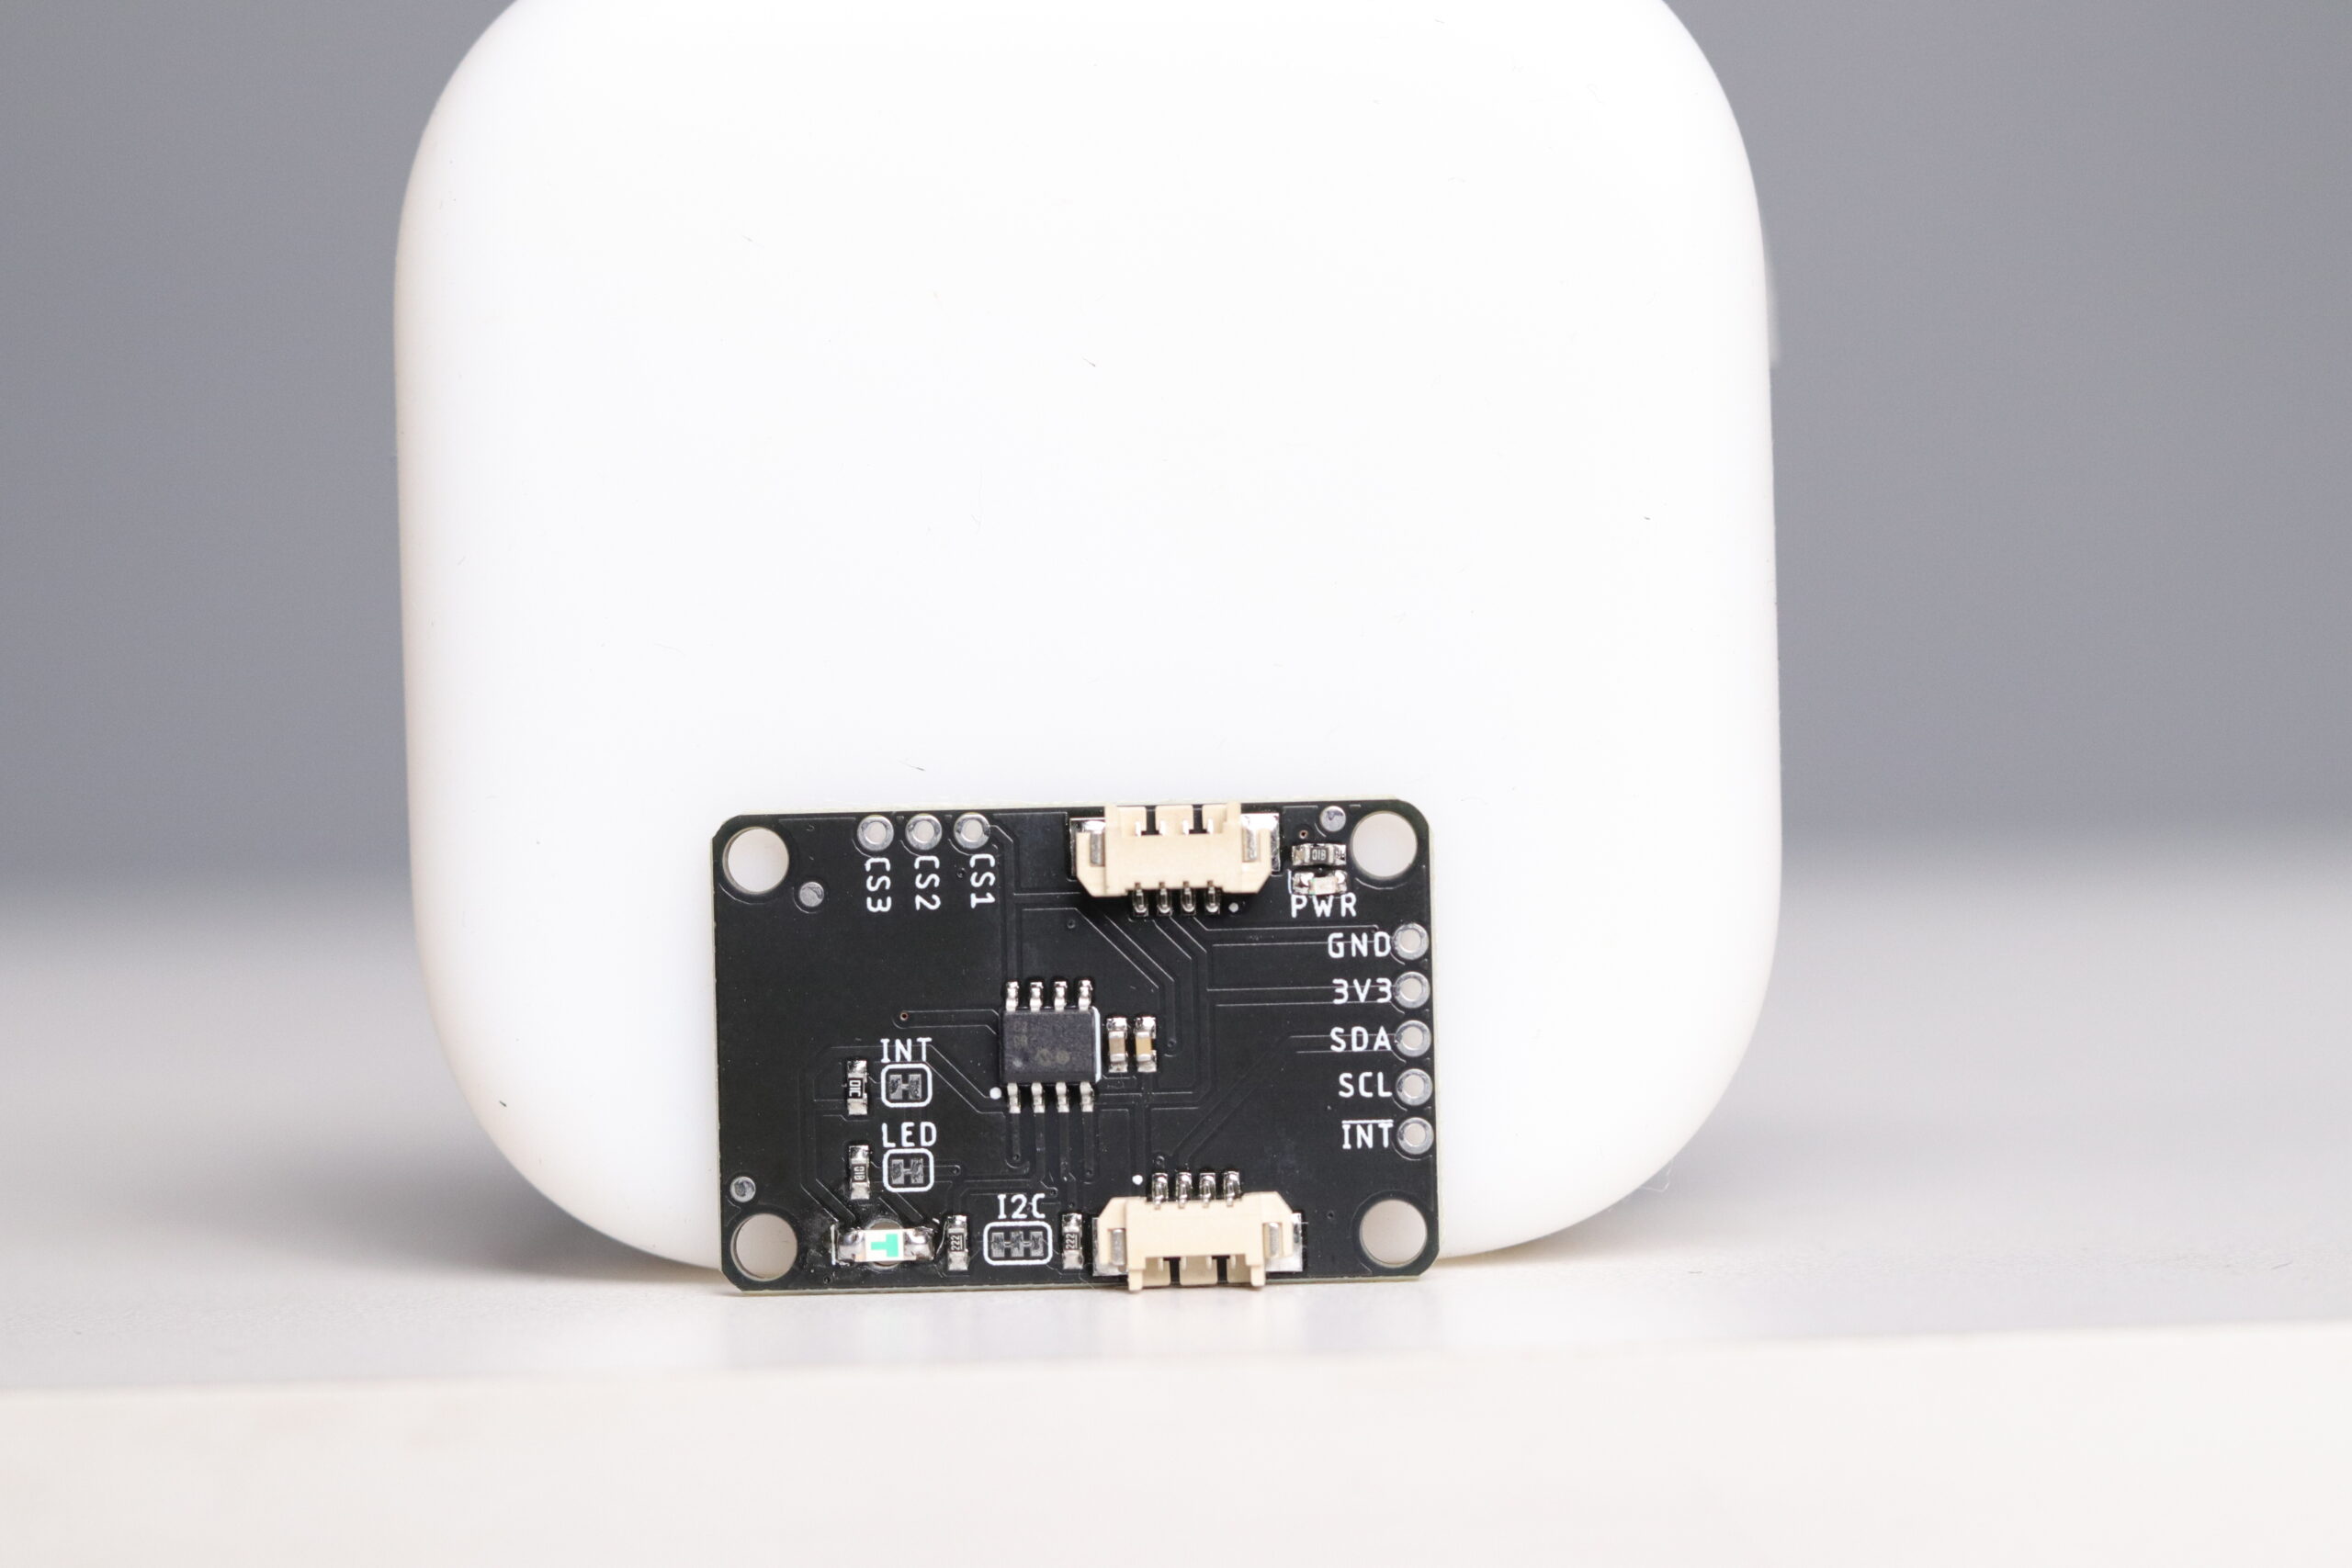
SmartElex Capacitive sensor (CAP1203)
It is based on CAP1203 A multiple channel capacitive touch sensor controller and has 3 capacitive touch pads for input which gives so it can we used it as touch sensor or slider. It operated from3.3v to 5v and has two I2C pin ports which makes interfacing much easier.
To interface this board just connect I2C pins to the board
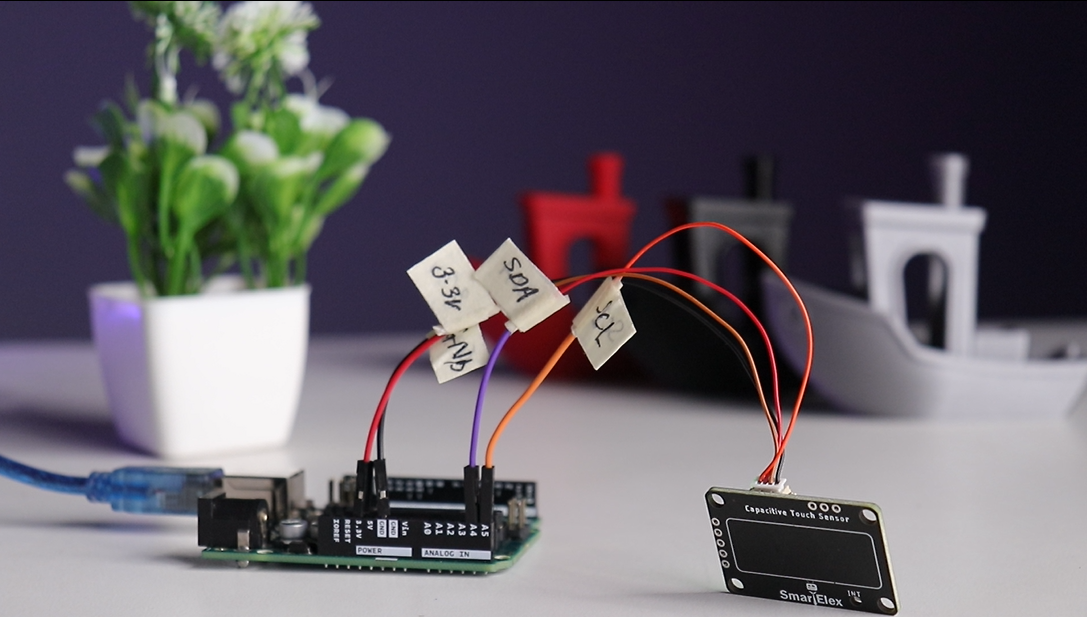
SCL-SCL
SDA-SDA
VCC-3.3V
GND –GND
Install the library for CAP1203
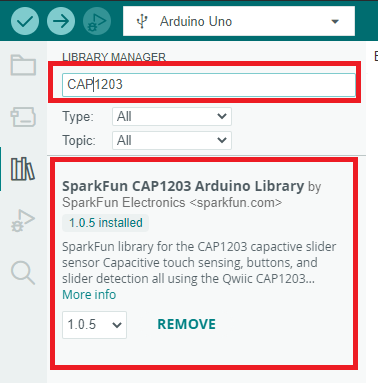
if you want get started there are various example code you can use them get start
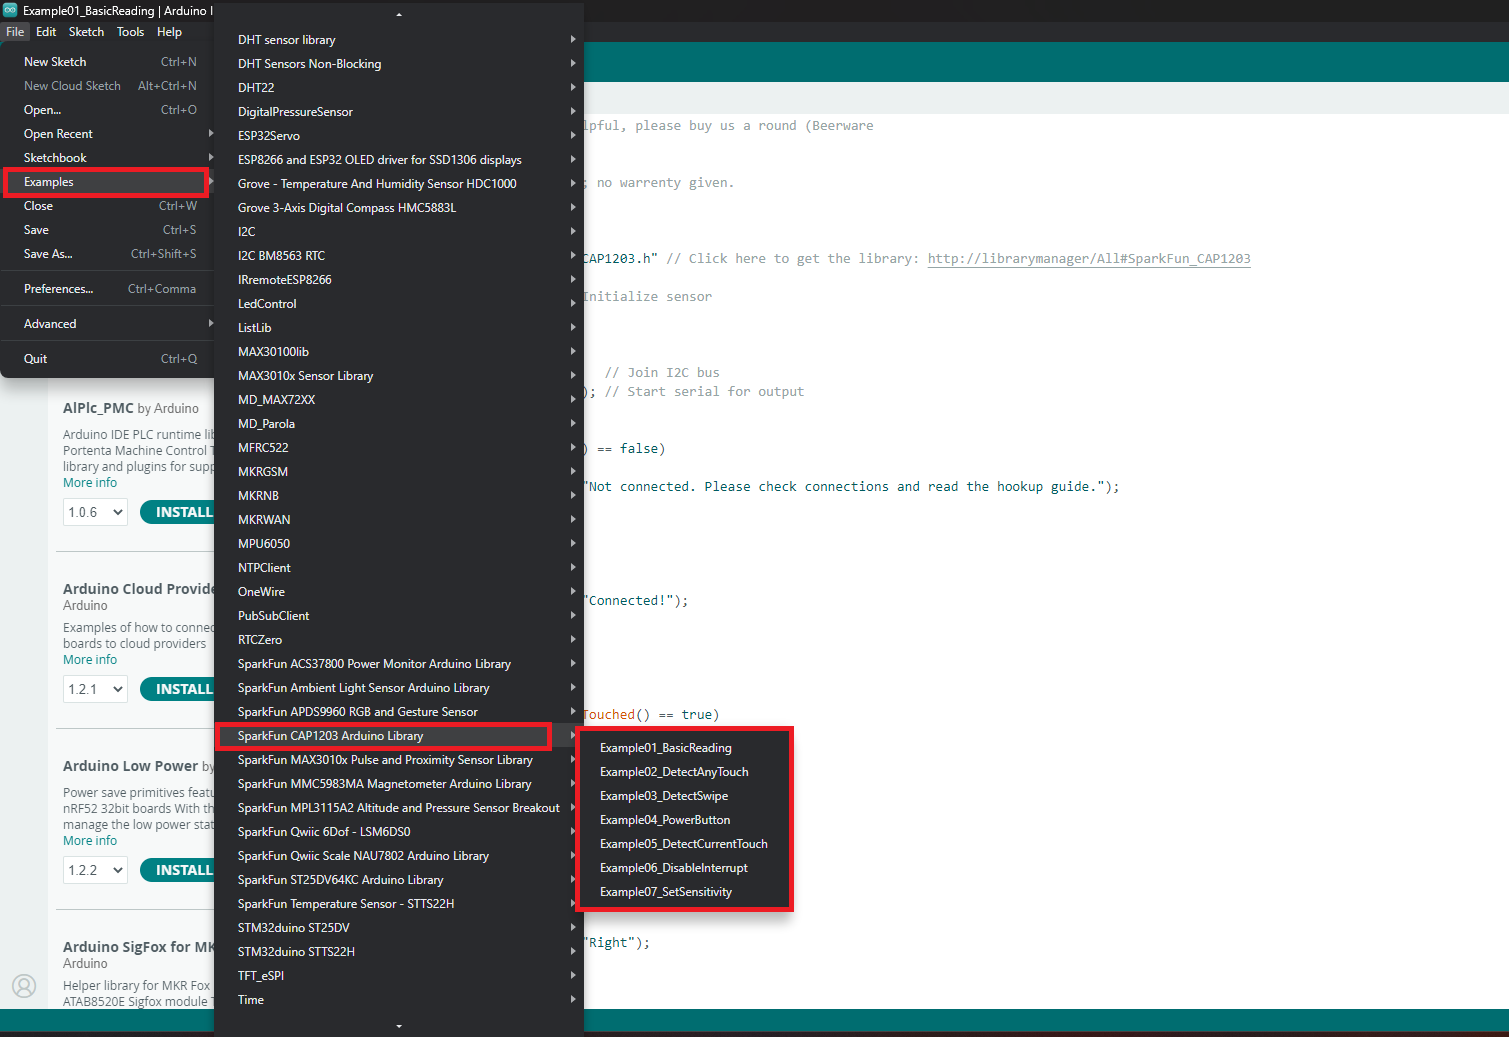
Like basic reading
Upload the code and sensor is interface
And as you touch different pad of sensor it gives the different output like if we touch left pad it display Left and if touch right it displays Right and for middle pad it display it Middle We can write or modify the code to use it according to your need.

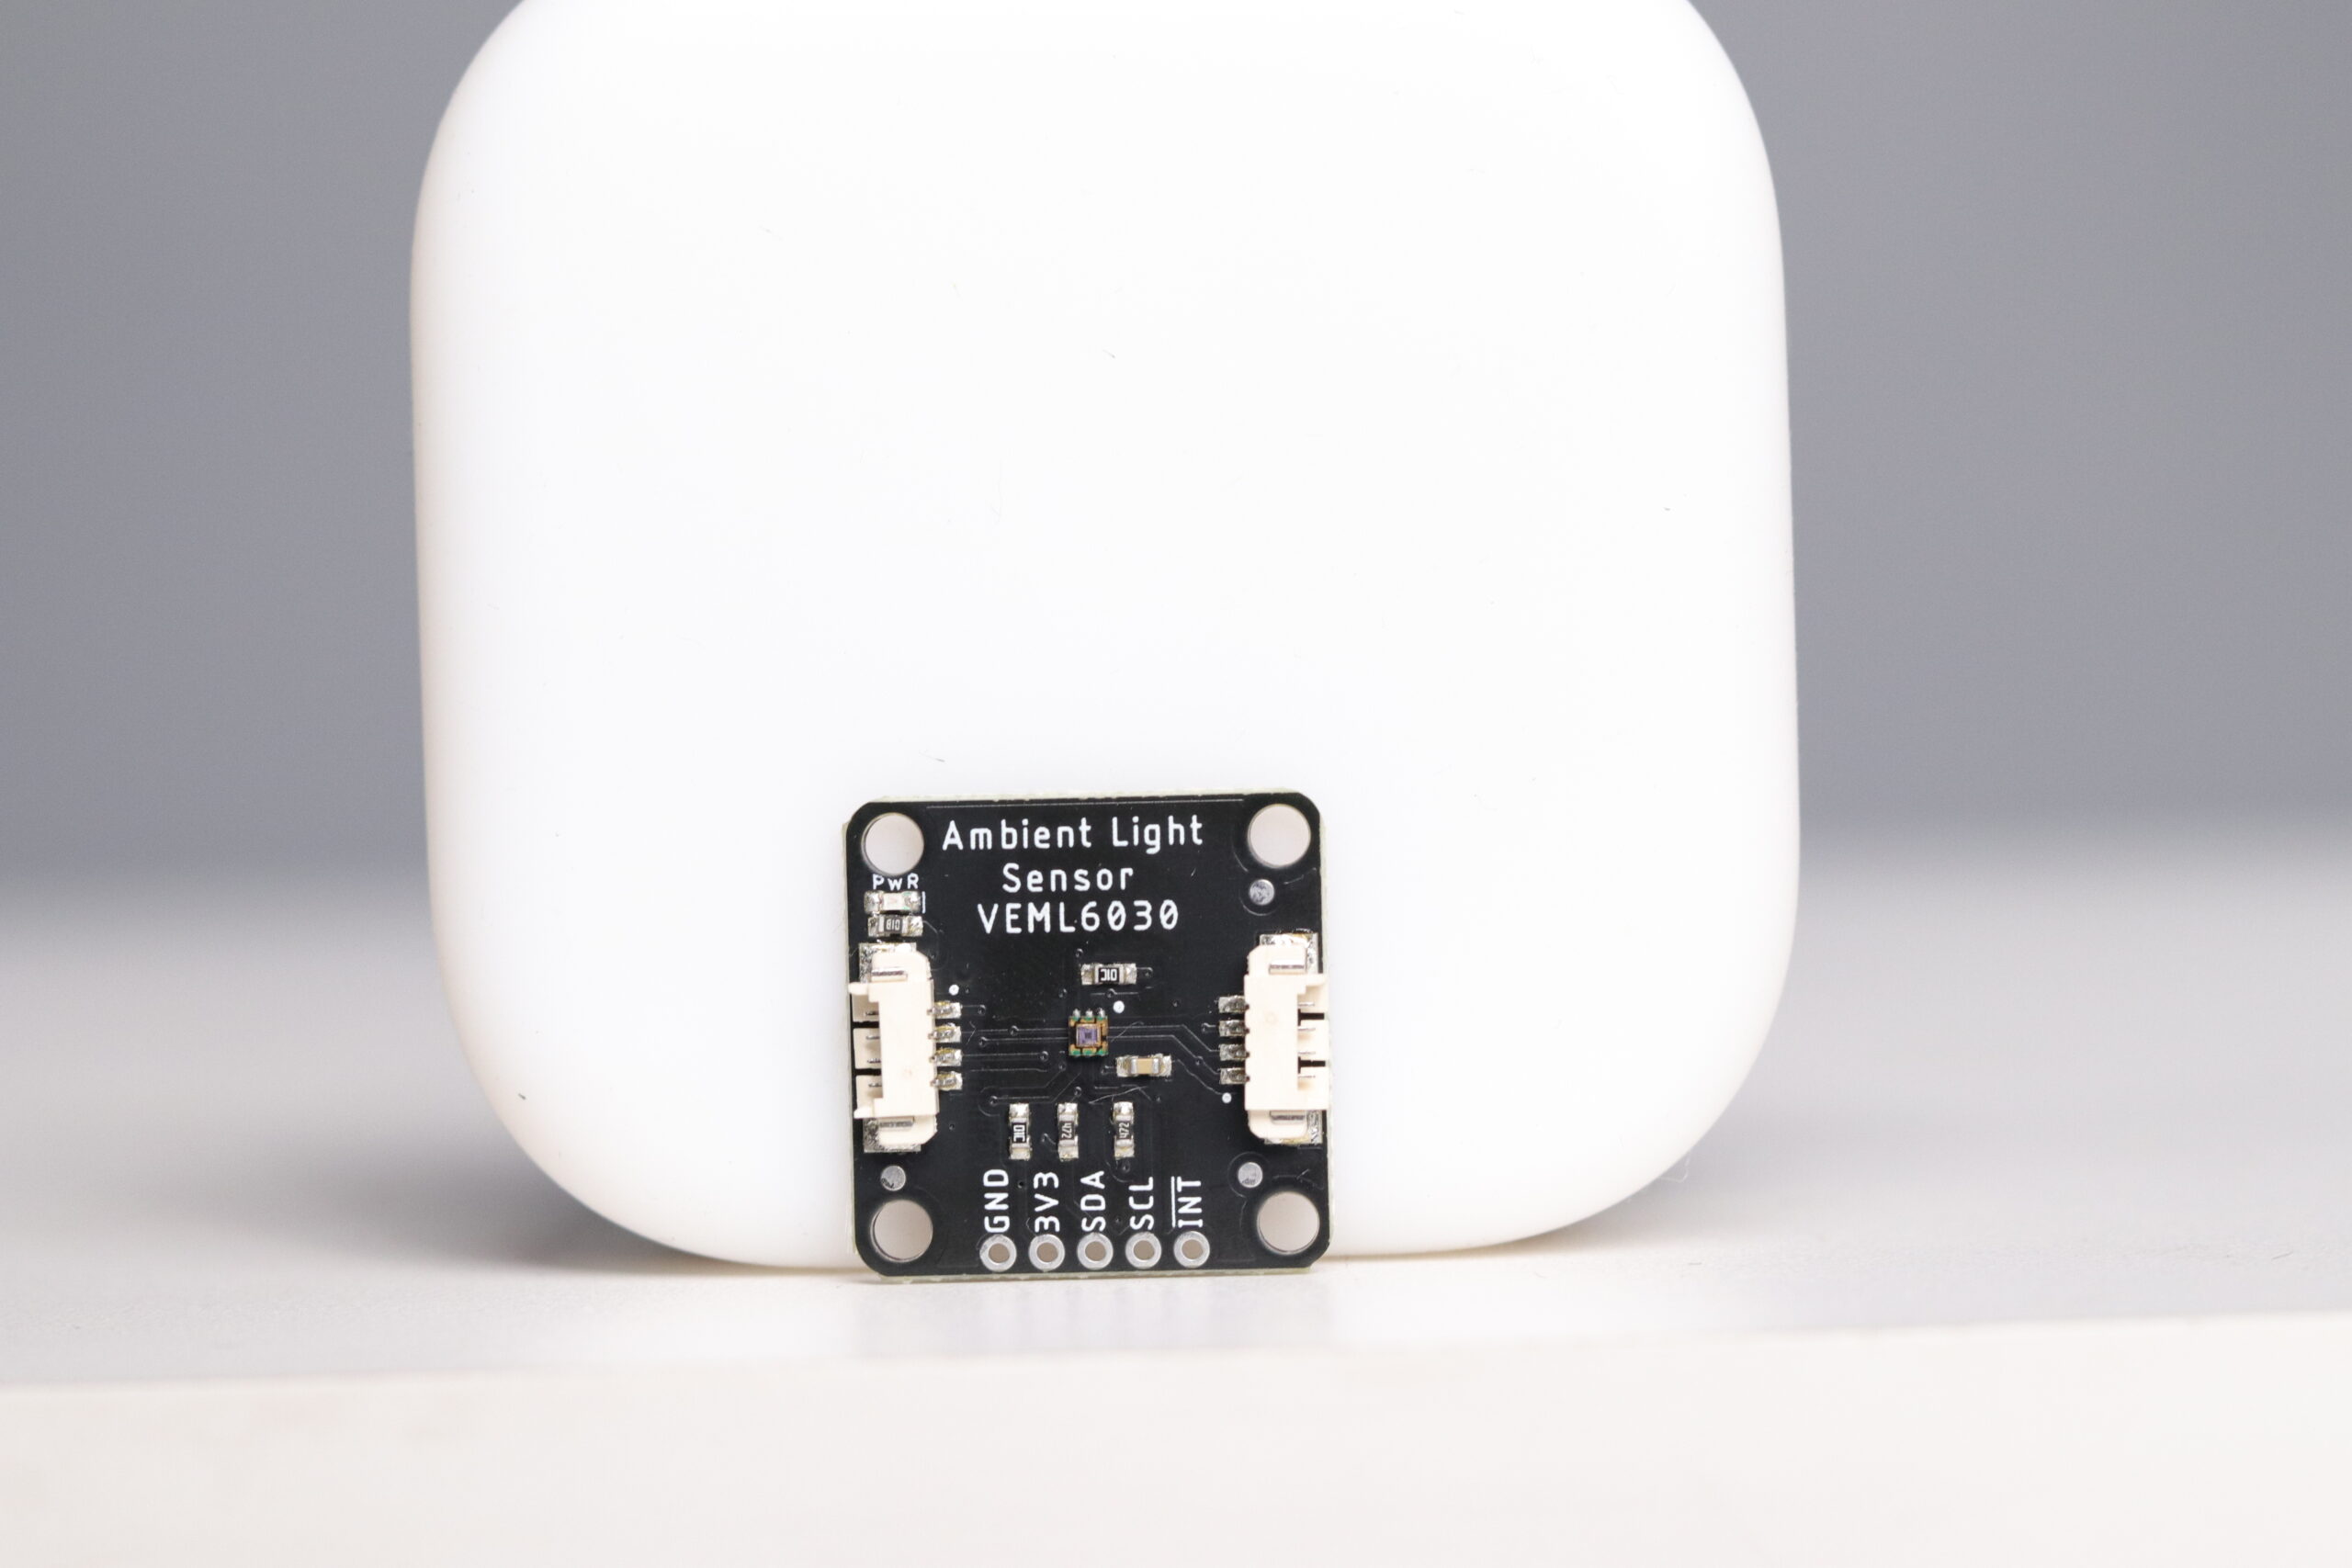
SmartElex Imaging sensor (VEML 6030)
Which has this VEML6030 High Accuracy Ambient Light Sensor with I2C Interface. Its operating voltage is up to 3.6v provides High Lux range 0 to 120,000 and has I2C connector for easy integration it also power saving modes.
For interfacing connect sensor to board using I2C connector and cable
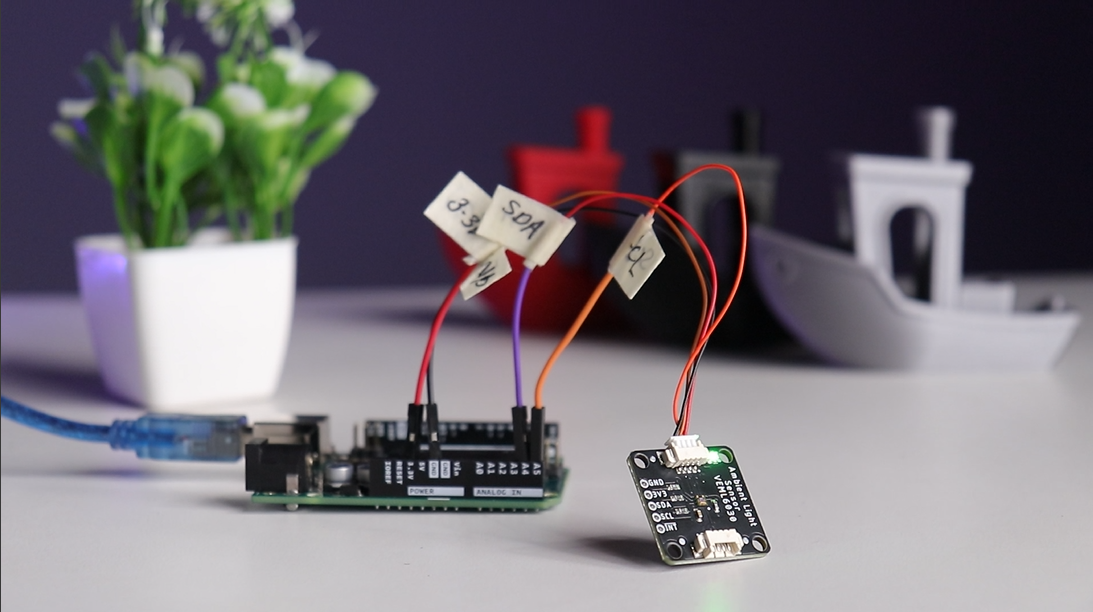
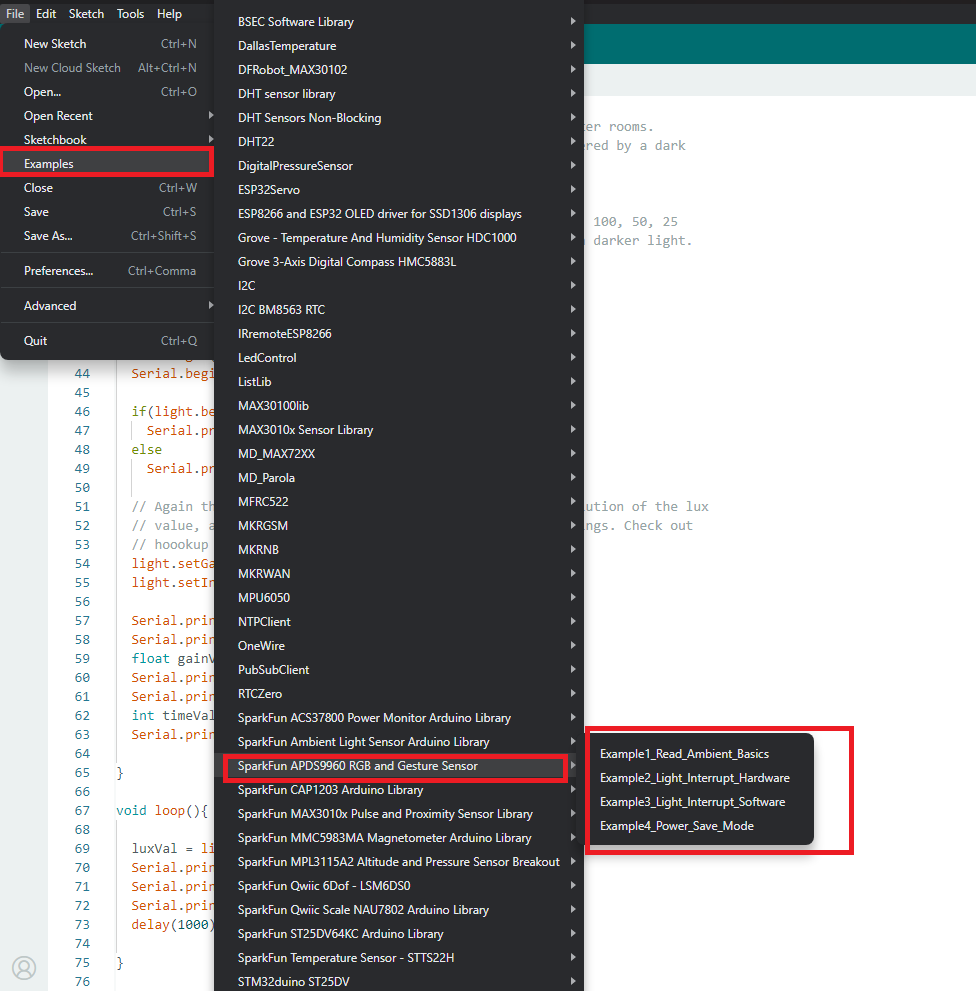
Install the required library for VEML 6030
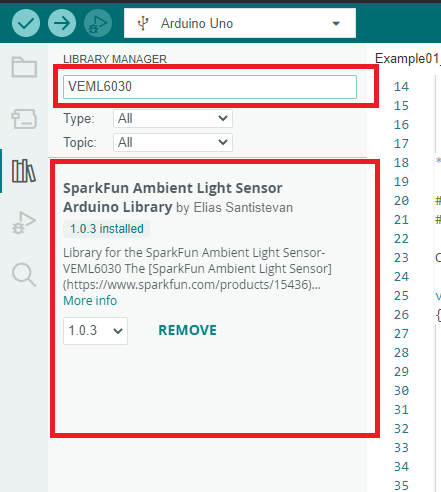
Open the example code for light detection
Upload the code
And sensor is interface
Open the serial monitor
Turn on flashlight above sensor reading of sensor will vary according to the intensity of the light
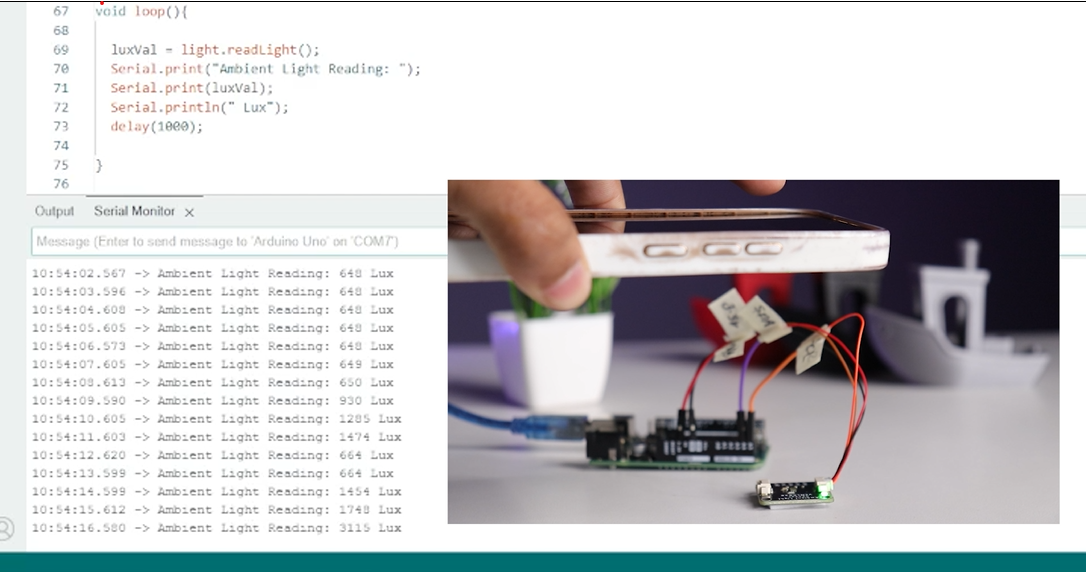
You can edit or write the code according to your need.
SmartElex IR/Line Sensor (QRE1113)
- It is a low current consumption simple three pin sensor based on (QRE1113) it operates rage is up to 5v for -40 to 85 C
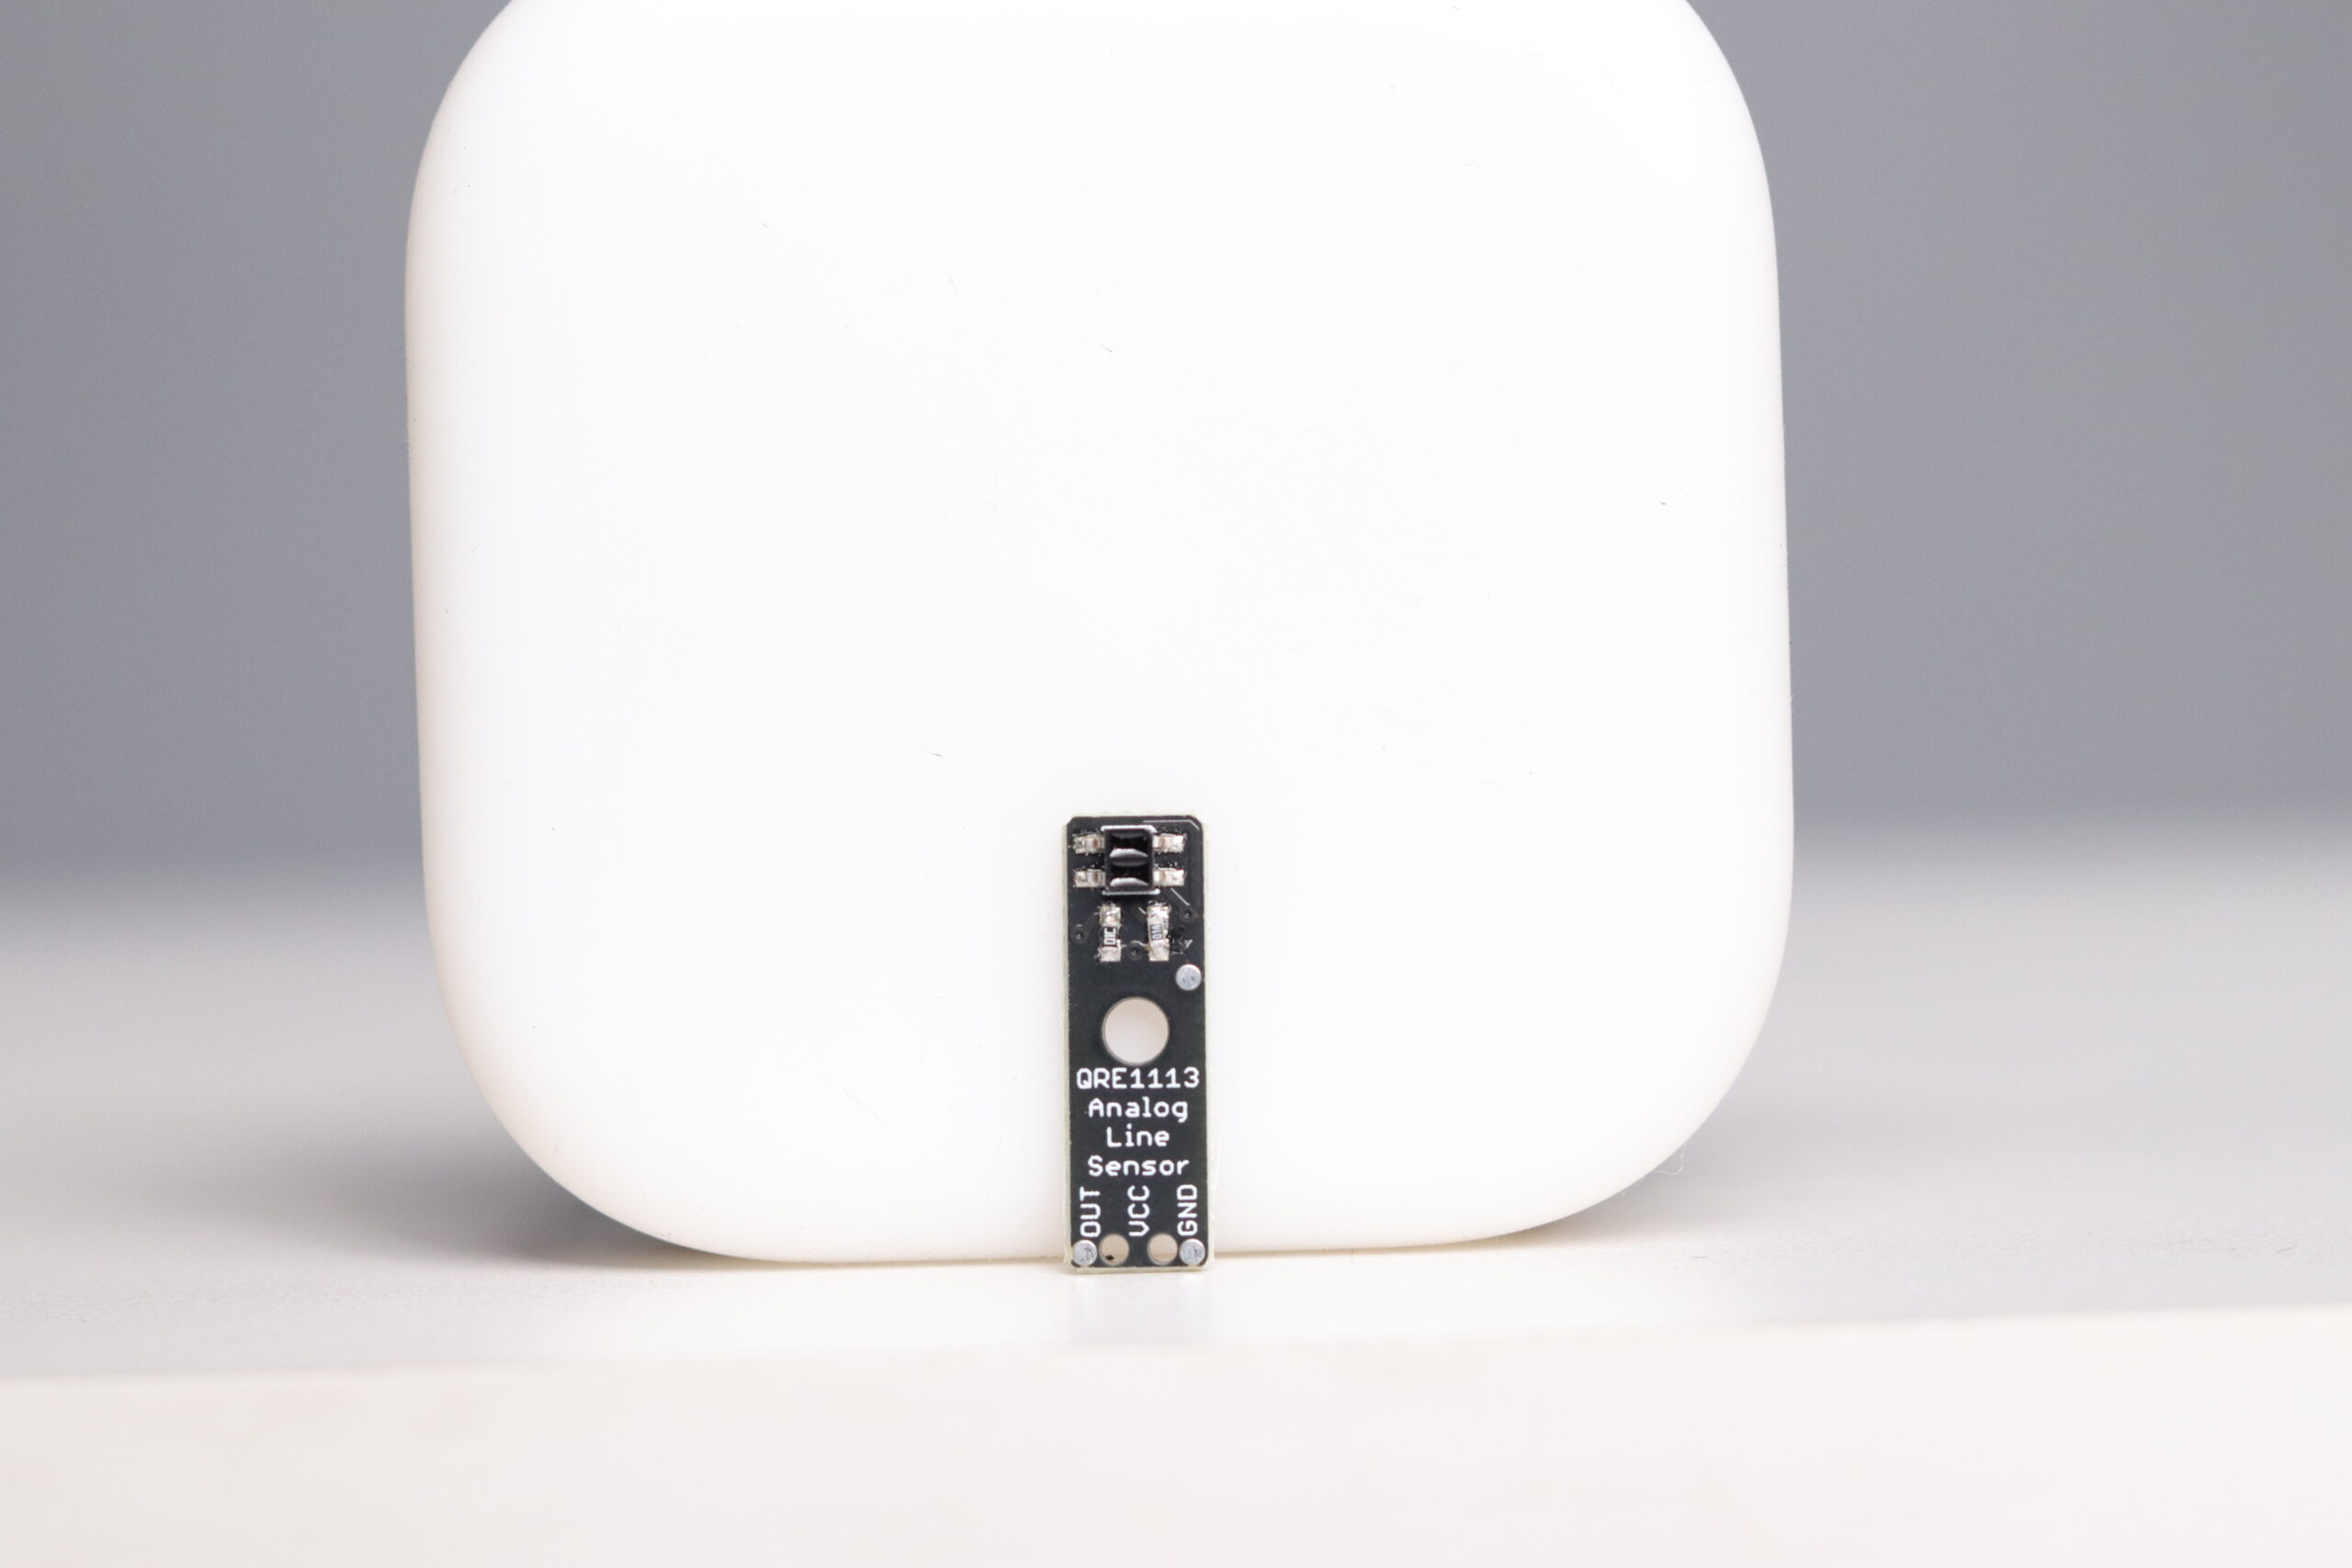
We can interface it using it three pins which are VCC, GND and OUT
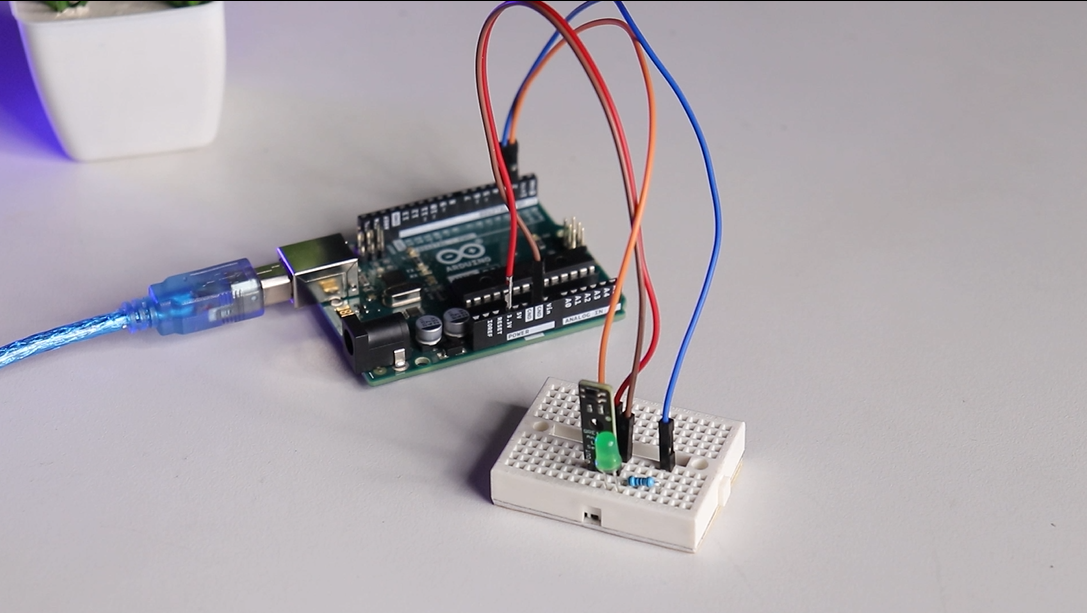
Connect VCC to 3.3v of board GND to GND and out pin to pin 2 of Arduino and connect the output led to pin 3 of Arduino
Write the code accordingly and upload it .
#define sensor 2
#define buzzer 4
#define red 5
#define green 3


void setup() {

  Serial.begin(9600);
  pinMode(sensor,INPUT);
  pinMode(buzzer,OUTPUT);
  pinMode(green,OUTPUT);
  pinMode(red,OUTPUT);
}

void loop() {

  bool value = digitalRead(sensor);
  Serial.print(value);

  if (value==0){
    digitalWrite(buzzer,HIGH);
    digitalWrite(green,HIGH);
    digitalWrite(red,LOW);

  }else if (value ==1){
      digitalWrite(buzzer,LOW);
    digitalWrite(green,LOW);
    digitalWrite(red,HIGH);
  }

}
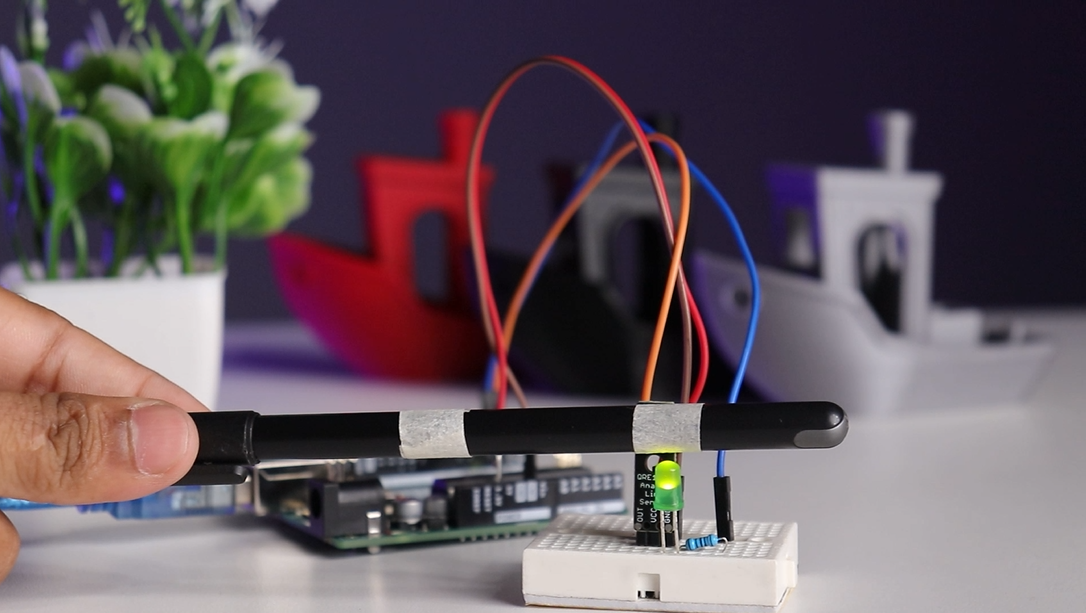
And here we can see that it and white strip appears eon black line sensor detects it and LED lights up
And line sensor is ready.
SmartElex Distance sensor (APDS 9960)
- It has APDS 9960 which can detect 6 Gesture and it also has Inbuilt proximity sensor
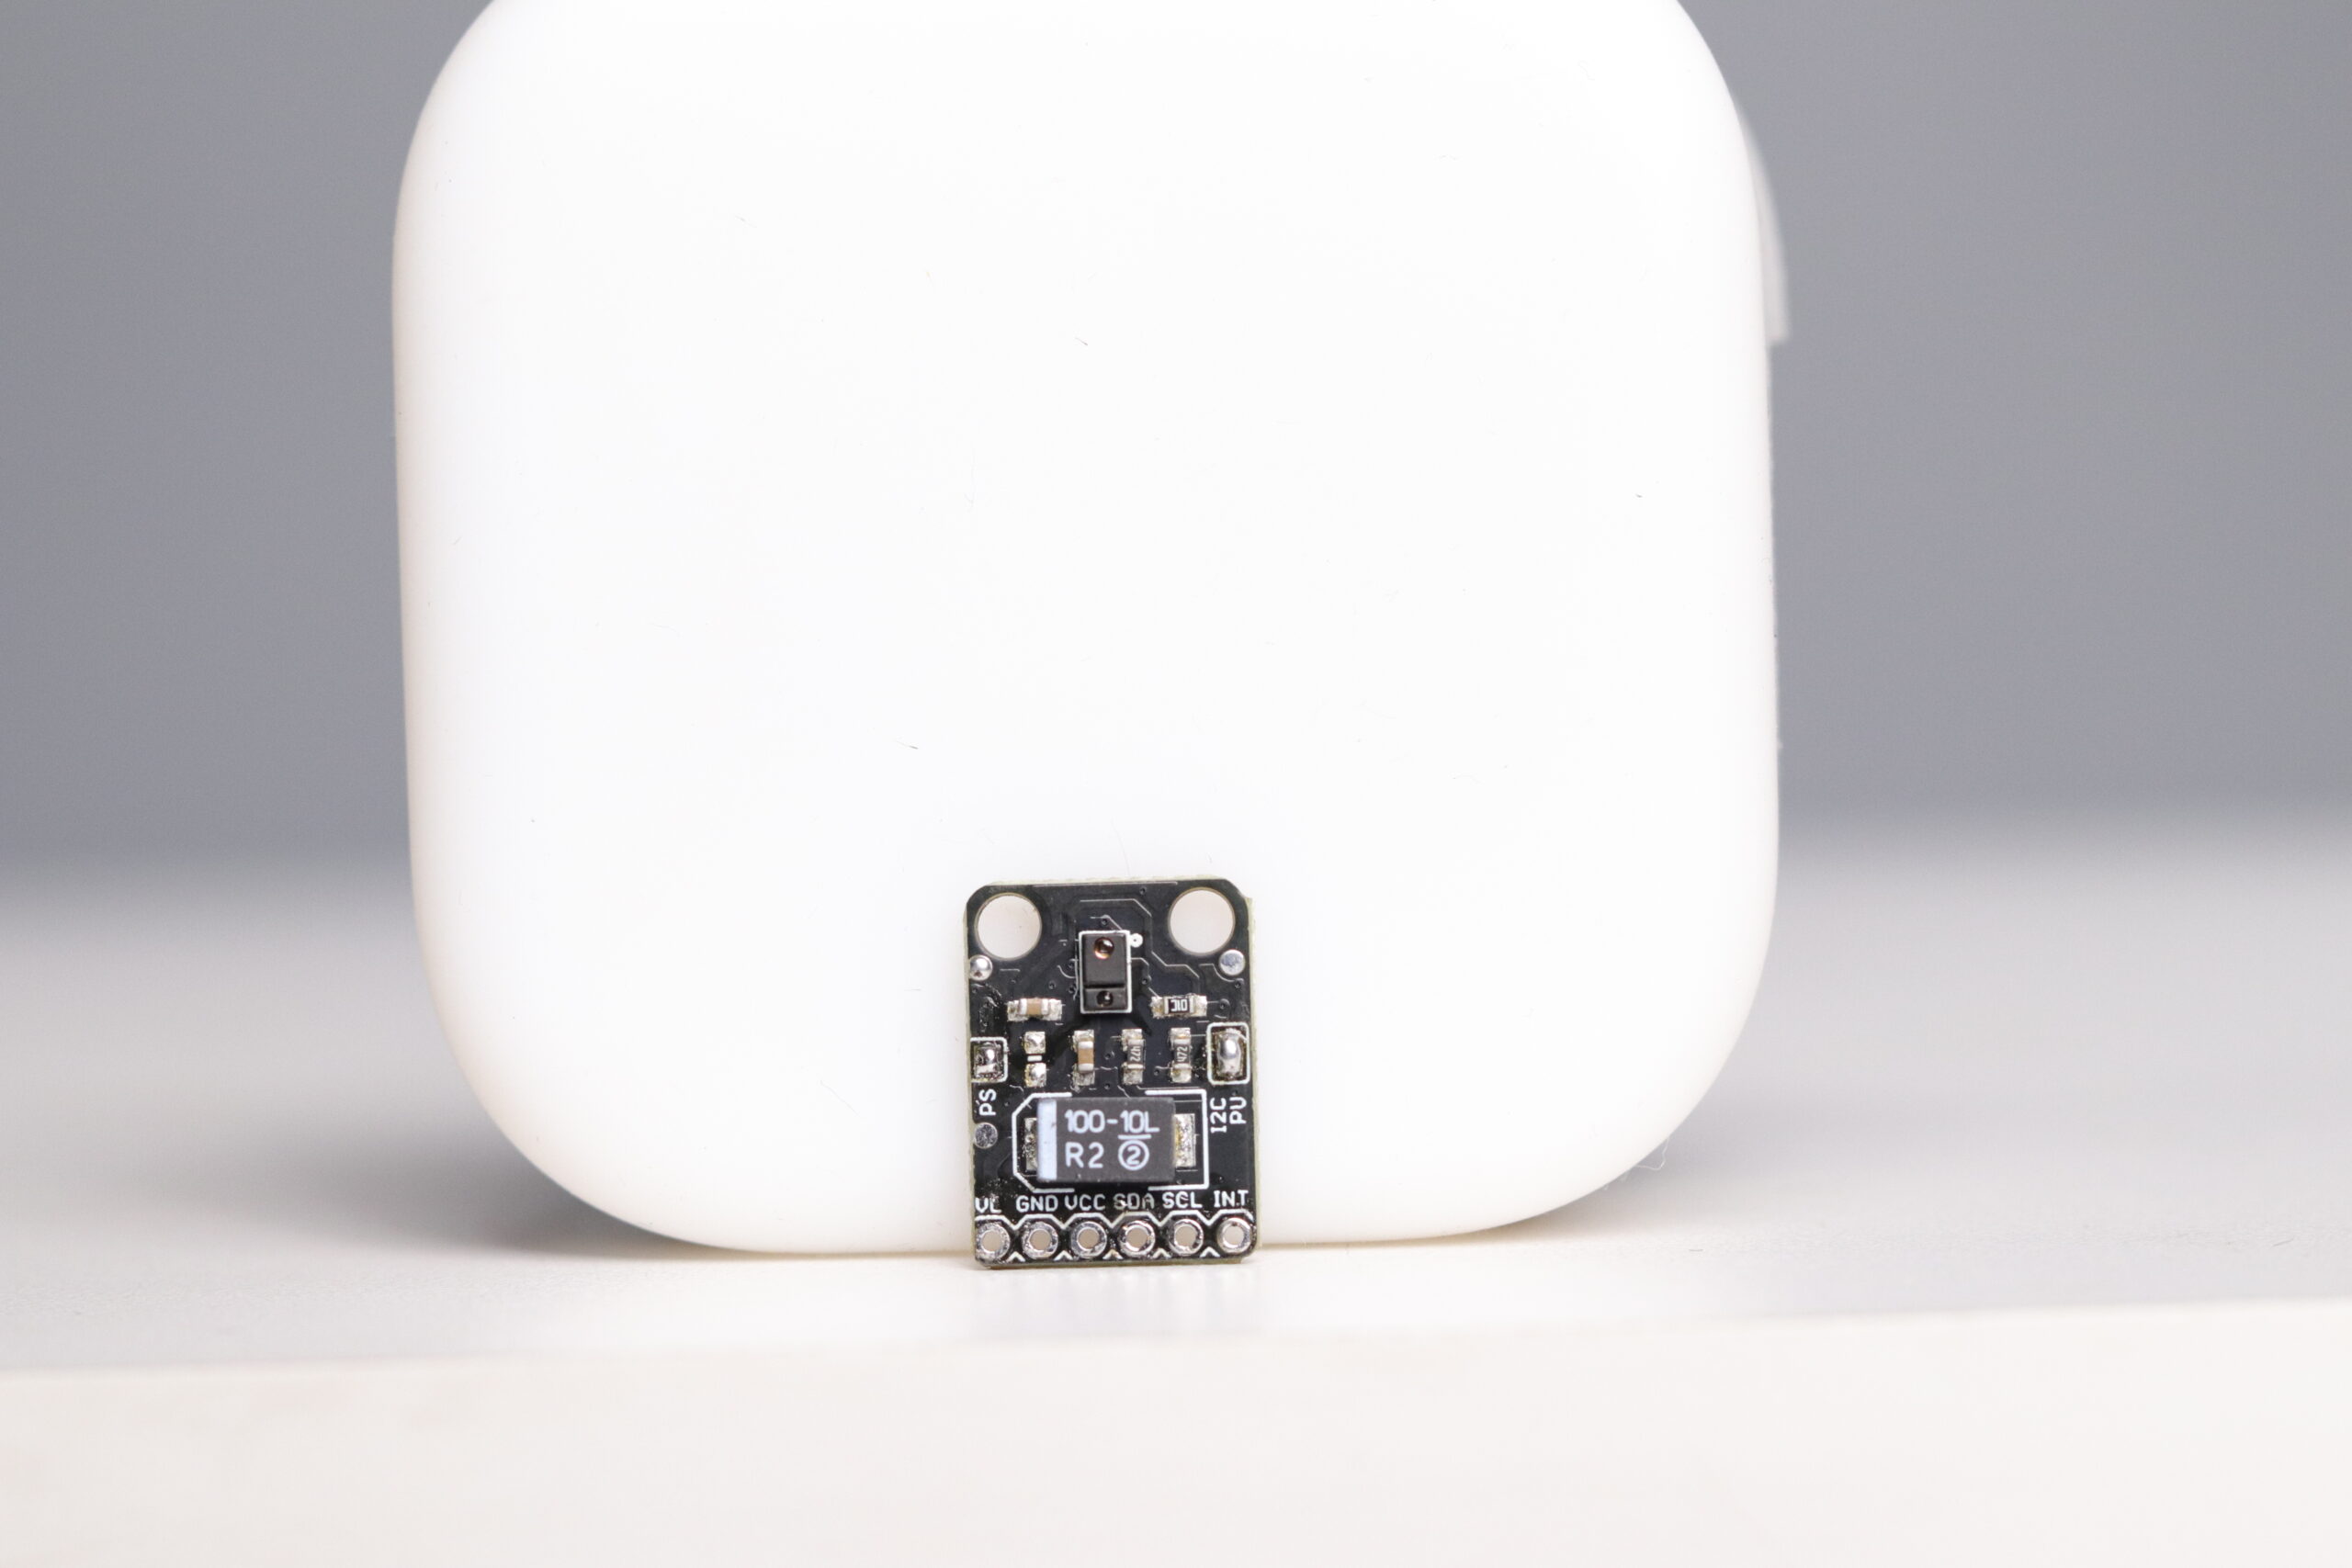
The Supply range on 2.4 to 3.6v and Supply range on VL- 3 to 4.5v.
It can be interface using its 6 pins which are VL,GND,VCC,SDA,SCL,INT. CONNECT GND to GND ,VCC to VCC ,SDA to SDA, and SCL to SCL .
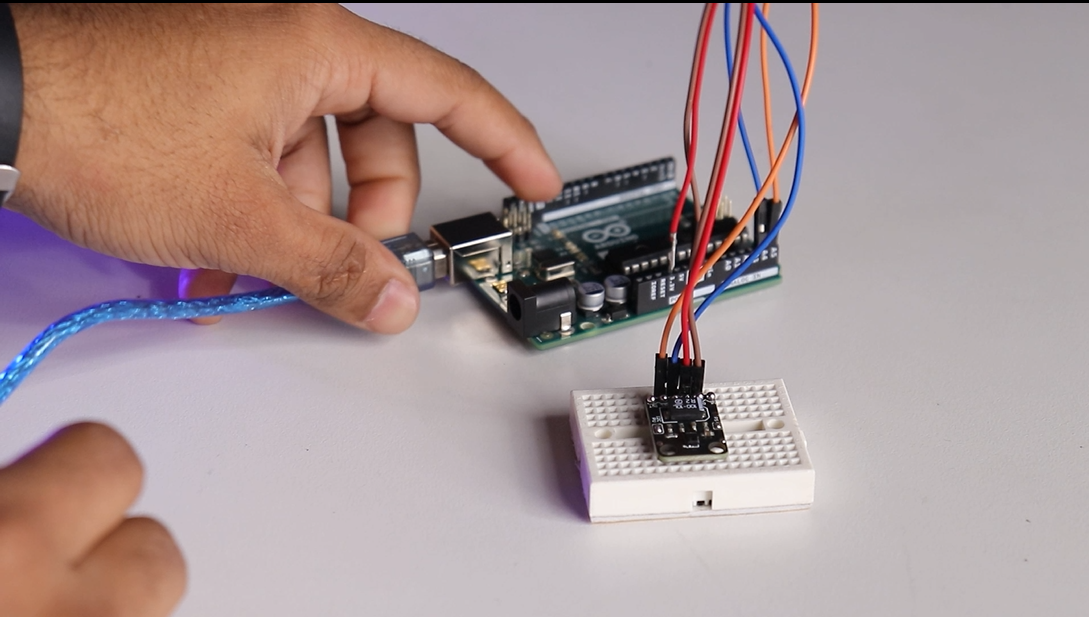
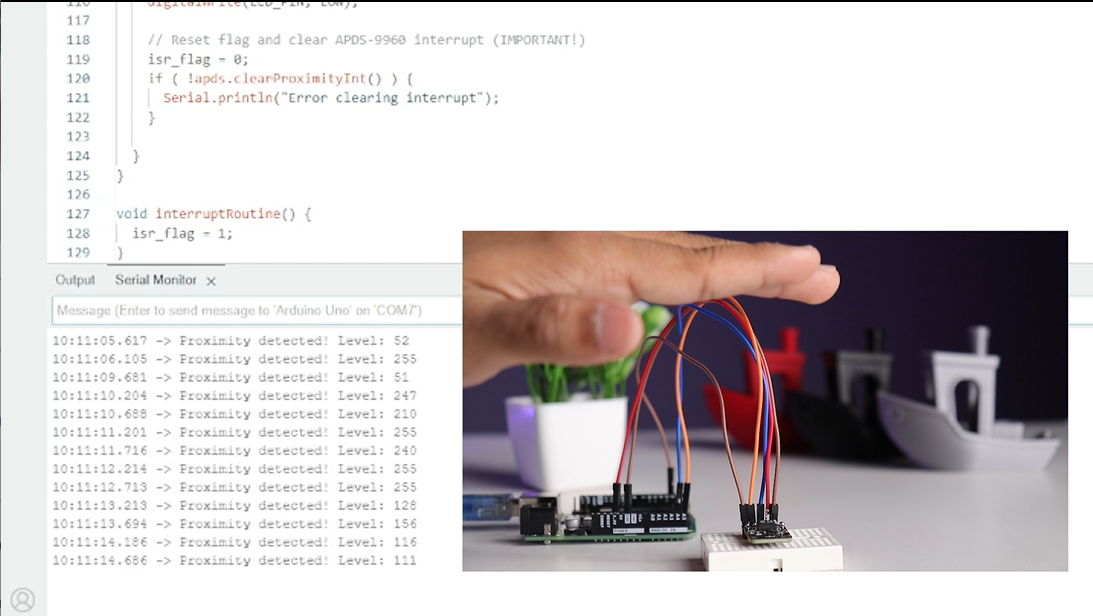
Download required library for APDS9960, open the proximity example code, upload it to board open the serial monitor check if proximity is properly detected and distance sensor is ready.
SmartElex RFID Tag (ST25DV64KC)
It is based on ST25DV64KC provided Long data retention 40 years appx. with operating range of -40 to 85 C and a supply range of 1.8 to 5.5 V.

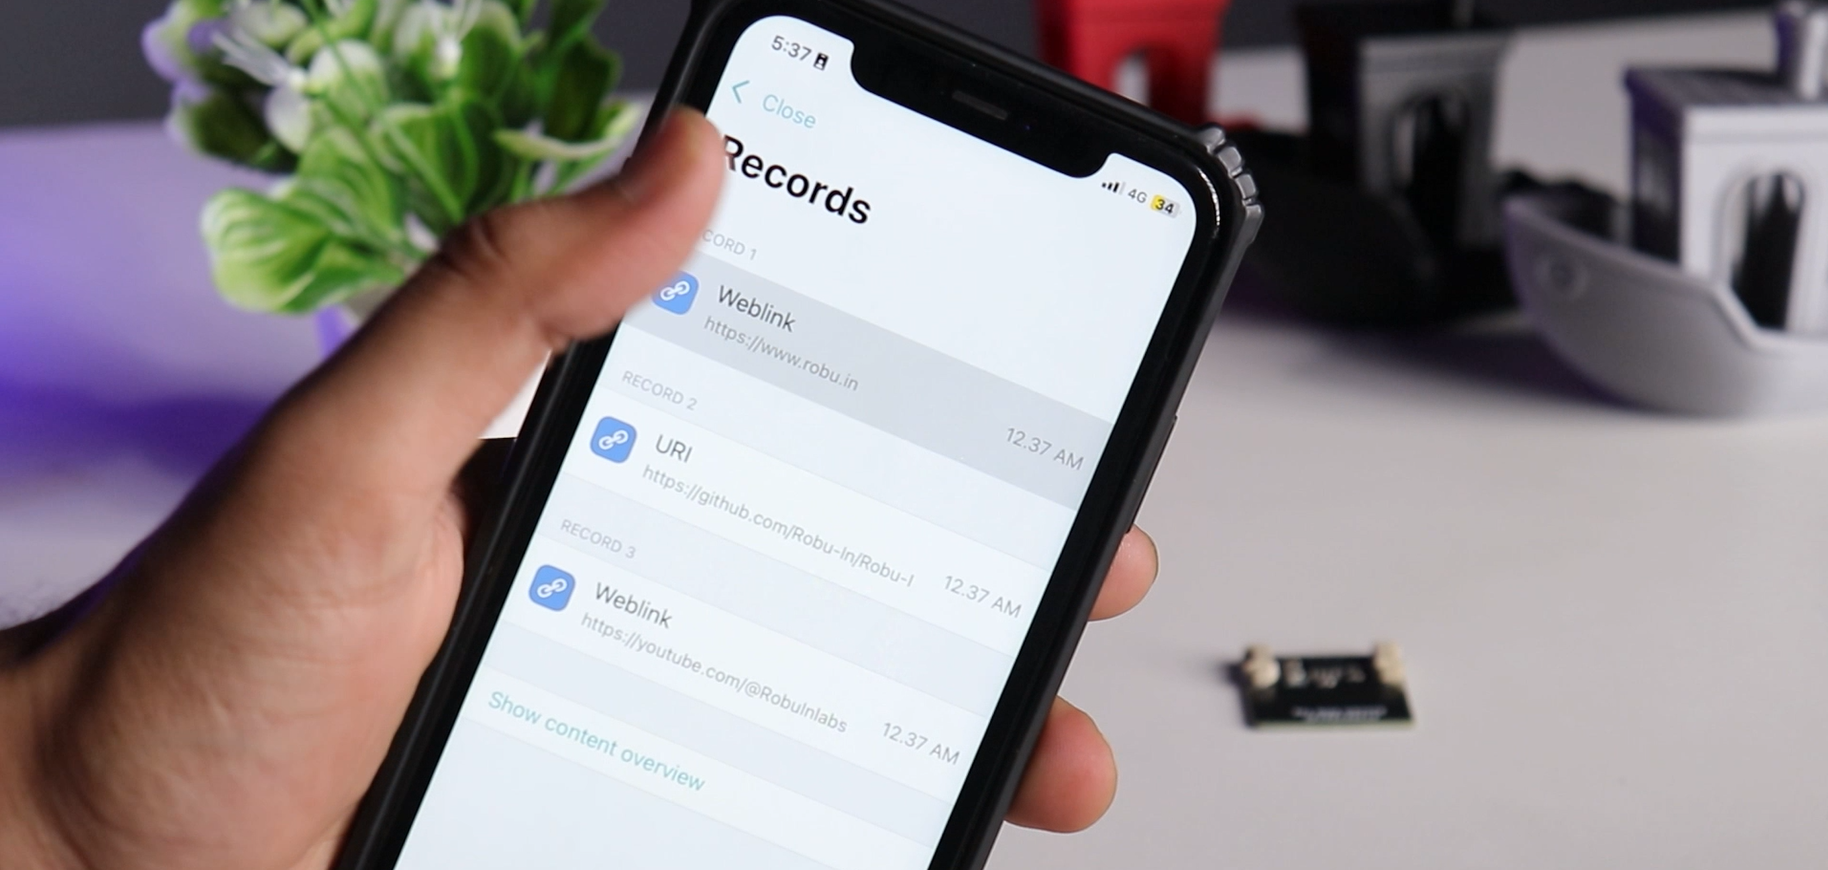
It has two I2C ports for easy interfacing just connect I2C Pins to Board ,install the required library open the for text, Wi-Fi or URI and edit the text, WIFI credential or URI accordingly upload the code
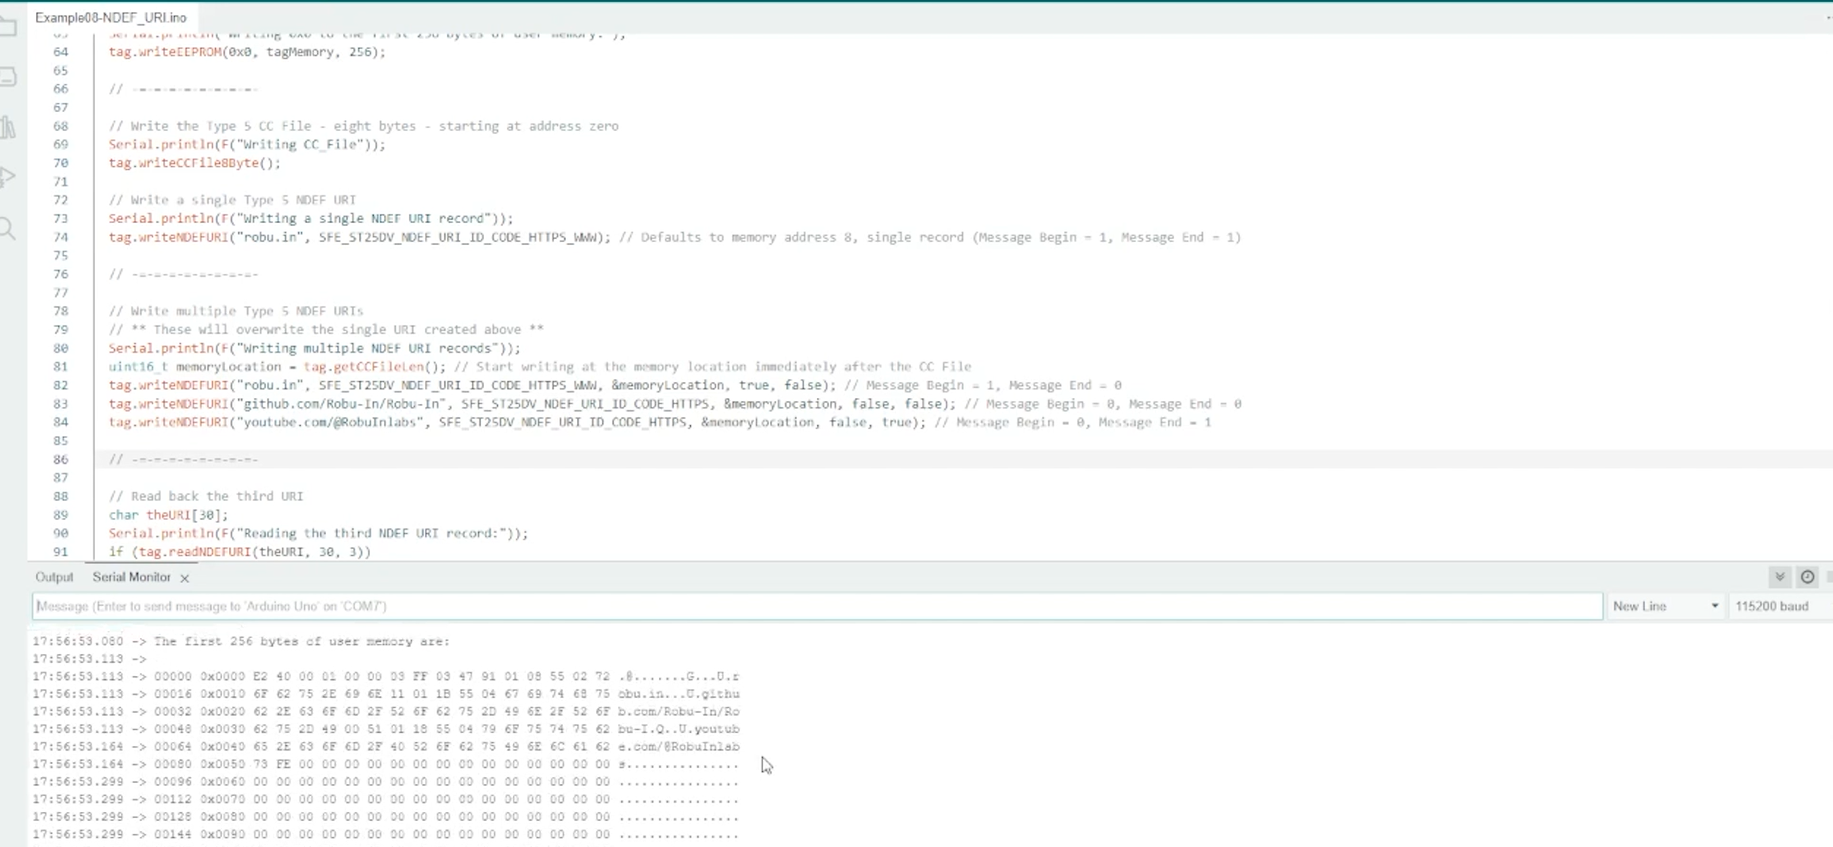
check on serial monitor if RFID tag is written properly now disconnect the board and open the NFC scanner and check if scanner detects the tag and shows proper info.
SmartElex Movement Sensor (LSM 6DSO)
It is based on LSM 6DSO which Detects shock, tilt, tap, double tap and has a supply range of 1.7 to 3.6v.
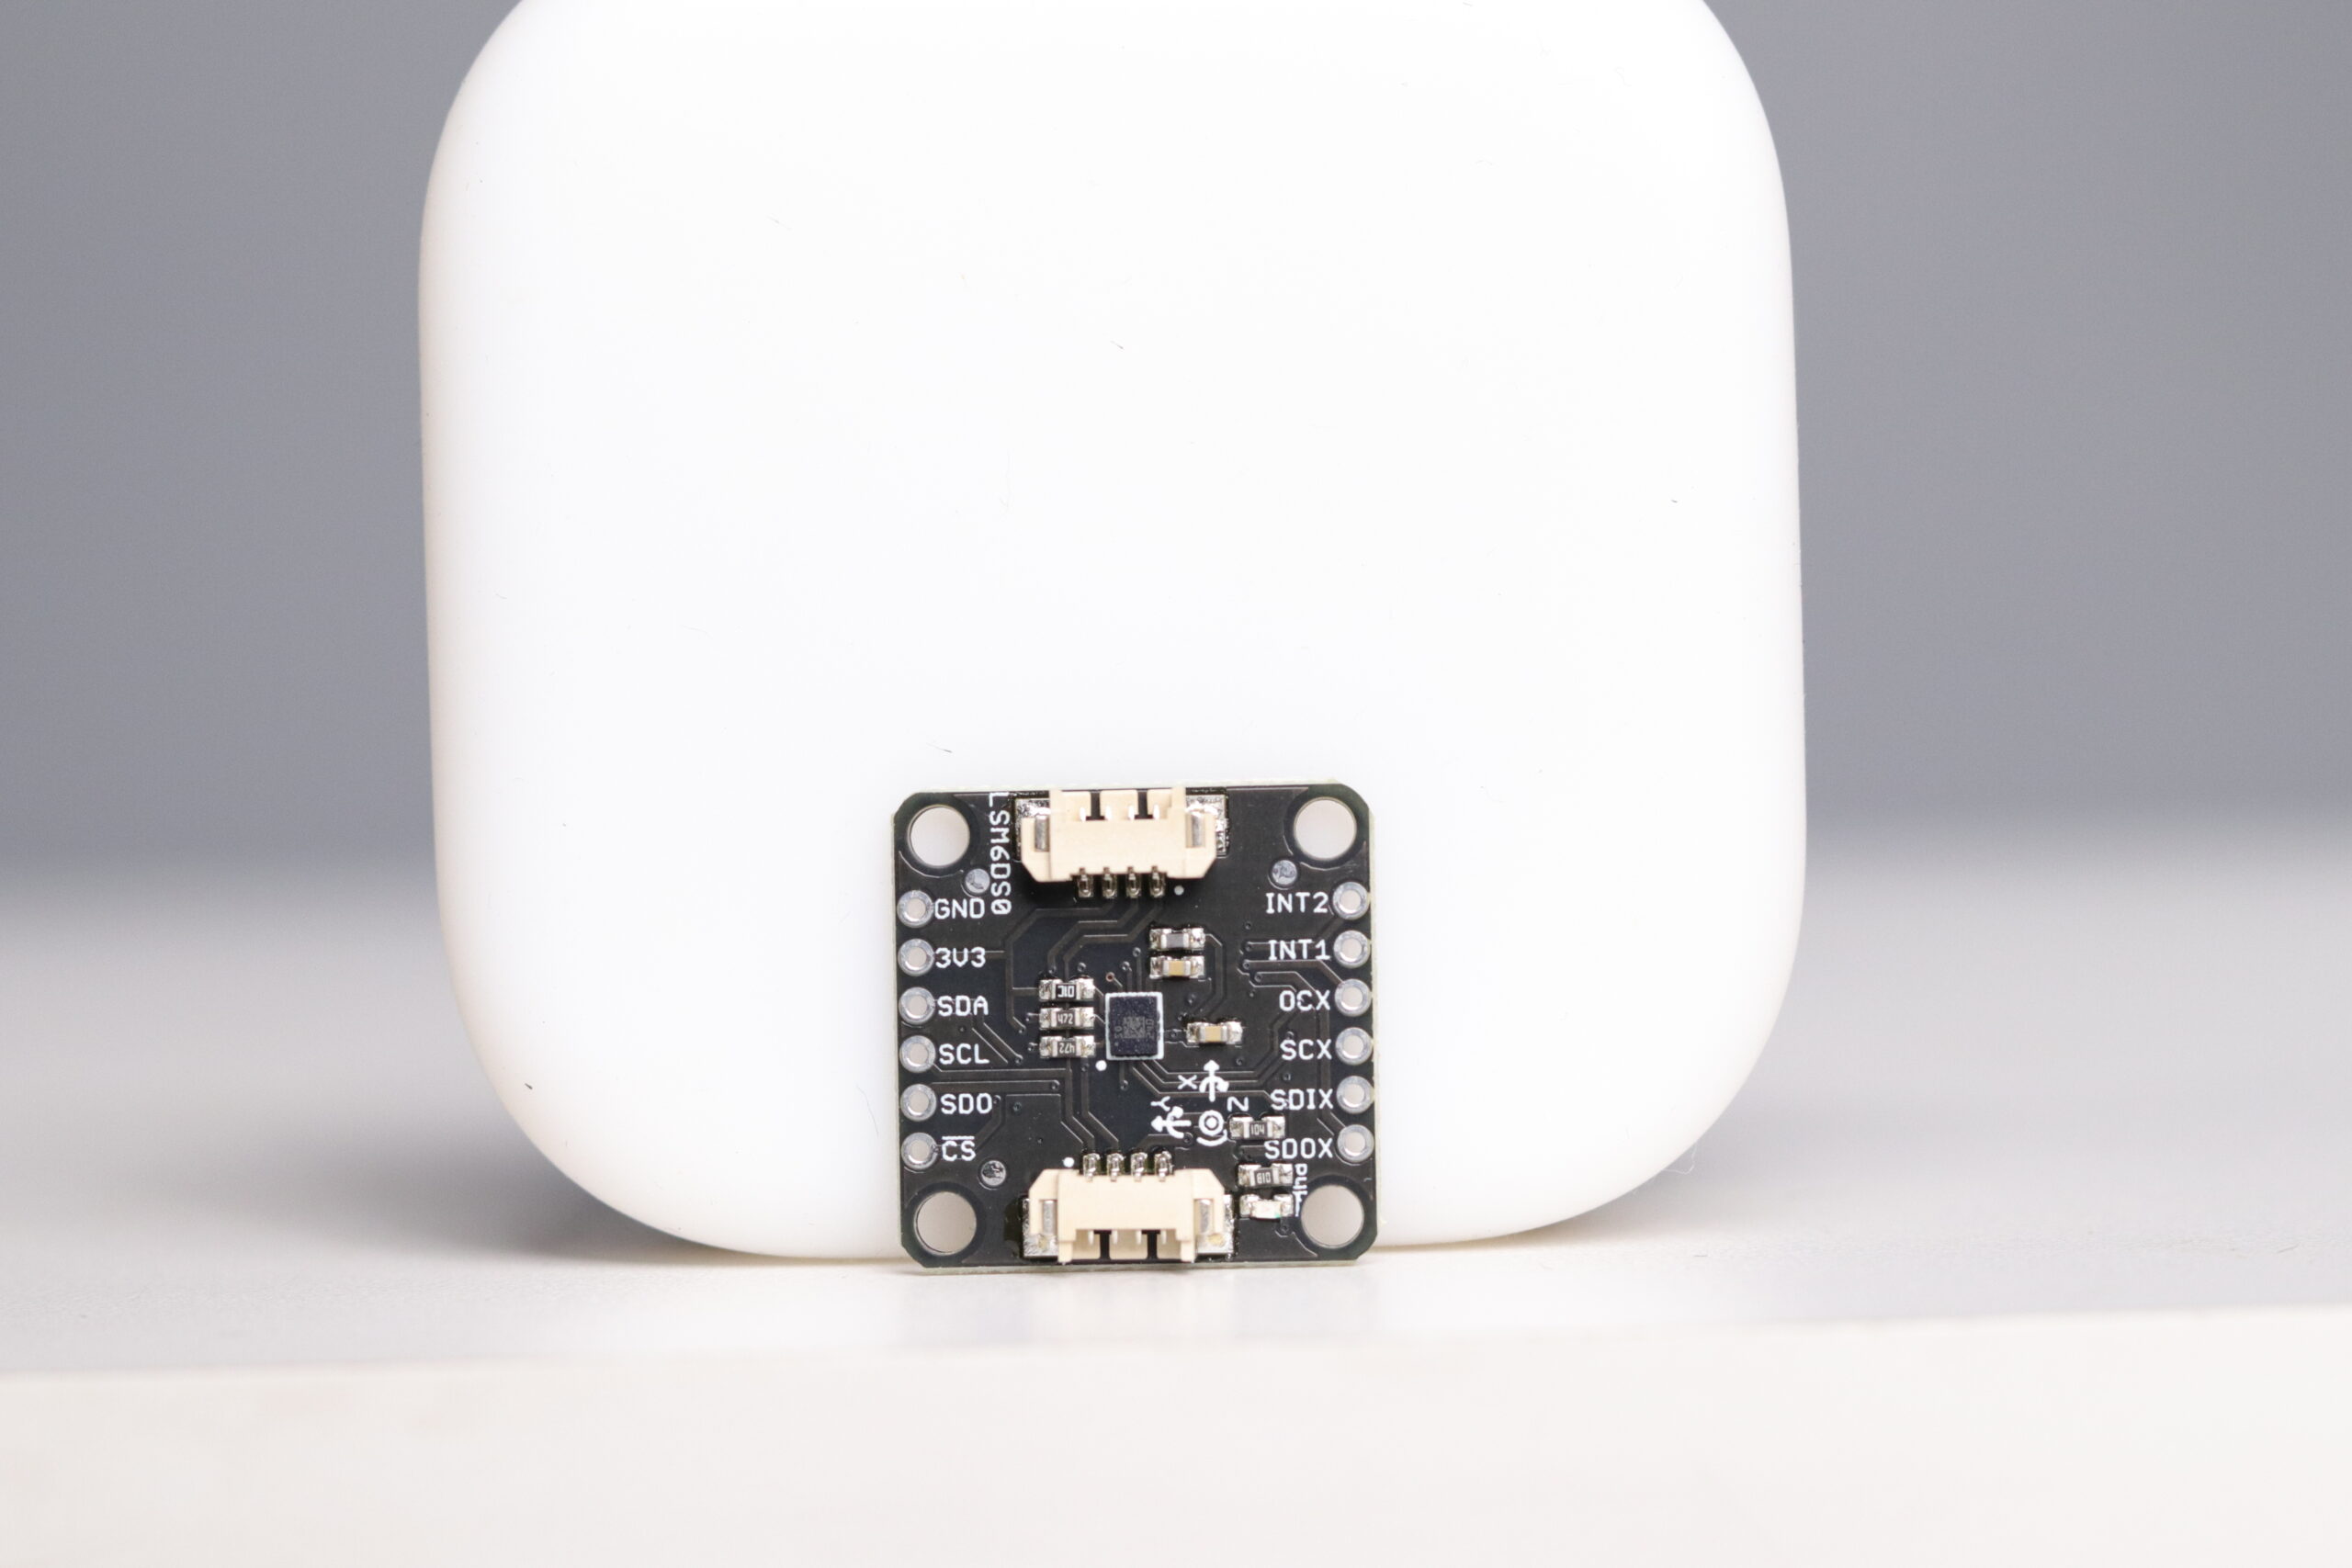
It is also has 2 I2C ports which makes interfacing quick and easy
For interfacing with Arduino just connect I2C pins to Arduino.

Install the LSM6DSO library, open the example code verify and upload the code. And the movement sensor is ready and can detect the movement you can see readings on the Serial monitor of Arduino IDE.

SmartElex Flex/ Force sensor (NAU7802)
It has NAU7802 which provides 24 bit extremely precise ADC it has I2C connector for easy integration
wide operating range -40 to 85 C
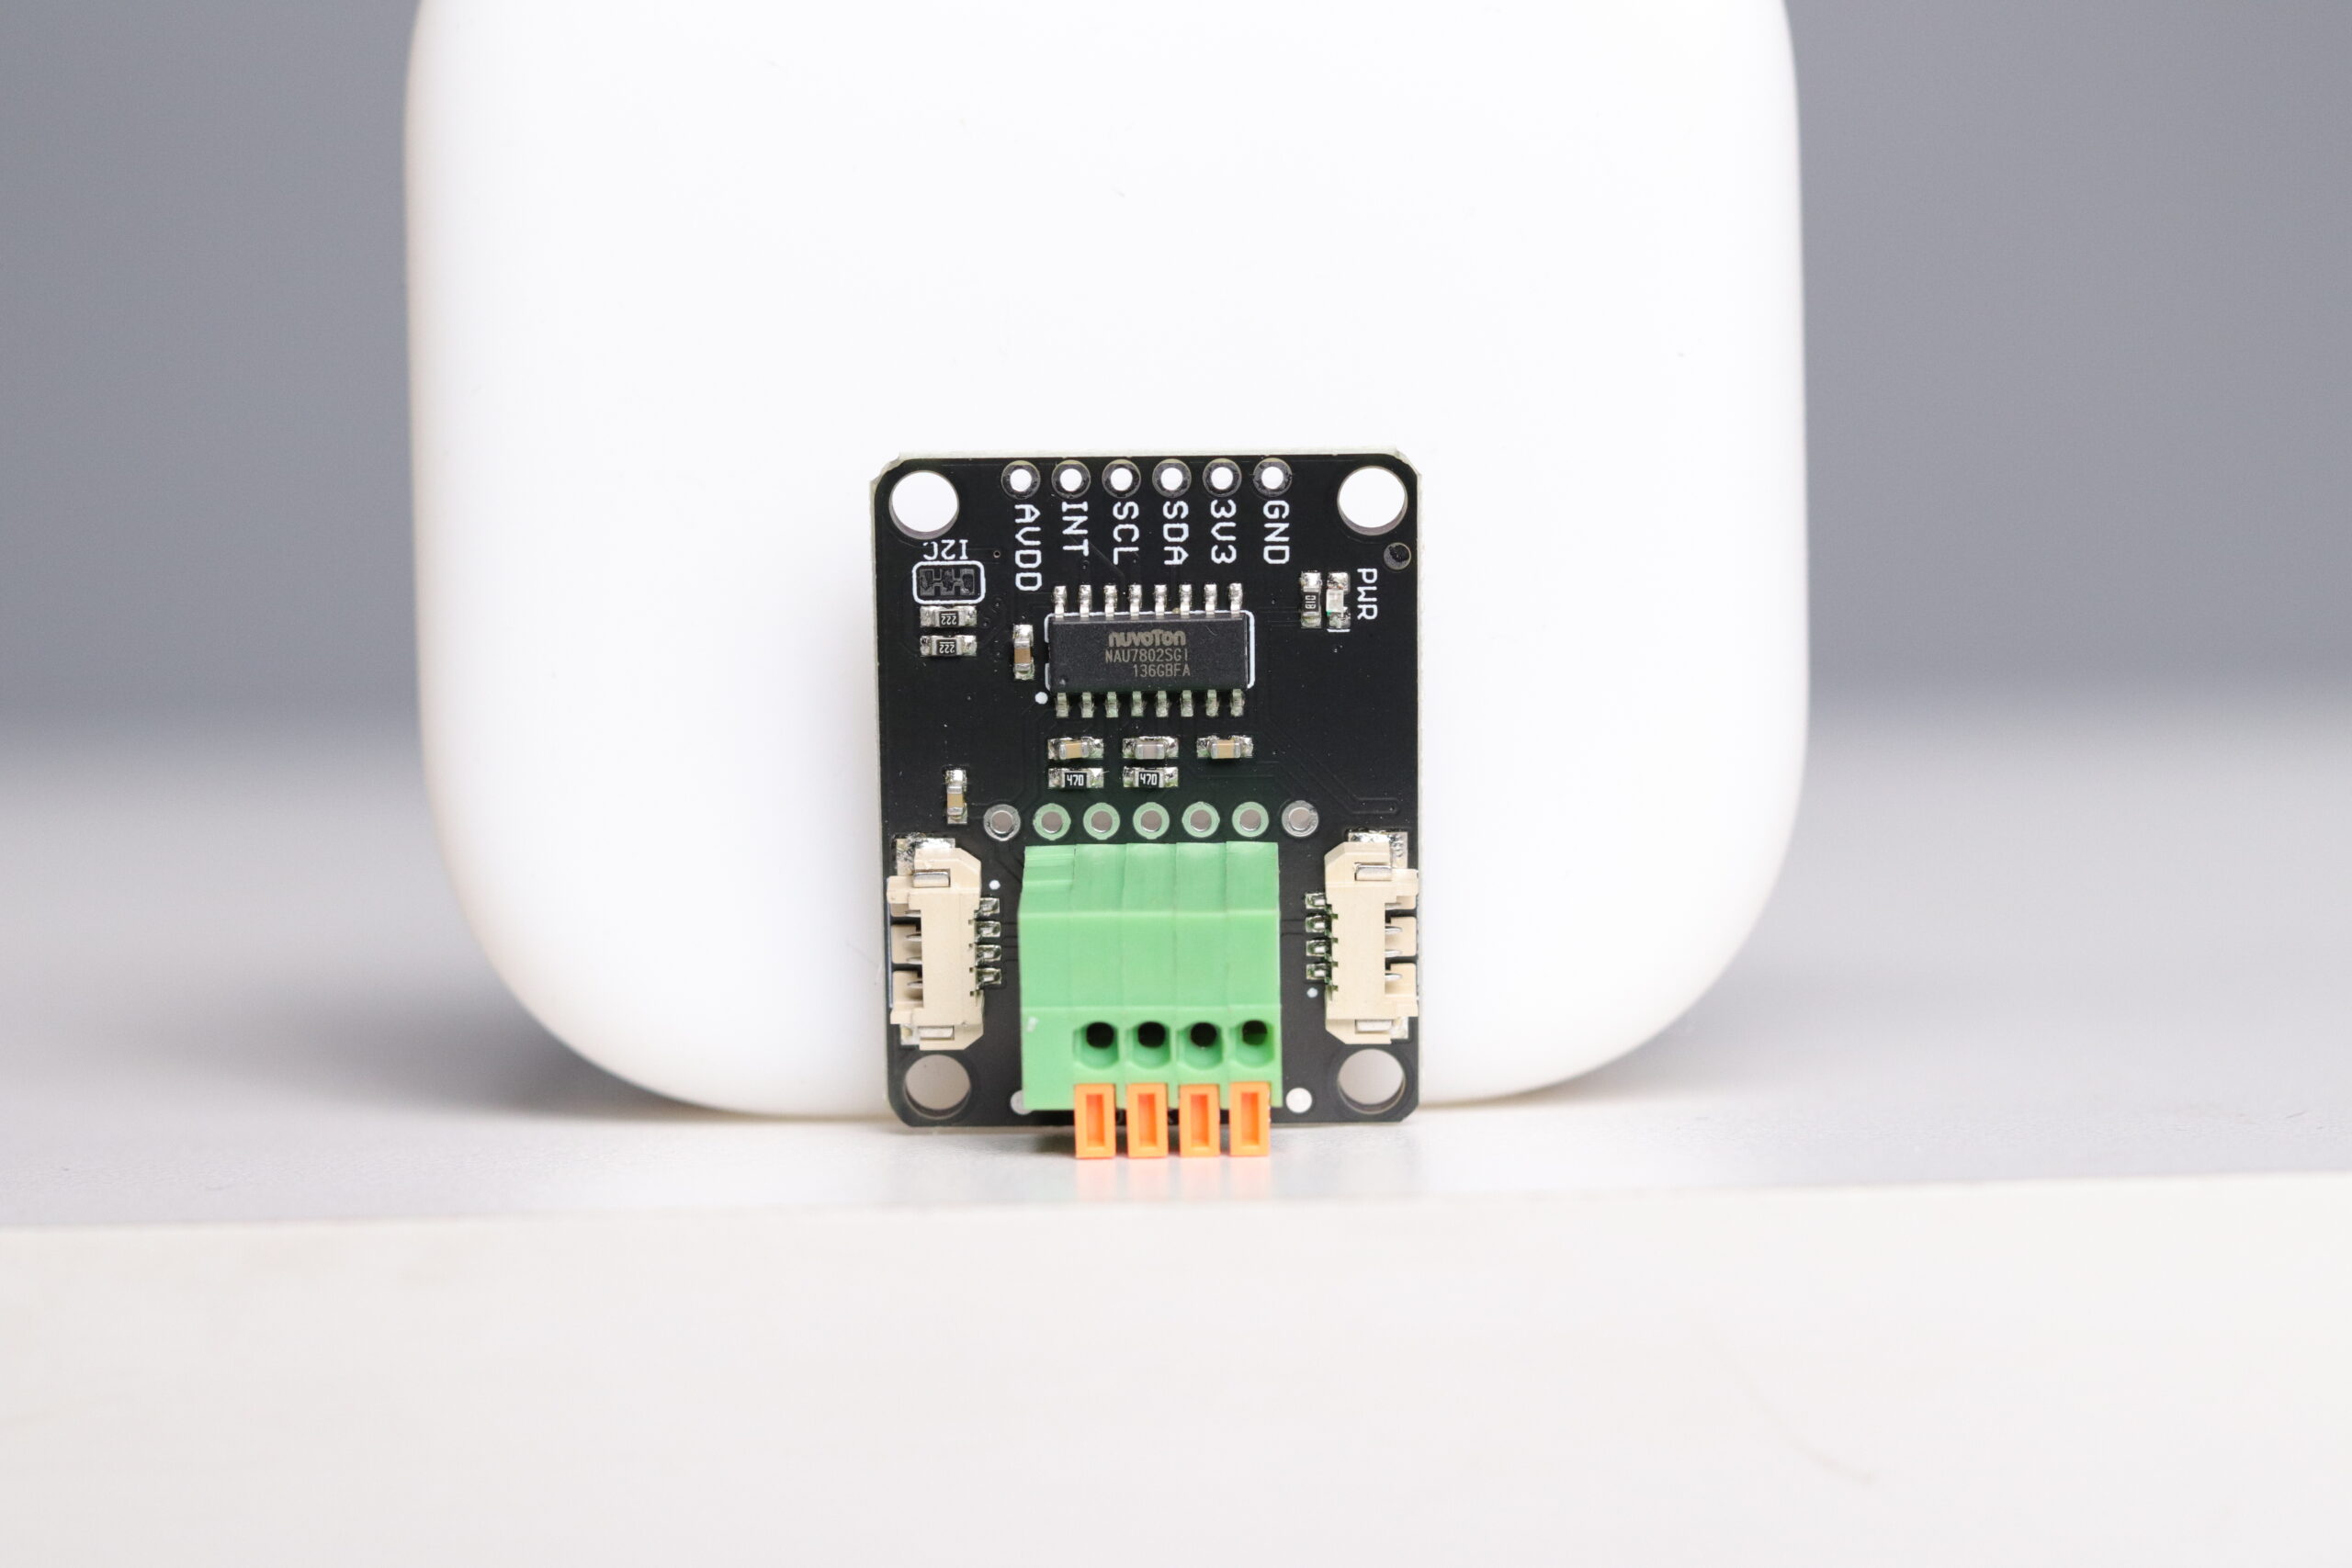
For easy interfacing use I2C pins and connect is to Arduino most of the time this sensor can be used in strain gauge, weight machine so interface it with load cell as shown, install the required library LSM6DSO open the example code upload it to board, and you can see the sensors operation.

SmartElex Current Sensor (ACS37800)
It is based on ACS37800 which has measuring Range 0 to 90 A Separate measurement for RMS and instantaneous values. has Low Input Resistance 0.85 mili Ohms and its Operating range -40 to 125 C and Supply range 3.3 to 5V
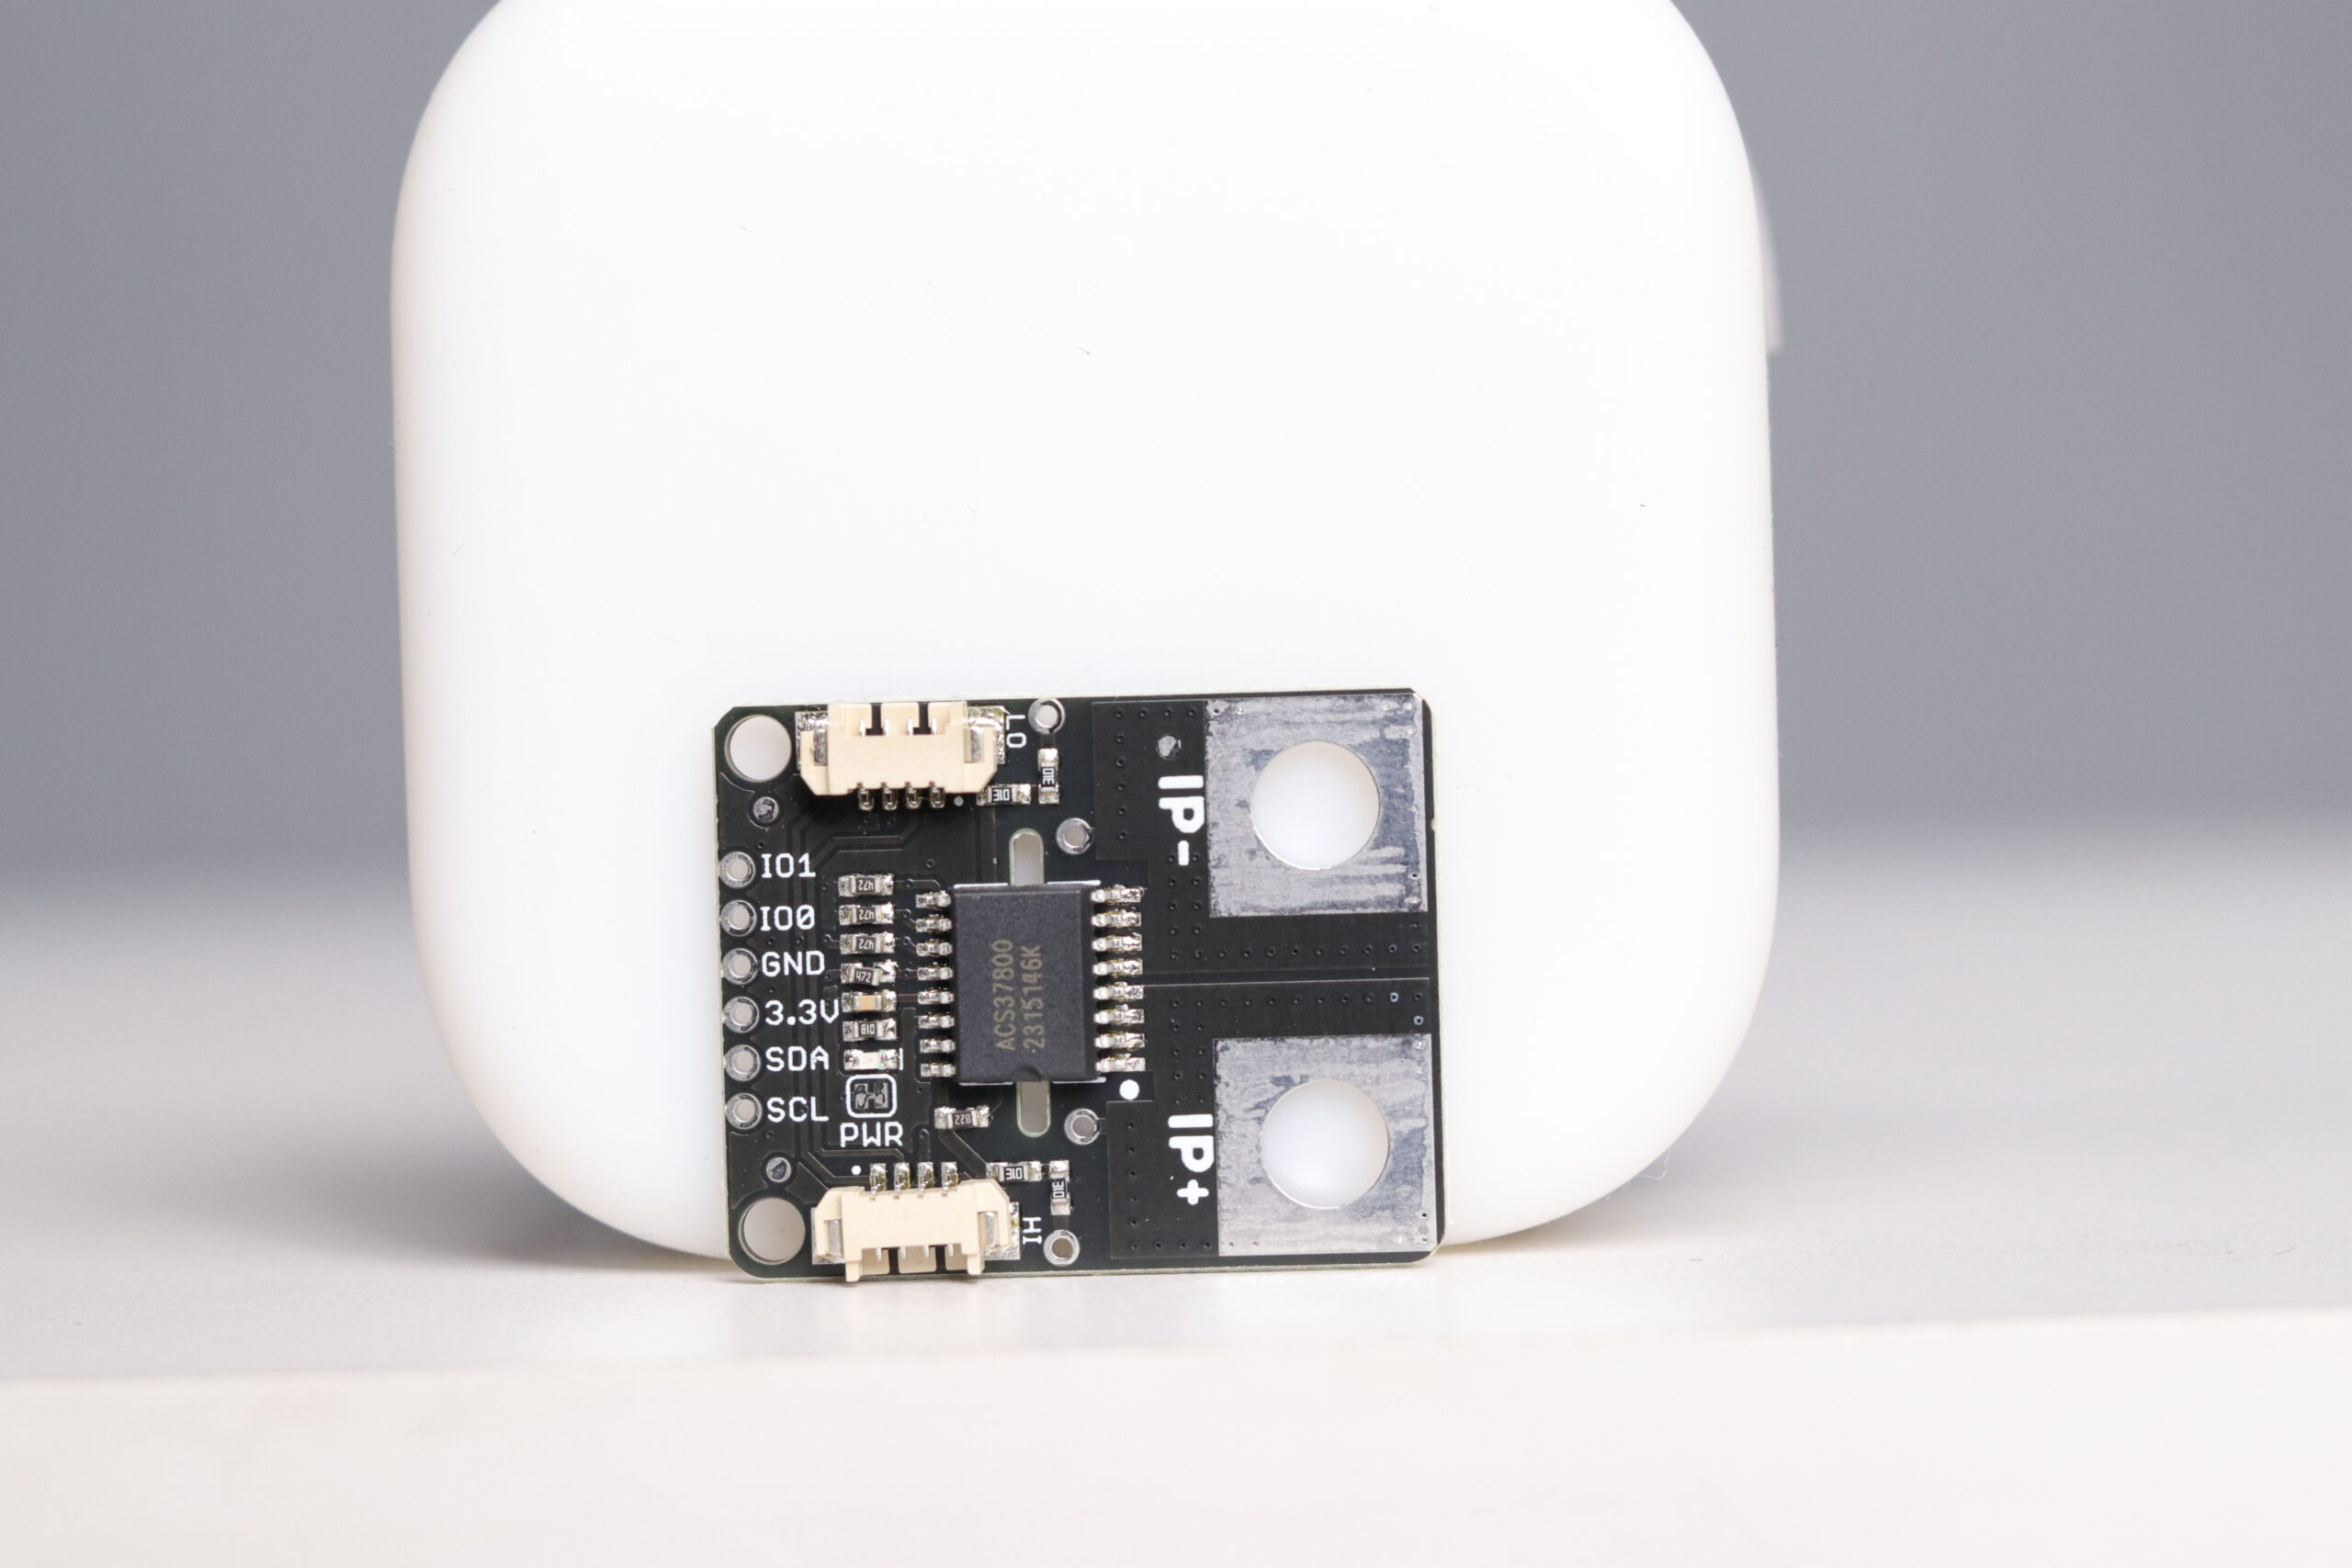
It comes with 2 I2C port for easy interfacing and lets interface
Connect I2C pins to Arduino install the required library, open the example code upload the code for power measurement, connect +IP on supply end and –IP on Load end and sensor will start measuring current and voltage
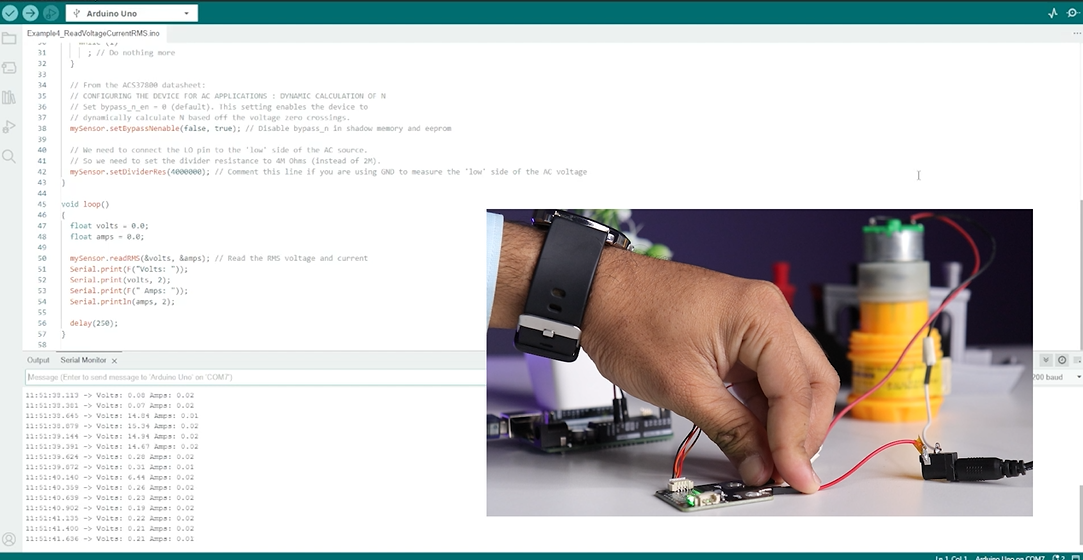
Make sure to connect the load and supply wire properly it may effect the readings.
Result
Here we have Interfaced the SmartElex sensors most of them have I2C ports which makes interfacing fast and easy.
One thing that stands out very well is that these sensors are precise and reliable because of the components used to build them as well as the board quality. You do not need to go look for
another boards because the libraries are easily available and bonus these boards are affordable.
Conclusion
Here we describes how to interface SmartElex sensors we have also covered how to locate libraries ,how we can program the board for sensor and how to test them and some found some useful applications of the sensors.
Video on YouTube: - https://youtu.be/ZpA7Fk8tztE
Related post :- https://robu.in/easy-smartelex-5-environmental-sensors-interfacing/
About Robu
India's biggest robotics E-commerce company. Robu deals with Arduino, Raspberry Pi, Sensors, Drone parts, 3D printer parts, E-bike accessories and Electronics components etc. Click here to explore range of Robotics products available at Robu. Also, do not forget to follow us on Facebook, Instagram and YouTube because we are constantly contributing to the community by creating content around Arduino, Raspberry Pi, Drones, Sensors etc.
Related Posts

DIY Self-Balancing Robot using balancewii
Wednesday October 26, 2022 4313 Views
Yes, you read it right! A bot that knows how to balance. In this post we’ll learn how to make your own Self Balancing Robot using balancewii.... Read More

How to Choose Lithium ion Battery for Drone: Pro Range Lithium-ion Batteries for Drones & RC
Thursday June 13, 2024 66 Views
Choose proper battery for your Drone and RC to increase the flight time and performance The important thing in drones is flight time and performance which depends on various parameters... Read More
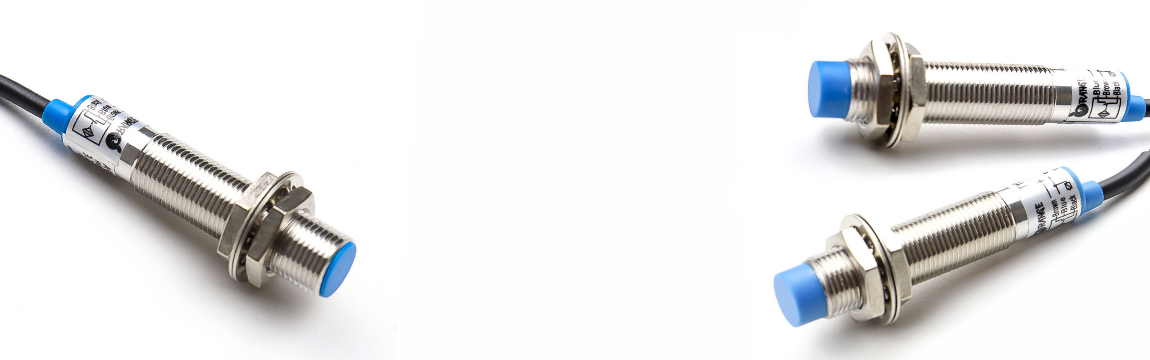
How Proximity Sensor Works?
Tuesday February 25, 2020 6022 Views
In this article, we discuss about the proximity sensor in details such as what is proximity sensor, features, and how proximity sensor works.... Read More
Arduino Pin Configuration - Complete Guide 2021
Tuesday July 14, 2020 19893 Views
This guide includes the explanation of the pin configuration of Arduino UNO, Mega, Nano, Leonardo, Due and Lilypad.... Read More
Informative Blog